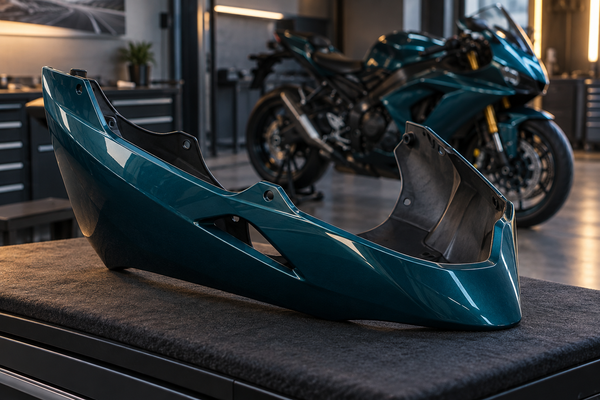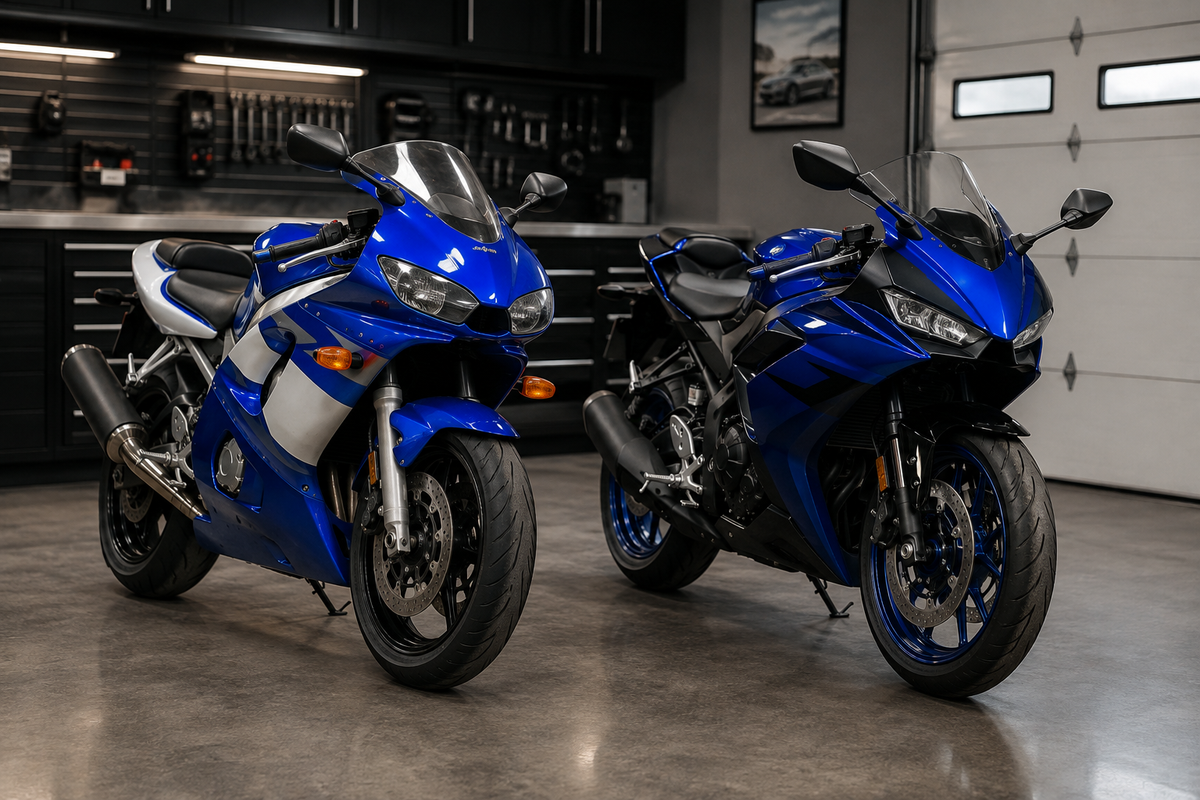
The fastest way to order the wrong Yamaha R6 fairings is to shop by color alone. The 2008–2016 and 2017–2026 catalog groups use visibly different exterior bodywork, openings, panel shapes, and mounting interfaces. A kit designed for one group should not be treated as a bolt-on replacement for the other.
This guide compares the two fairing groups from a bodywork buyer’s point of view. It is intended for riders repairing crash damage, refreshing tired paint, or planning a custom street or track-style build. It does not compare engine performance, and it does not assume that every individual panel is interchangeable within a broad year range. Always confirm the model year and the exact fitment statement on the product page before ordering.
Quick Comparison: Which R6 Fairing Group Do You Need?
Check |
2008–2016 Group |
2017–2026 Group |
|---|---|---|
Overall look |
Rounder, flowing R-series surfaces |
Sharper, R1-influenced front and side styling |
Front cowl |
Earlier headlight and intake openings |
Reworked cowl, screen, and recessed-light treatment |
Side panels |
Panel seams and vents follow the earlier body profile |
More angular surfaces and different panel interfaces |
Tank and tail area |
Shaped for the earlier tank-cover and tail arrangement |
Matched to the later tank and seat-area bodywork |
Buying rule |
Choose a kit specifically listed for your exact year |
Choose a kit specifically listed for your exact year |
Yamaha’s official 2017 material describes a redesigned front cowl, screen, tank, seat area, and next-generation R-series styling. That is a useful factory reference for understanding why the later exterior looks and fits differently. See the official 2017 YZF-R6 factsheet.

Front-Cowl and Headlight-Area Differences
The front is the easiest place to tell the groups apart. Earlier R6 bodywork has its own upper-cowl outline, windscreen profile, headlight openings, and center-intake shape. The 2017 update moved to a much sharper visual language with recessed lighting elements and a front cowl derived from Yamaha’s newer R-series design.
For a fairing buyer, the important point is not the styling nickname; it is the geometry around the lights, screen, intake duct, mirrors, and fairing stay. Those interfaces determine whether the upper cowl sits correctly. A photo that looks “close” is not enough. Compare the year listing, the opening shapes, and the mounting tabs before you buy.
If the motorcycle has been repaired before, inspect the front fairing stay and headlight brackets for bending. New plastic cannot correct a distorted support. Test-fit the upper cowl without forcing it, check that the screen holes line up naturally, and confirm that the headlight unit sits centered before tightening anything.

Side Panels, Belly Pan, Tank Cover, and Tail
Compatibility problems continue beyond the nose. Side-fairing contours, vent cutouts, overlap points, and lower-cowl seams are shaped as a system. Mixing pieces from different bodywork groups can leave gaps, put stress on tabs, or place a fastener hole where the neighboring panel does not support it.
The tank-cover and tail areas need the same attention. These pieces must meet the seat, fuel-tank area, undertray, and adjacent side panels cleanly. Do not assume that a tail section will fit because its length looks similar in a marketplace photo. Confirm the exact year group and compare the underside tabs and bolt locations.
When replacing only one damaged panel, color match can be as important as fit. Existing paint may have faded, and pearl or metallic finishes change under different light. Ask for current finished-product photos where available. For a uniform appearance after a larger crash, a complete painted kit can be easier to match than combining one fresh panel with several aged originals.

Crash Repair or Custom Restyle?
Choose repair-first when alignment is the priority
After a low-side or tip-over, begin with the bike rather than the shopping cart. Remove loose pieces, photograph every fastener location, and check the fairing stay, brackets, lights, windscreen, undertray, and mounting points. If a support is bent, correct or replace it before judging the new panels.
Reuse of original hardware depends on its condition and on what the chosen kit includes. Sort bolts and clips into labeled containers during removal. Replace damaged rubber well nuts, stripped clips, or corroded fasteners instead of forcing them into fresh ABS panels.
Choose a full restyle when consistency matters
A full kit is usually the cleaner route when several panels are cracked, the paint is badly faded, or the goal is a completely new color scheme. Race-replica graphics, OEM-inspired colors, carbon-look patterns, and original custom layouts can all work, but the design should follow panel seams so the finished bike reads as one composition.
Browse the dedicated Yamaha R6 2008–2016 fairings or Yamaha R6 2017–2026 fairings rather than relying on a generic search result. The collection page is the starting point; the individual product page remains the final fitment check.

Pre-Fit Checklist Before Final Installation
Verify the motorcycle: confirm the VIN/model-year record and compare it with the product’s stated fitment.
Inventory the kit: lay out every panel and identify which original brackets, lights, ducts, clips, and fasteners must be reused.
Inspect supports: check the fairing stay and mounting brackets for bends or old repairs.
Start loose: install bolts only finger-tight so neighboring panels can settle into position.
Work in sections: align the upper cowl and lights, then the side panels and lower cowl, followed by the tank-cover and tail area.
Watch stress points: never pull a panel into place with a bolt; investigate the bracket or adjacent panel causing the mismatch.
Check clearance: turn the handlebar fully, inspect brake-line and wiring clearance, and make sure no panel touches hot or moving parts.
Tighten gradually: only after the complete bodywork sits evenly should you tighten hardware in stages.
For more preparation guidance, use the motorcycle fairing pre-fit checklist and the NiceFairings FAQ.
Verify the Motorcycle, Not Just the Registration Year
Start with the VIN, registration and the physical bodywork on the bike. A motorcycle may have been rebuilt with another front stay, headlight assembly, tail or track conversion, so the year printed on a document is only one part of the check. Compare the upper-cowl outline, light openings, side-panel seams, belly-pan joints and tail mounting points with the product listing.
Ask the seller to confirm the exact year group in writing when the history is unclear. Yamaha's official 2017 YZF-R6 factsheet is a useful visual reference for the later design, while original parts diagrams can help identify the hardware on a specific bike.
Check Everything Behind the Painted Panels
The front fairing stay, headlight assembly, air ducts, inner trim and wiring routes influence how the outer bodywork sits. Inspect them before blaming a replacement panel for an uneven gap. A slightly bent bracket can shift several interfaces at once; forcing the plastic to compensate can load tabs and mounting holes.
Lay out the original fasteners and rubber pieces by location. Replace damaged or missing hardware with the correct type rather than an improvised screw. During the dry-fit, leave the panels loose enough to settle together, then verify steering and cable clearance before following the service information and kit instructions for final assembly.
Before removing the old bodywork, photograph the routing around the nose, radiator and tail from several angles. Label bags for each fastener group and note where rubber well-nuts, collars or heat protection belong. This simple record makes reassembly faster and reduces the chance that a correct panel is blamed for hardware placed in the wrong location.
Single-Panel Repair Versus a Full Restyle
A single panel preserves more of the original bike and can shorten the job, but color matching becomes harder as the existing paint ages. Request photos in natural light and compare graphics, pearl or metallic effects and gloss level. A complete kit provides a coordinated finish across the motorcycle, although the larger installation makes careful inventory and pre-fit work more important.
If the purpose is crash repair, solve alignment and mounting issues before choosing graphics. If the purpose is a full visual change, decide how the new scheme will work with the wheels, frame, tank and any pieces that stay original. Browse Yamaha R6 fairing options only after confirming the correct year group.
Final Road-Ready Inspection
Before riding, turn the handlebar from lock to lock with the engine off. Confirm that no panel contacts the tire, controls, exhaust or another moving or hot part. Check that lights and signals remain visible and secure. After a short first ride, inspect every interface again for movement, rubbing or unusual vibration.
Final Recommendation
Choose by exact model year first, then by design. The 2008–2016 and 2017–2026 R6 collection groups are separate bodywork families, and a visually similar panel is not evidence of compatibility. If you are repairing crash damage, correct the underlying supports before fitting new plastic. If you are restyling, use a complete, year-correct kit to keep the paint, graphics, and panel seams consistent.
That approach avoids the two most expensive mistakes: ordering the wrong generation and forcing correctly made panels onto a motorcycle with bent or mismatched mounting hardware.
Frequently Asked Questions
Can I install 2017-style fairings on a 2008–2016 R6?
Not as a normal bolt-on replacement. The exterior bodywork, openings, and mounting interfaces differ. A conversion can require extensive non-standard parts and fabrication, so most owners should choose the correct year-group kit.
Does every panel interchange within 2008–2016 or 2017–2026?
Do not assume that from a broad collection label. Confirm the exact fitment on the individual product page and ask before ordering if your bike has unusual trim, track parts, or earlier repairs.
Should I tighten each panel as soon as it is installed?
No. Keep hardware loose during the initial assembly, align the complete panel system, and tighten gradually only after gaps and clearances look correct.
Useful NiceFairings Resources
Continue with the Motorcycle Fairing Guides, browse motorcycle fairings by bike, review custom fairing options, understand production and shipping, check the FAQ, read the return policy, or contact NiceFairings with fitment questions.