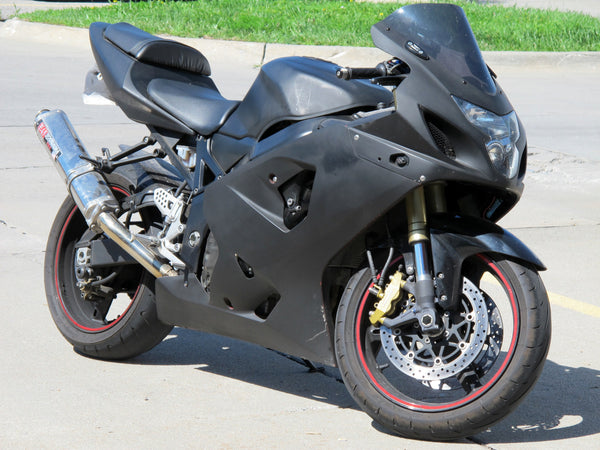
An autumn club ride puts several small pressures on a fully faired motorcycle at once: cooler mornings, changing light, road debris, extra layers, luggage and a schedule shared with other riders. The answer is not to start turning every visible screw in the parking lot. It is to arrive early, inspect the bodywork methodically and separate a harmless cosmetic mark from a loose, cracked or interfering part that needs attention before departure.
This guide is a fairing-focused companion, not a substitute for a full motorcycle inspection, the service manual or qualified mechanical help. The Motorcycle Safety Foundation's T-CLOCS pre-ride checklist covers tires and wheels, controls, lights and electrics, oil and other fluids, chassis and stands. NHTSA also advises riders to check tires, brakes, lights, signals, fluid levels and leaks before every ride. Complete those checks as well.
If the fairings themselves need replacement or a planned visual refresh, review the current NiceFairings motorcycle fairing selection before the ride rather than turning the meeting point into a repair bay.
What This Check Is Designed to Catch
A useful group-ride bodywork check looks for evidence that can change during the ride: a fastener working loose, a tab starting to split, a panel touching the tire or exhaust, a connector left unsecured, a windscreen mounting point sinking, or luggage rubbing through a painted edge. It also creates a simple baseline. If a new buzz, gap or mark appears at the first stop, you have a clear “before” condition to compare.
It is not an invitation to diagnose every scratch. A stable scuff on a painted surface may be only cosmetic. A hairline mark that crosses a mounting tab, a changing seam or a missing fastener deserves more caution. When the evidence is uncertain, do not force the panel into place. Photograph it, note the location and decide whether the bike should stay home until it is properly inspected.
For a deeper fault-finding process, use the panel-gap conflict guide. If the damage is already visible, the repair-or-replace guide for cracked fairings helps organize the decision without pretending every crack has the same cause.
Set Up a Calm 30-Minute Inspection
Park on firm, level ground with good light. Let the motorcycle cool, especially around the exhaust, radiator and lower fairing. Keep the key under the rider's control and follow the owner's manual for any stand or lifting procedure. You do not need a pile of tools for the first pass. A clean microfiber cloth, flashlight, phone camera and the correct documentation are more useful than an improvised wrench.
Divide the half hour into five short blocks:
- Five minutes for the visual baseline: walk around the motorcycle and photograph both sides, front and tail.
- Ten minutes for seams, tabs and visible retainers: look and touch lightly; do not “test” strength by flexing panels.
- Five minutes for lights, windscreen and steering clearance: operate the controls according to the manual and observe the bodywork.
- Five minutes for heat, wheel and luggage clearance: focus on anything recently changed.
- Five minutes for the decision: ride, correct a documented minor issue properly, or postpone.
If a new fairing kit was installed recently, compare your findings with the pre-fit and final-check guide. That article addresses installation workflow; this one addresses the ride-day inspection after the motorcycle has been assembled.
Start With a Walk-Around, Not a Screwdriver
Stand back far enough to see the silhouette. Compare the left and right sides without assuming they should be perfectly symmetrical; many motorcycles have different ducts, covers and exhaust clearances on each side. Look for a panel sitting farther outward than usual, an edge dipping toward the tire, a tail piece lifted near the seat, or a windscreen that no longer follows the upper cowl evenly.
Then move closer. Use reflections across the paint to reveal a shallow dent, stressed clear coat or a ridge where two panels are pressing together. Autumn dust and dried water spots can hide the start of a crack, so wipe only the small area you need to inspect with a clean cloth. Do not scrub grit across the finish.
Photographs are especially helpful when several riders are leaving together. Take the same four views each time and one close-up of any concern. The goal is not social content; it is a condition record. A timestamped image can show whether a gap grew, a decal lifted or luggage moved between stops.
Read Panel Seams and Mounting Points
Move around the motorcycle in a fixed order: front cowl, left side, lower fairing, tail, right side and back to the windscreen. At each seam, ask three questions:
- Is the gap reasonably even compared with the surrounding edge and previous photographs?
- Are the two panels meeting without one edge riding over the other?
- Is there a visible fastener, grommet or clip position that looks empty, displaced or pulled inward?
Do not tighten a visible screw merely because it can turn. Fairing stacks may include model-specific collars, washers, rubber pieces or well-nuts, and incorrect tightening can distort paint, crush a mount or hide the original alignment problem. Use the motorcycle and component instructions for fastener type, sequence and torque. If the stack is unknown, stop and identify it first.
Pay special attention to tabs near the headlight, side-panel junctions, lower-fairing joins and tail edges used while mounting the motorcycle. A white stress line, fresh paint lifting around a hole or a crack extending from a tab changes the decision. Do not press it flat for the ride. Record it and arrange a proper inspection.
Check the Windscreen and Front-Cowl Area
Cooler air does not make a loose screen harmless. Inspect the windscreen edge, every mounting position and the surrounding upper cowl. Look for a fastener sitting unusually deep, a rubber mounting point rotating with light contact, a screen touching painted bodywork or a crack radiating from a hole.
The screen should not be used as a handle while moving the bike. Avoid pushing on it to decide whether it is “strong enough.” If a mounting point spins, sinks or remains loose, use the windscreen well-nut diagnosis guide before replacing parts at random.
With the motorcycle supported and operated only as its manual allows, confirm that steering movement does not pull wiring, pinch a loom or bring controls into contact with the screen or cowl. A fairing check cannot certify the steering system; any binding, unexplained resistance or control interference calls for professional attention before riding.
Verify Lights, Signals and Reflective Surfaces
Shorter autumn days make lighting faults more consequential, but the inspection remains straightforward. Confirm that the headlight, brake light and turn signals operate correctly, and that the lenses are clean, secure and free from cracks or heavy condensation. Ask another rider to observe the rear while you operate the controls; follow the owner's manual and local law.
Look at the bodywork around each lamp. A signal can illuminate while its stalk, bracket or surrounding panel is loose. Check whether a connector or wire is visible where it was previously protected. Do not stuff wiring behind a panel without knowing its route and clearance.
Reflective additions can support conspicuity, but placement should not obscure required lamps, reflectors, vents or legal identifiers. NHTSA recommends making yourself visible and keeping lights in working order; it does not mean every decorative reflective strip is suitable for every location. Check local requirements.
Inspect Heat and Wheel-Clearance Zones
The lower fairing deserves a separate pass after an exhaust change, repair or recent reinstallation. When the motorcycle is cold, look for new discoloration, blistering, softened edges, a displaced heat shield or a panel that has shifted toward a hot component. Do not reach into a warm exhaust area. If heat evidence is new, investigate the source before another long ride.
Next, visually inspect the clearance between bodywork and both tires through the full area you can see without unsafe lifting or disassembly. Look for polished rub marks, rubber dust or an edge that appears closer than in the baseline photographs. The same applies near the chain and moving suspension components. Never assume a stationary gap proves clearance through the full suspension and steering range.
If an accessory, exhaust or bracket was recently changed, treat that modification as a new configuration requiring its own documented check. A cosmetic panel should never be allowed to interfere with steering, suspension, wheels, controls or hot parts.
Add Luggage Without Sacrificing the Paint
Autumn rides often add a tail bag, extra gloves or a rain layer. Fit luggage before the inspection rather than after it. Follow the luggage and motorcycle manufacturers' instructions for attachment, load limits and placement. Confirm that straps cannot enter the wheel, chain, exhaust or controls, and that the bag does not cover a lamp or rest on an unsupported painted edge.
Check every contact point for grit. A soft strap can still abrade clear coat when dust is trapped underneath and movement continues for hours. Use only protection compatible with the finish and attachment system; do not improvise a thick pad that makes the load unstable.
For motorcycles being trailered to a club event, use the separate fully faired sportbike transport checklist. Fairings and windscreens are not tie-down anchors.
Use the First Stop as a Second Inspection

Editorial concept: compare the same seam and fastener with the pre-departure photograph; do not flex the panel to test it.
The meeting-point check establishes a baseline; the first planned stop shows what changed under vibration, airflow and luggage movement. Park safely, switch off and wait for hot areas to cool. Compare the main seams, windscreen mounts and luggage contact points with your photographs. Listen to the rider's description of any new buzz, rattle, steering interference or smell.
A new symptom is evidence, not a challenge to “make it home” with a quick push or random fastener adjustment. If a panel is loose near a wheel, control, light or hot component, do not continue until the motorcycle has been made safe through the correct procedure. Arrange assistance when needed.
The group should agree before departure that no rider has to continue merely to protect the schedule. A route can be shortened; a damaged tab cannot be made reliable by group enthusiasm. Keep the bodywork decision separate from the social pressure of the ride.
Build a Club Routine Without Turning It Into Group Maintenance
A club can make the process easier by assigning simple roles: each rider inspects their own motorcycle, one partner confirms lights, and the ride leader protects the departure schedule by setting an arrival time that includes checks. The club is not certifying anyone's machine. It is creating space for each owner to notice a problem before the group moves.
For the ride briefing, keep route, regrouping, fuel and communication plans separate from motorcycle condition. The Motorcycle Safety Foundation's group-riding guidance emphasizes arriving prepared, holding a riders' meeting and planning how the group will regroup. Riders should still obey local rules and use training appropriate to their experience.
If your club is also planning a shared visual identity, the club fairing design guide shows how to coordinate colors without making every motorcycle identical. Design planning belongs before production, not in the parking lot on ride morning.
Decide: Ride, Correct, or Postpone
Use three outcome categories instead of “looks fine”:
| Outcome | Evidence | Appropriate next step |
|---|---|---|
| Ride after the complete pre-ride check | Bodywork is secure, clear of moving and hot parts, lights work, and no new damage or interference is found | Record the baseline and repeat a short check at the first stop |
| Correct before departure | A known minor issue has a documented, model-appropriate correction and the correct parts and instructions are available | Complete the work without rushing, then repeat the affected checks |
| Postpone and inspect | Missing or unknown hardware, spreading cracks, loose lamp or screen, control interference, rubbing, heat damage, fluid evidence or uncertainty about safety | Do not improvise; use qualified service or the correct technical information |
If replacement bodywork is part of the solution, gather the motorcycle's exact model, year, market, current panel photos, retained parts and desired finish. The NiceFairings custom fairings page explains the design inquiry route, while the production and shipping overview helps set timing expectations. Review the frequently asked questions and contact NiceFairings with the bike details before ordering. Those pages support a quote and planning discussion; they do not replace model-specific installation information or a mechanical inspection.
Autumn Group-Ride Fairing Checklist
- Photograph both sides, front and tail before departure.
- Compare the silhouette and major seams with earlier images.
- Inspect visible tabs, retainers, grommets and fastener stacks without forcing them.
- Check the windscreen and upper cowl for sinking mounts, cracks or contact.
- Verify headlight, brake light, turn signals, lenses and surrounding panels.
- Look for wiring that is exposed, pinched or routed differently after recent work.
- Inspect the cold lower fairing for heat marks and displaced shielding.
- Look for evidence of contact near tires, chain, suspension and controls.
- Fit luggage early and inspect straps, lamp visibility and paint contact points.
- Repeat the key checks at the first stop and act on any change.
- Complete the full motorcycle pre-ride inspection in addition to this list.
A Better Ride Starts Before the Group Photo
The best result is uneventful: no loose edge, no rushed repair and no rider pressured to continue with an uncertain motorcycle. A short, repeatable fairing inspection protects the finish, helps reveal mounting problems early and gives the group a shared language for deciding when to pause.
Plan replacement or customization on a separate timeline, verify the exact motorcycle before ordering, and keep safety decisions grounded in the owner's manual and qualified advice. For available bodywork and support options, start at NiceFairings and treat the ride-day checklist as what it is: a disciplined visual check before the road, not a substitute for complete maintenance.
Cover image: editorial concept created for this guide. It is not a customer motorcycle, product photo, mechanical inspection record or proof of fitment.