Images are editorial illustrations, not exact model-year, fitment, or paint-color evidence.
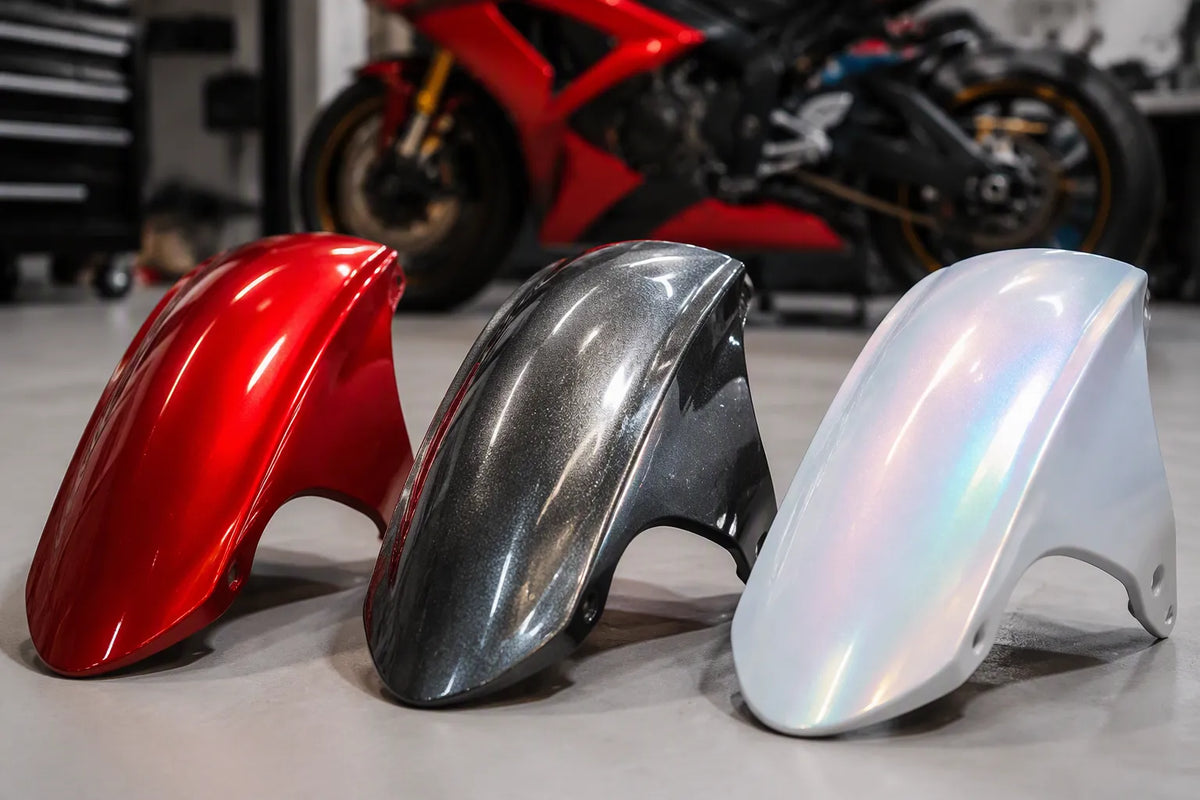
Solid, metallic, and pearl describe different paint effects. Solid offers color without metallic or pearl effects, metallic adds reflective sparkle, and pearl can add a softer glow or depth. Your priority helps narrow the choice, but none of these labels guarantees an exact match, a lower repair bill, or a particular service life.
Three practical tests guide the choice: how the finish looks in person, how hard it is to match later, and how you approve a sample before ordering.
This is buyer guidance for replacement sportbike bodywork, not a chemistry lesson. You compare solid, metallic, and pearl fairing options by eye and by sample, then commit.
Key Takeaways
Solid color is separate from surface sheen: it can be gloss, satin, or matte.
Metallic paint adds shine with tiny reflective flakes.
Pearl pigments can create glow and depth; the exact effect depends on the finish.
Matching difficulty depends on the specific color, coating system, application, and condition of the retained panels—not a fixed solid-to-pearl ranking.
Check a real paint sample in sunlight and shade before you order.
Write down the paint code and the finish type so you can look them up later.
Choose an effect by its appearance, then confirm the matching plan and maintenance requirements separately.
A physical sample, when available, reduces uncertainty but is not a guarantee that every finished panel will match perfectly.
Motorcycle Fairing Paint: Solid, Metallic, Pearl
When you pick replacement bodywork, you have three pigment groups to choose from. Each one changes how light hits the surface. Each one also changes how you plan a color match later. This section explains what makes solid, metallic, and pearl different so you can choose with clear eyes.

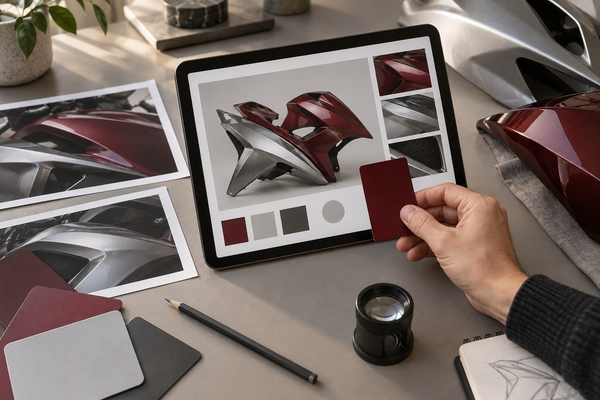
Blue finish samples illustrate effect selection; AI concept, not an exact paint reference.
Solid Paint: One Flat Color
Solid paint does not rely on metallic flake or pearlescent effects. A solid color may still be made from several pigments. Its apparent brightness and color can change with lighting, reflections, and viewing conditions. In the heading, “flat color” describes the absence of an effect pigment; it does not mean a matte surface.
Gloss, satin, and matte are separate surface-sheen choices. They go on top of any pigment group. A solid black panel can have a glossy clear coat or a matte clear coat. The pigment stays the same. The sheen changes how light bounces off the surface. Do not treat gloss or matte as a fourth finish group. Sheen and pigment are two different choices.
Solid finishes remove effect-pigment variables, but that does not make every solid color easy to match. Still, no finish promises an exact match. Lighting, formulation, aging, and surface condition all affect how any color looks.
Metallic Paint: Flake That Sparkles
Metallic paint begins with a solid color base. Then it adds reflective metal flake. Those flakes line up within the dried film and reflect light at different angles. The result is a sparkly, glitter-like effect. The sparkle shifts as you move around the bike.
Flake size, distribution, the coating system, and application all influence whether a metallic effect appears subtle or prominent. As a buyer, describe the visual result you want and ask for an example of that exact finish. Leave spray settings and application decisions to the coating manufacturer and qualified painter.
Compare the visible sparkle on a curved sample rather than selecting spray-tool specifications. The following distinctions are useful buying questions, not instructions for applying paint.
- What level of sparkle or glow should the approved finish show?
- Which retained panels must be compared?
- What sample or written reference is available for approval?
The base color under the flake changes the final look. A dark base coat makes the flakes look deeper and more dramatic. A bright or color-matching base gives a cleaner, more even effect. The same flake product can look different depending on the color underneath.
Pearl Paint: Depth and Color Shift
Pearlescent coatings use effect pigments to create a characteristic glow or depth. Some finishes show a noticeable hue shift; others do not. Pearl and candy are not interchangeable terms, so ask the supplier what their specific finish description means.
Not all pearl finishes are three-stage systems. The effect may be part of a basecoat or supplied through a separate layer, depending on the product. Confirm the actual coating system with the painter rather than assuming the number of layers from the word “pearl.”
Color shift works differently than many buyers expect. A pearl mid-coat can make color shift depending on viewing angle. But pearl does not always change hue. Some pearls add depth and glow without a big hue swing. Pearl can sometimes mimic a metallic look while adding depth. The two effects are related but not the same.
Do not infer clear-coat thickness or available correction depth from a finish label. If a panel needs correction or repair, ask the refinisher to evaluate its actual condition and coating system.
Pearl white is not a universal specification. Different products and formulas can produce different results, even when listings use the same color name. An approved reference is more useful than assuming a particular layer count.
Keep these three groups separate in your mind. Solid has no metallic or pearl effect; metallic and pearl finishes introduce different effect pigments. Each one changes how your solid, metallic, and pearl finish decision plays out in person. None of them ranks above the others in durability, UV resistance, price, or repair ease. Those factors depend on formulation and application, not on the pigment group alone.
How Motorcycle Fairing Paint Colors Look in Light
Sunlight, Shade, and Viewing Angle
Direct sunlight can reveal sparkle and effect-pigment detail that is less obvious in diffuse light. Solid colors also respond to illumination and reflections. Look at the same sample under several conditions; do not expect any finish to look identical from every angle.
In shade, some metallic and pearl effects may become less prominent. They do not necessarily disappear. Comparing sunlight and diffuse light helps you decide whether the finish has the amount of visual contrast you want.
Effect pigments can create changes in brightness or color as the relationship between the light, panel, and viewer changes. The magnitude and character of that effect depend on the formulation. Not every pearl produces a rainbow or dramatic color shift.
Metallic particles reflect light and can create moving highlights as the viewing angle changes. A broad, curved fairing can show those effects differently from a small flat screen image. Compare more than one area and angle before approving the overall appearance.

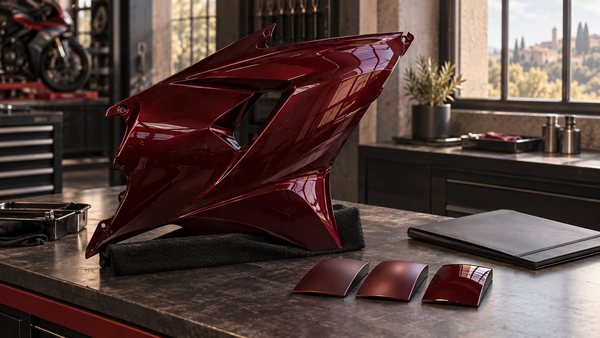
Lighting changes the appearance of painted curves; AI illustration, not a color-match sample.
Why Screen Images Mislead
A screen image is not an exact color sample. Neither is an AI picture. Camera sensors capture color in their own way. Screen calibration is different on each device. Lighting conditions at the photo shoot change everything. All these factors twist how a finish looks on your phone or screen. A photo of a motorcycle fairing paint colors option can look nothing like the real panel.
PPG provides examples of physical sprayed chips in its custom color tools. Its automotive color history provides additional background on finish trends. These are reference resources, not a claim that NiceFairings uses PPG products or has a partnership with PPG.
Your solid, metallic, and pearl finish choice needs a real sample. Ask for a real spray-out if one is available. Look at it in sun, shade, and garage light. Your eyes will tell you more than any screen can. A sample lets you check sparkle, depth, and color change in your own place. That beats any photo.
Whole-Kit Repaint vs Matching Retained Panels
When you order replacement bodywork, you face a big choice. You can paint all the new panels together at once. Or you can keep some old panels and match the new piece to them. This choice shapes your color matching plan from the start. The main question is whether you want a finish change for your current bodywork or new panels. This question guides how you check condition, the look you want, and future repainting.
Repainting the Whole Kit
Painting the replacement set together can reduce the need to match differences between separate production batches or aged panels. It does not automatically make the entire motorcycle uniform: the fuel tank, tank cover, seat cowl, or other retained painted pieces may remain outside the kit. Confirm exactly which surfaces are being refinished.
Picture a BMW S1000RR build as an example. You want a special custom look that stands out. You order a full set of replacement fairings. The painter uses the same finish on every panel. The aim is a coordinated appearance, with retained painted parts checked separately.
This approach gives you freedom for your own design. You can plan a coordinated scheme across the supplied panels instead of trying to reproduce every retained surface. Still, panel orientation, application, and adjacent components matter. Approve how the full set should look together rather than assuming that painting at the same time guarantees a perfect result.
Painting the whole kit works well for a complete visual change. You can change the color entirely. You can add graphics without worrying about old paint. The new set becomes one unit. Through NiceFairings custom fairing options, you can review possibilities for ordering a full set of replacement bodywork. This online resource helps you plan your build from start to finish.

A coordinated whole-bike color concept; AI illustration, not an actual kit or exact model.
Matching Retained Panels
Matching a retained panel introduces its current condition into the decision. A factory code is a starting reference, not proof of an exact match to a used or previously refinished part. Age, exposure, prior repairs, and production variation can matter. The new piece may differ visibly even when the code appears correct.
Take a Yamaha R6 as a hypothetical example. You want one replacement side panel beside an existing painted tank cover. Before ordering, explain which parts stay and provide clear photographs. A qualified refinisher can advise whether an acceptable match is realistic and whether a broader refinishing plan is appropriate. The color-matching decision guide discusses similar questions; it is not a cross-model fitment recommendation.
Different finishes introduce different matching variables, but there is no dependable universal difficulty ranking. A particular solid color can be challenging, and an effect finish with a well-documented formula may be manageable for the right refinisher. Compare the actual target, coating system, and acceptable tolerance before deciding.
For a matching project, consult the custom fairing design-brief guide. It helps you list the details your painter needs. You record the paint code, finish type, sheen level, and any flake or pearl additives. A written reference protects you if you need a second panel later.
Sample Approval and Written Color References
Why a Physical Sample Matters
A real spray-out on a test panel lets you see the finish in your own light before you buy. You cannot judge paint color well from a screen. Camera sensors change hues. Screen settings twist brightness. A real sample sits in your hand and reflects the same light your bike will sit in.
You should look at the sample under a few different lighting conditions. Check the panel in good sunlight or color-matching light. See if the area has been refinished, because this changes color comparison. Do not trust a single garage photo, since it does not show all viewing conditions. Compare real paint samples under good lighting. Think about viewing angle, especially for effect finishes, by looking at the same spot from more than one angle instead of just a straight-on photo. Use natural light for photos when you document the sample next to the motorcycle. For close color matching, looking in person is better than photos alone.
Looking at the sample in sun, shade, and garage lights shows how the finish acts in its real world. A pearl panel might glow under a midday sky and look flat in evening shade. A metallic finish can sparkle in one light and look dull in another. Solid finishes stay more steady, but even they shift a little as lighting changes. You need to see all three conditions to make a smart choice. The same sample seen at noon versus dusk can look like a totally different color. That is why a real sample matters so much. It takes the guesswork out of your decision.

Discuss an available physical sample and written reference; AI illustration, not actual staff or a service guarantee.
Written References to Lock In the Order
A written reference protects you if you need a second panel later. Write down the paint code or custom mix reference, the finish type (solid, metallic, or pearl), the sheen level, and any flake or pearl additive details. This information gives your painter or supplier a clear target for matching.
Follow a simple process to capture the paint code:
Consult your model-specific documentation or an authorized dealer to locate available paint or color identification. Label locations and available codes vary.
Write down the VIN from the motorcycle's VIN label.
Ask the manufacturer or authorized dealer what color information can be confirmed for your exact motorcycle. A VIN alone does not always identify a usable refinishing formula.
Compare the available records with the actual retained panels, especially if the motorcycle has been repainted.
Store the references with the order correspondence and approved sample details. A code and written notes give a future painter a starting point; they do not lock in an exact result forever. A later replacement may require a fresh comparison because the existing finish and available coating products can change.
The details matter. A pearl additive changes how light moves through the coating. A flake size changes sparkle. A sheen level changes gloss. Write all of them down. You cannot guess these details from memory. A written reference is your insurance policy for consistent matching across future orders. Without a written reference, you rely on memory or a photo. Neither one captures the full effect. A photo cannot show how pearl shifts in direct sunlight. A memory cannot recall a specific flake density. Written notes give you a target you can repeat.
Making the Final Ordering Decision
Match Your Priority to the Finish
Your fairing choice comes down to one question. What matters most to you? Your answer picks the right finish for your project.
Pick a solid finish when you prefer a clean color without metallic or pearl effects. Decide separately whether you want gloss, satin, or matte. If future single-panel replacement matters, ask how the supplier records the finish and handles repeat orders. Do not buy a solid finish solely because someone promised that matching or repair will always be easy.
Pick a metallic finish when you want reflective sparkle and visual energy. Look at a curved sample or clear photographs under different lighting to decide whether the effect should be fine and subtle or more pronounced. Ask the painter how retained panels will be compared. Matching effort and price depend on the actual project, not the metallic label alone.
Pick a pearl finish when you prefer its glow, depth, or the particular angle-dependent effect shown by the reference. Ask whether the chosen formula changes hue noticeably or mainly changes brightness. Do not assume that every pearl is a dramatic color-shifting finish or that every pearl requires the same repair process.
Your priority decides the path. All three finishes offer valid options. They provide different visual effects. They present different matching challenges. You weigh the look you want against the work you accept. No single finish suits every rider. Your specific use case guides the choice.
Consider three hypothetical buyers. One wants an understated daily-rider appearance, another wants sparkle in sunlight, and another prefers the glow of a particular pearl sample. Any of them may prioritize future matching, budget, or replacement availability. These priorities should be discussed with the supplier rather than inferred from a finish name.
Your Next Step
Take action now. Your choice is clear based on your priority. The next step is the same for all three finishes.
Ask whether a physical sample or spray-out is available for the finish you are considering, and confirm any cost and lead time. Compare it under daylight, shade, and the lighting where you normally see your motorcycle. If no sample is available, discuss the limits of photographic approval and agree on the reference before committing.
At the same time, confirm the written color reference with your painter or supplier. Share the paint code. State the finish type. Note the sheen level. Record any flake or pearl additive details. This written record protects your purchase. It gives everyone a clear target. Your new panels arrive with confidence when you check the sample first and confirm the code second.
The NiceFairings custom fairing options offers a starting point for your order. The custom fairing design-brief guide helps you write down your specifications. Use these resources together. They make the ordering process smoother and reduce errors.
A sample and written reference reduce uncertainty. They do not eliminate variation between the reference and finished panels. Agree on the approval process, which pieces are covered, and what to do if the delivered appearance differs materially from the agreed reference.
Your motorcycle deserves the finish you want. Your practical test of light, match difficulty, and sample approval guides you to the right choice. Trust your eyes. Lock in your written record. Move forward with confidence. The time you spend now on sample approval and written documentation saves frustration later.
What you care about most helps narrow the finish: understated color, metallic sparkle, or a particular pearl effect. Confirm sheen and matching requirements separately. The strongest choice is the one supported by a clear reference and a realistic ordering plan.
Ask for a real sample before you buy. Check a written color reference with your painter. Use the NiceFairings custom fairings page and the design-brief guide as your next-step resources. These steps guard your motorcycle paint choice. A sample and a written record take away the guessing. Your fairing decision turns clear and sure.