
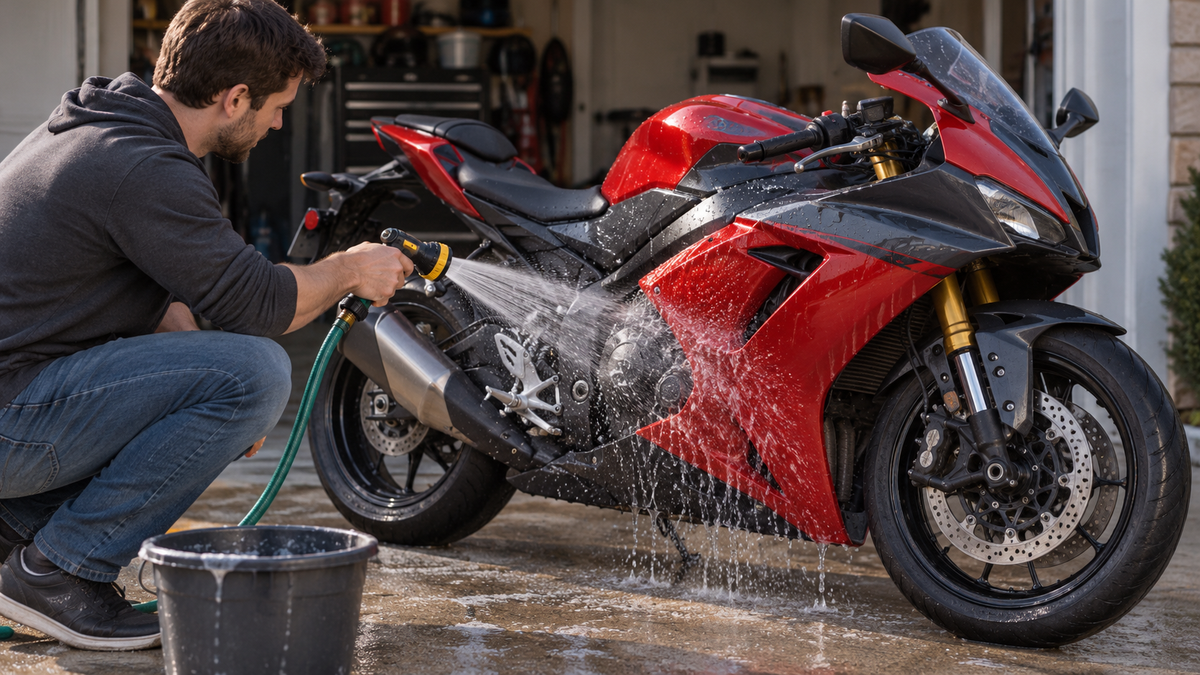
A pressure washer can make a dirty sportbike look like a ten-minute job. It can also send water toward seals, electrical connectors, bearings, vents and overlapping bodywork that were never designed to meet a concentrated jet. The key question is therefore not “Which nozzle color should I use?” It is what the owner’s manual for this exact motorcycle permits.
Some motorcycle manuals explicitly say not to use a high-pressure washer or steam cleaner. Others give model-specific areas that must not be sprayed. When the manual says no, distance and a wider nozzle do not turn the procedure into an approved one. A low-pressure hose, clean sponge or wash mitt, mild compatible detergent and patient rinse are the safer default.
This guide is about washing a fully faired street motorcycle without confusing clean paint with a complete inspection. It does not provide a universal pressure, distance or chemical recipe, because the correct limits depend on the motorcycle, finish, decals, accessories and product instructions.
The short answer: read the manual before you pull the trigger
Find the care or appearance section in the owner’s manual for the exact model, year and market. Look for language about high-pressure washers, steam cleaners, air intakes, electrical parts, brakes, bearings, seals, the muffler outlet and storage compartments. Follow the strictest applicable instruction, including any requirements from an aftermarket paint, film or accessory supplier.
If the manual prohibits high-pressure cleaning, use a normal low-pressure garden hose or the method it specifies. If you are at a coin-operated bay and cannot control the equipment well enough to meet the manual, leave the lance holstered. A bucket wash is less dramatic than a pressure jet and often gives you more time to notice loose hardware, chipped paint and trapped debris.
Fairings change the water path, not the motorcycle’s basic risks
A full fairing presents a large, glossy surface, but it is not a waterproof shell. The visible panels overlap around the headlight, windscreen, tank cover, radiator ducts, frame, belly pan and tail. Behind them are brackets, rubber isolators, threaded features, wiring and heat-management parts. Water landing on the outside can follow gravity, panel gaps or a cable path into a less visible area.
That does not mean ordinary rain or low-pressure washing automatically causes damage. It means the wash method should not force water into interfaces. Our post-rain drying guide follows natural water paths after a ride; this article addresses the added force and direction created during washing.
Why there is no honest universal PSI or distance
Pressure at the machine is only one variable. The nozzle pattern, flow, distance, angle, trigger time and condition of the target all change the result. A narrow jet aimed at a decal edge behaves differently from a broad rinse over an intact panel. A loose grommet, cracked tab or lifted film edge changes the risk again.
For that reason, a universal “safe PSI” would be misleading. Manufacturer instructions take priority. Yamaha manuals for some models state that high-pressure washers or steam-jet cleaners can cause water seepage and deterioration at seals, electrical components, hoses and vents. Honda manuals for some motorcycles recommend a low-pressure garden hose and warn that high-pressure water can damage parts. These examples show the type of guidance to look for; they are not substitutes for your own manual.
Make the wash site safe before the motorcycle gets wet
Park on firm, level ground with adequate drainage. Use the stand arrangement approved by the motorcycle manufacturer. Keep extension cords, chargers and powered equipment away from water. The ignition should be off, the key removed if appropriate, and the engine, exhaust and brakes allowed to cool.
Wet concrete becomes slippery. Route the hose so it cannot pull the side stand, catch a footpeg or drag across painted bodywork. Do not use a fairing, mirror or windscreen as a handhold while moving the bike. If the ground is soft or unstable, stop and solve that first; our soft-ground parking guide explains why a clean bike is not worth a low-speed fall.
Inspect the bodywork before rinsing
Walk around the dry motorcycle in neutral light. Look for lifted graphics, chipped clear coat, missing fasteners, loose trim, cracked tabs, open accessory holes and a panel edge that no longer sits flush. Photograph anything questionable before water changes the evidence.
Gently check visible panel stability without flexing or forcing it. A moving panel needs diagnosis, not a water test. If a fastener is missing, use the roadside fairing-fastener decision guide to document the complete joint rather than inserting a random screw. If the bodywork already rubs the tank or seat, resolve that interface with the fairing-rub diagnostic before another wash hides fresh contact dust.
Pre-rinse by letting water carry grit away
The first rinse should remove loose dust and grit before a cloth touches paint. Use cool or appropriately tempered water as specified by the manual and cleaning-product maker. Let low-pressure water flow down the panels rather than driving contamination sideways into seams.
Work from cleaner upper areas toward the dirtier lower bodywork, changing tools when necessary. The belly pan and lower side panels may carry road film, chain residue or tar that should not be transferred to the tank cover or upper cowl. For bonded insects and tar, use the staged method in our bug-and-road-tar guide; more water pressure is not a substitute for dwell time and compatible chemistry.
Treat seams, fasteners and decal edges as boundaries
Do not aim a concentrated stream into a panel joint, fastener recess, rubber well-nut, vent, headlight edge or the underside of a lifted graphic. Approach intact exterior surfaces at a shallow, gentle rinse angle that carries dirt away from the interface. If the manual identifies a no-spray area, respect it even when a fairing partially hides it.
The visible screw head is not the entire mounting system. A panel may use a rubber grommet, clip, collar, bracket or molded insert behind the painted face. Those details can retain moisture or already be damaged without showing from the outside.

A close view of one threaded mounting feature from the NiceFairings production process. The photograph shows why an exterior fastener location has structure behind it; it does not establish the material specification or mounting design of every kit.
Keep water away from the motorcycle’s functional openings
The fairing may visually frame an opening without sealing it. Do not direct water into the air intake, muffler outlet, under-seat area, electrical switches, instrument cluster edges or exposed connectors. Follow model-specific warnings for wheel hubs, steering-head bearings, suspension pivots, brake master cylinders, chain, throttle body and other components.
Avoid temporary plugs, bags or tape unless the owner’s manual or component maker calls for them. A forgotten cover can create a different hazard. Never start the motorcycle merely to “blow water out” of an unknown area; complete the prescribed drying and inspection first.
Wash the paint with clean tools and compatible chemistry
Use a clean, soft sponge or wash mitt and a mild detergent approved for the finish. Keep a separate tool for the dirtiest lower areas. Rinse the tool frequently so captured grit does not become an abrasive. Do not use household solvents, scouring pads or a brush that has cleaned wheels on painted panels.
Gloss, matte, satin, decals and protective film have different stopping points. Spot-polishing a matte panel can change its sheen, while an aggressive cleaner may attack a graphic or film edge. Read the matte-fairing cleaning mistakes guide and the fresh-paint PPF checklist before assuming one product belongs on every surface.
Rinse detergent away without chasing it into gaps
Residual detergent can leave marks or affect metal surfaces, so rinse thoroughly with clean, low-pressure water. Follow the natural top-to-bottom path and use volume rather than force. Do not put the nozzle against the fairing to reach a shadowed area.
If foam keeps emerging from a seam, stop adding detergent and continue a controlled rinse as the manual allows. Persistent residue behind a panel may need a later, dry inspection by someone familiar with the model rather than a harder jet. Removing bodywork simply to finish a casual wash can create broken tabs or misaligned joints if the correct service procedure and tools are not used.
Dry the motorcycle by lifting water, not grinding residue
Use clean, absorbent microfiber towels or the drying method approved in the owner’s manual. Blot and lift water from painted surfaces. Do not drag a towel over grit that the rinse missed. Change towels as soon as they become dirty.
Compressed air and powered blowers are not automatically safe: pressure can push water and contamination deeper or aerosolize dirt. Use them only where the motorcycle and equipment instructions allow, at an appropriate setting and direction. Open the seat or compartments only as the manual permits, and keep water away from documents, tools and electrical accessories.
Wet brakes and tires change the first meters after washing
Water can temporarily reduce braking effectiveness, and cleaning products on brakes or tires can be dangerous. Keep wax, dressing, oil and detergent off tire tread, brake discs and pads. If contamination is suspected, do not ride until the braking system has been assessed and corrected.
Follow the exact post-wash brake-drying instruction in the motorcycle’s manual. Some manuals direct the rider to test or apply the brakes at low speed in a safe area, but this is not a universal invitation to ride before inspection. Verify the controls, tire condition, lights and visible leaks first.
Reinspect after the surface looks dry
A glossy panel can appear finished while water remains at a windscreen well-nut, lower overlap or tail seam. Check beneath the visible edge without prying. Look for new fogging, a changed panel gap, trapped foam, a loose graphic edge or water emerging from a fastener location.
If the cockpit buzzes after washing, do not tighten everything indiscriminately. Use the cockpit-buzz diagnostic and the windscreen well-nut guide to identify the interface. A noise that appeared after water exposure may still be an assembly issue rather than “water inside the fairing.”
Salt exposure needs a specific rinse plan
Road salt and sea spray raise corrosion concerns, but warmer or more forceful water is not automatically better. Some manuals specifically call for cold water after salt exposure because warm water can intensify salt’s corrosive action. Follow the manual and address metal, chain and painted-plastic care as separate tasks.
Our road-salt and sea-spray inspection explains what to record behind overlaps without turning every rinse into a teardown. The goal is to remove contamination, dry the motorcycle and identify a developing issue—not to force water behind every panel in search of salt.
New or custom-painted fairings deserve a baseline wash record
Before the first wash, photograph the assembled motorcycle in diffuse light: both sides, front, tail, major graphics, panel gaps and a few close views of fastener locations. Confirm that the paint has cured and that the painter’s care instructions are compatible with the motorcycle manual. Fresh paint, decals and film may have specific wait periods or chemical restrictions.
After washing, photograph any change before polishing or disassembly. A useful record separates a pre-existing chip, a lifted edge and a new mark. For general finish planning, see how to protect custom-painted fairings. If replacement is eventually needed, browse the NiceFairings collections by motorcycle family and verify the exact model and year before treating a color match as a fitment match.
A ten-minute low-pressure wash checklist
Use this before and after washing:
- Manual checked for this model and year: yes / no
- High-pressure cleaning permitted: yes / no / not stated clearly
- Motorcycle stable, off and cool: yes / no
- Loose panel, graphic edge or missing fastener found: yes / no
- Hose and cords routed away from stand and bodywork: yes / no
- Low-pressure rinse available: yes / no
- Clean upper-bodywork mitt separated from lower-panel tool: yes / no
- Air intake, exhaust, electrics and manual-listed zones protected from direct spray: yes / no
- Detergent approved for the finish: yes / no / unknown
- Detergent fully rinsed: yes / no
- Brakes, tires, controls and lights checked: yes / no
- Seams and fastener areas rechecked after drying: yes / no
- Before-and-after photos saved: yes / no
If the manual is unclear, contact the motorcycle manufacturer or an authorized service source before using a pressure washer. Do not let a queue at the wash bay make the decision for you.
When to contact NiceFairings
Contact us when washing reveals a cracked panel, damaged mounting feature, persistent interference or finish problem that may require replacement bodywork. Send the motorcycle make, exact model, model year and market, along with wide photos of both sides and close photos of the affected panel and mounting area. State whether the bodywork is original, aftermarket or unknown.
Use the NiceFairings contact page for fitment and order questions. A photograph cannot prove hidden water damage or paint chemistry, and we will not label ordinary water spotting as structural failure. Clear evidence helps determine whether the next step is cleaning, mechanical diagnosis, refinishing or a correctly specified fairing kit.
Sources and image notes
- Yamaha motorcycle owner’s manual example: model-specific care guidance warning against high-pressure washers and steam-jet cleaners and identifying water-seepage risks. Consult the manual for your exact motorcycle.
- Honda motorcycle owner’s manual example: model-specific appearance-care guidance recommending low-pressure washing and listing areas to avoid. Consult the manual for your exact motorcycle.
- Cover image: created with OpenAI image generation for NiceFairings as an editorial illustration of a low-pressure garden-hose wash. It is not a photograph of a customer motorcycle and does not demonstrate a universal washing procedure.
- Inline image: NiceFairings production-process archive, provided by the store owner. The visible threaded feature is described only as shown; no universal material or fitment claim is made.


