Your Gen 2 Hayabusa has earned its legend. Yet after years of street miles, the bodywork shows cracks, fading, or scars from a low-side. You want it flawless again-a build that turns heads at every stoplight. So how do you choose the right Hayabusa fairings without sacrificing fitment or durability? This guide answers that question directly. You'll learn what separates quality ABS from brittle alternatives, how to match panels to your tank and wheels, and the exact steps to inspect and pre-fit your new kit. Trust this resource-it's built for riders like you who demand precision.
Key Takeaways
Make sure your fairings match your exact Gen 2 model year (2008-2017 or 2018-2020) so they fit perfectly.
Choose ABS plastic fairings for street riding; they resist cracking and handle vibration well.
Check your new kit and test-fit all panels before you install them permanently to avoid alignment issues.
Buy from trusted sellers who have good reviews and clear return rules so you get quality and help if needed.
Plan your purchase around lead times, especially for custom paint, to avoid delays.

Know Your Bike: Gen 2 Fitment Basics
Before you order anything, you must know your motorcycle's generation. The Suzuki Hayabusa comes in two main eras. Gen 1 bikes ran from 1999 to 2007. Gen 2 bikes cover 2008 through 2020. These two groups share almost no body parts. Gen 2 Hayabusa fairings will not fit a Gen 1 frame. The mounting spots, panel shapes, and sizes are totally different. If you own a 2006 model, you cannot use parts made for a 2012 bike. Knowing your generation stops you from wasting cash on parts that won't work.
Identifying Your Model Year (2008-2020)
The Gen 2 era splits into two smaller groups. Models from 2008 to 2017 share the same basic fairing shape. Models from 2018 to 2020 got small styling updates. The newer bikes have changed front cowl details and slightly different side panel curves. These changes are small but important. A 2016 fairing kit will not line up right on a 2019 frame. You must pick parts that match your exact build year.
Check your motorcycle's VIN to confirm the model year. The tenth character of the VIN shows the year. You can also look at your owner's manual or the sticker on the steering head. When you shop for new bodywork, always say your exact year. Do not think all Gen 2 parts swap freely. This quick check stops headaches during setup.
Why Fitment Matters for Street Bikes
Good fitment affects more than looks. Misaligned fairings leave gaps where wind and dirt get in. They can shake at highway speed and make annoying noises. Poorly fitted panels may rub against your fuel tank or wires. Over time, this rubbing harms both the new bodywork and the parts under it.
Street riders deal with special issues compared to track riders. You hit potholes, temperature swings, and daily shaking. Your fairings must handle these without cracking or coming loose. A kit made for your exact model year gives proper mounting points. Pre-drilled holes match your frame's current brackets. This accuracy makes setup easy and gives a clean, factory look. For a street bike you ride every day, correct fitment is not a choice-it is a must.
Choosing the Right Hayabusa Fairings: OEM vs. Aftermarket
Now you face the main choice for your street build. You can buy factory Suzuki bodywork from a dealer. Or you can pick an aftermarket kit from a specialty supplier. Each option has clear pros and cons. Your choice affects your budget, your time, and how your bike looks. Knowing both paths well will help you avoid costly errors.
The Case for Factory Suzuki Bodywork
Factory panels come straight from Suzuki's own production line. They fit your bike's mounting points perfectly. Every hole lines up with no extra work. The plastic is the same grade as your original bodywork. Paint colors match Suzuki's official palette exactly. If you want a stock look, OEM parts give you that result without any guesswork.
The downsides are big, though. Factory parts cost a lot more. One side fairing can cost several times more than a full aftermarket set. You also have fewer choices. Suzuki only offers the colors and graphics from each model year. If you want a custom look, you must pay more for painting. Getting parts can also be slow. Dealers often backorder older Gen 2 panels. You might wait weeks or even months for delivery.
For a rider fixing a rare bike or keeping a collector model original, OEM makes sense. For a street rider who wants to fix damaged bodywork or change the bike's style, the cost is hard to justify.
The Value and Risks of Aftermarket Kits
Aftermarket makers produce replacement bodywork in larger amounts. This scale lowers their costs. You pay much less than OEM for a full kit. You also get many color and graphic options. Many suppliers offer custom paint too. This variety lets you create a unique street build without going to a paint shop.
Quality varies a lot across the aftermarket market, though. Some cheap kits come from factories with poor quality checks. Their panels may have thin plastic, uneven surfaces, or misaligned mounting tabs. These flaws cause gaps and shaking once installed. You must research each supplier carefully before ordering.
Good aftermarket brands close this gap. They use injection-molded ABS plastic that matches factory specs. Their kits come with pre-drilled holes that line up with your stock mounts. This design gives a true bolt-on fit. You do not need to drill, trim, or change anything. The final result looks factory-fresh.
One trusted source for Gen 2 bodywork is the NiceFairings Hayabusa collection. This supplier focuses on Suzuki sportbike fairings. Their kits come ready to install with all needed hardware. You can choose from OEM-style copies or bold custom graphics. Each set uses strong ABS plastic built for street use.
Before you buy any aftermarket kit, check that the product matches your exact model year. Look at the product details for fit notes. Contact the seller with your bike's year if you are unsure. A good company will confirm the fit before you order. This small step keeps you from buying the wrong panels.

Fairing Materials: ABS vs. Fiberglass
The material inside your new bodywork decides how well it handles real street riding. You have three main options: ABS plastic, fiberglass, and carbon fiber. Each one reacts differently to heat, vibration, and impact. Knowing these differences helps you choose a kit that lasts for years, not just one season.
ABS Plastic: The Street Rider's Choice
ABS injection-molded plastic is the top pick for street motorcycles. Factory Suzuki panels use this same material. The reason is clear: ABS gives you the best mix of strength, flexibility, and looks for everyday use.
You get a factory-like finish with ABS because the injection molding process makes smooth surfaces and sharp edges. The plastic takes paint well, so custom colors look deep and even. ABS also bends a little under pressure instead of breaking. This flexibility matters when you hit a pothole or when vibration shakes the fairing at highway speed. The material soaks up small impacts without hurting the mounting tabs.
Another plus for ABS is its weather resistance. Rain, UV rays, and temperature changes do not wear it down quickly. Your fairings keep their shape and color for many seasons. Repairs are possible too. A crack in ABS can be plastic-welded or reinforced from behind, giving you options if damage happens later.
Most quality aftermarket kits, including those from NiceFairings, use strong ABS plastic. These kits copy the factory molding process, so you get panels that match OEM thickness and mounting points. When you pick ABS Hayabusa fairings, you choose the same material your bike came with. That consistency means predictable fitment and steady performance.
Fiberglass and Carbon Fiber Trade-offs
Fiberglass and carbon fiber offer one clear benefit: less weight. These materials weigh less than ABS, which can lower your bike's total mass. Track riders often pick them for this reason. The lighter panels cut unsprung weight and boost acceleration feel.
However, these materials bring serious problems for street use. Fiberglass and carbon fiber are brittle. They do not bend under pressure. A small stone kicked up by the car ahead can crack or chip the surface. Road vibration creates weak spots over time, leading to hairline fractures around mounting holes. These cracks spread fast and often need full panel replacement.
Repairing fiberglass or carbon fiber is harder too. You need special resin systems and cloth to patch damage. Most riders do not have these tools at home. A simple crack that a plastic welder could fix in ABS becomes a shop visit with these materials.
Cost is another issue. Carbon fiber panels cost much more than ABS ones. Fiberglass sits in the middle but still costs more than ABS. For a street build you ride daily, the weight savings rarely make up for the extra cost and breakage risk.
Your bike faces constant vibration from the engine and road. It deals with debris, weather, and temperature changes. These conditions punish brittle materials. ABS handles them with ease. Unless you build a dedicated track machine, ABS stays the smarter choice for your Gen 2 Hayabusa.
Defining Your Street-Build Visual Direction
Your Gen 2 Hayabusa should have a look that shows who you are. The right style turns a simple fix into a true street build. Before you buy new bodywork, pick a look you like. This choice will guide every other decision you make.
OEM-Inspired and Understated Styles
OEM-inspired builds keep the bike looking like it came from the factory. You pick the same Suzuki colors from your model year. This works well if you like the original design. It also helps the bike's resale value later. Many riders choose this path when they replace damaged panels. The bike looks like new again without extra work.
Understated styles are different. You might pick matte black or dark gray finishes. Simple graphics add style without being loud. These bikes look clean and professional. They also hide dirt and small scratches better than shiny paint. For daily riders, this choice saves cleaning time.
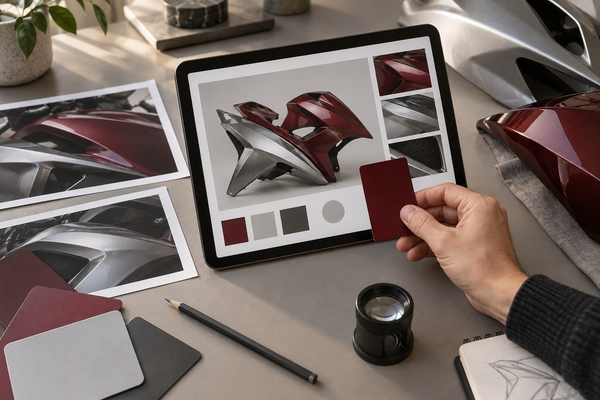
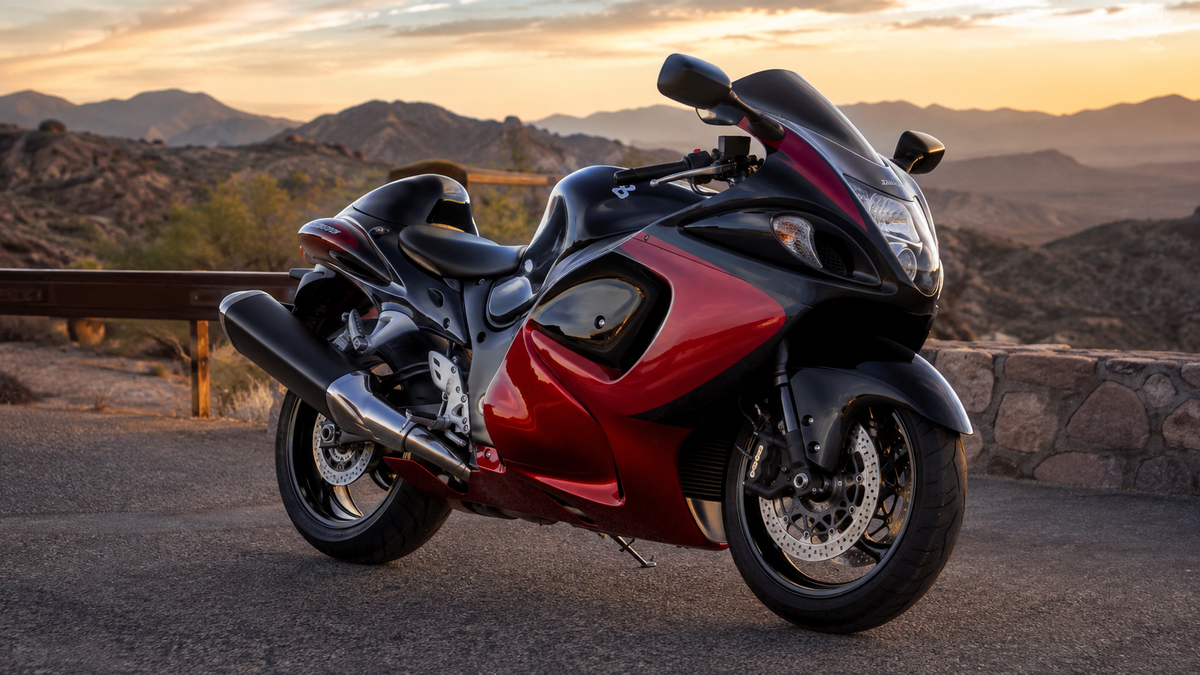
Your fuel tank sets the whole color scheme. Most Hayabusa tanks keep their original paint. Match your new fairings to that tank exactly. Wheel color matters too. Silver or black wheels work with most styles. If your tank has custom paint, bring a color sample when you order.
Bright Customs and Touring-Friendly Looks
Bright custom builds get attention. You pick strong colors like electric blue, fire red, or bright orange. Bold graphics and racing stripes make the bike look fast even when stopped. These builds show a rider who likes the spotlight. Custom paint shops can make any design you dream up.
Touring-friendly looks focus on lasting over flash. You choose tough colors that don't fade fast. Neutral tones like silver, gray, or dark blue work well. These shades hold up on long highway miles without showing wear. Clear coats protect against stone chips and bugs. For riders who do many miles each year, this style is smart.
No matter which direction you take, keep the whole bike matching. Your Hayabusa fairings must go with the tank, wheels, and seat. A mismatched set looks unfinished. Take photos of your bike from different angles. Look at how light hits each panel. This check helps you spot color problems before you spend money.
Your visual direction shapes your whole build experience. Pick a style you will love for years. The right look changes your motorcycle from damaged to amazing.

Inspecting and Pre-Fitting Your New Kit
Your new Hayabusa fairings arrive in a large box. Do not rush to install them. A careful inspection now saves you from headaches later. Set aside thirty minutes for this step. You need good lighting and a clean workspace.
What to Check Upon Delivery
Start with the box itself. Look for dents, punctures, or crushed corners. Shipping damage happens more often than you think. Take photos of the box before you open it. These pictures help if you need to file a claim.
Open the box and check every panel against the packing list. Count each piece. Verify that you received both side fairings, the front cowl, the tail section, and all small covers. Missing parts happen rarely, but catching them early makes returns easier.
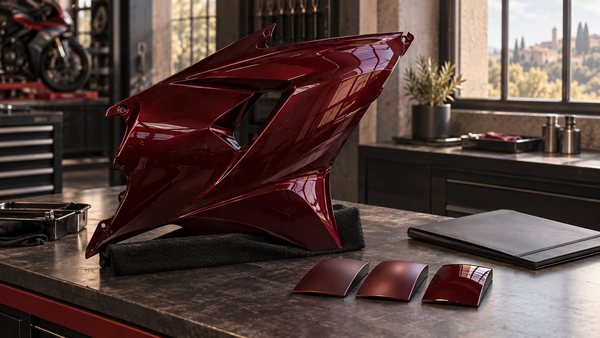
Examine each panel for cracks, deep scratches, or warping. Run your fingers along the edges. Feel for rough spots or uneven surfaces. Check the mounting tabs carefully. These small pieces break during transit. Look at the color match against your fuel tank. Hold the panel next to the tank in natural light. Fluorescent lights can trick your eyes.
The Correct Pre-Fit and Install Order
A dry fit means mounting the panels without final tightening. This step confirms that every hole lines up with your frame. You do not need to paint or modify anything yet. Just place each panel in position and insert the bolts loosely.
Start with the front cowl. Attach it to the upper bracket first. Then move to the side fairings. Align the tabs with the rubber grommets on the frame. Insert the bolts but do not tighten them fully. Check the gaps between panels. They should sit even and consistent.
Follow the tail section next. Secure the rear panels and check the seat alignment. Walk around the bike and look for uneven gaps. Adjust each panel until everything lines up. Tighten all bolts to the factory torque specifications. You can find these numbers in your Suzuki owner's manual.
For a detailed step-by-step guide, consult the NiceFairings installation checklist for model-specific tips. Suzuki's official owner resources also provide torque specs and assembly procedures. A proper dry fit takes time, but it guarantees a clean final result.
Where to Buy and What to Expect
Finding a seller you can trust is just as important as picking the right material. You want a company that backs up its products. Look for businesses that have been around for a while in the motorcycle world. New sellers might have low prices, but they often lack the know-how to fix fitment problems.
Evaluating Sellers and Reading Reviews
Customer reviews show you what real riders have gone through. Look for comments that talk about how parts fit. A review that says "bolted right up" helps more than one that only likes the paint. Search for reviews from Gen 2 Hayabusa owners. Their bikes share your mounting points and panel shapes.
Check the seller's return policy before you buy. A good policy lets you send back panels that do not fit. Look for a warranty that covers defects from the factory. Ask questions through the seller's contact page if anything seems unclear. A quick response shows they care about your business.
Visit motorcycle forums and ask other riders about their experiences. You will find honest opinions about which suppliers deliver quality kits. Pay attention to complaints about thin plastic or misaligned holes. These issues show up in reviews when a seller cuts corners.
Understanding Pricing and Lead Times
Full Hayabusa fairings kits start around $719 for standard color options. Custom paint jobs cost more because each set gets individual attention. You pay for the extra labor and materials that go into a unique design.
Lead times vary by what you order. Stock color kits often ship within a few days. Custom painted sets take longer, sometimes several weeks. The painter needs time to prep, spray, and cure each panel properly. Rushing this process leads to defects you will notice later.
Plan your purchase around your riding season. Order custom work in winter when you do not need the bike daily. This timing gives the seller room to do quality work without pressure. You also avoid the spring rush when many riders order new bodywork.
The NiceFairings Hayabusa collection offers a proven track record for Gen 2 models. Their customer service team knows these bikes well. They can confirm your model year and guide you toward the right kit. This expertise saves you from costly ordering mistakes.
Choosing new Hayabusa fairings comes down to three priorities. Fitment matters most. Your kit must match your exact Gen 2 model year. Material choice comes second. ABS plastic serves street riders best. It bends under pressure and resists cracking. Price and looks matter, but they cannot fix poor alignment or brittle panels.
You now have the knowledge to select with confidence. Verify your bike's year. Inspect every panel upon delivery. Dry-fit before final installation. These steps protect your investment.
The right fairings transform your motorcycle's appearance. They also preserve its value and performance for years. Explore the NiceFairings Hayabusa collection to start your build. Good luck with your project.

FAQ
Will Gen 1 Hayabusa fairings fit my Gen 2 bike?
No. Gen 1 parts (1999-2007) have different mounting points and panel shapes. They do not fit any Gen 2 model (2008-2020). Always buy bodywork designed for your specific generation.
What material should I choose for a street build?
Choose ABS plastic. It bends under pressure, resists cracking, and handles daily vibration and road debris well. Fiberglass and carbon fiber are lighter but more brittle for street use.
How do I confirm which fairing kit matches my model year?
Check the tenth character of your VIN. Models 2008-2017 share one shape. Models 2018-2020 have small styling updates. Always verify fitment before ordering.
Should I dry-fit the panels before painting?
Yes. A dry fit lets you check that every hole aligns with your frame. Adjust the panels loosely, then tighten them once the gaps look even. This step prevents costly mistakes later.
Can I match aftermarket fairings to my stock fuel tank?
Yes, if you order a color match. Hold the panel next to your tank in natural light before final installation. Many suppliers, including the NiceFairings Hayabusa collection, offer custom color options.