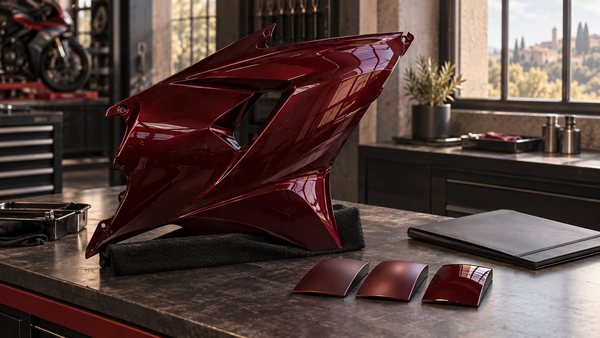
Having a 2017-2024 GSX-R1000 means you own a legendary bike, and you want to personalize it for the street. The key question is: how do you pick the perfect color and finish for your Suzuki GSX-R1000 fairing kit 2017-2024? The answer requires balancing looks, durability, and care. This guide covers everything from OEM-inspired hues to custom matte finishes. It also emphasizes proper fitment and quality materials, referencing reputable sources like NiceFairings for high-quality kits. Consider this your complete guide for a stunning visual upgrade that gets attention. You will learn how to balance style and practicality to achieve a unique look that lasts.
Key Takeaways
Check your bike?? exact model year (2017-2019 or 2020-2024) before you order a fairing kit, so it fits correctly.
Pick a kit made for your bike?? year so it fits without gaps, crooked parts, or extra holes.
Choose colors that fit who you are and how you ride, from factory-inspired to custom designs.
Gloss finishes are shiny but can show scratches and dirt, while matte finishes hide wear but need extra care.
Match your fairing color with your wheels, tank, and windscreen so the whole bike looks put together.
Choose bright colors or reflective designs to be seen and stay safe while riding.
Pick pre-painted kits for convenience and a professional finish, or unpainted kits for full customization.
Use digital mockups and dry-fit tests to make sure your design looks good and fits well before you install it for good.
Confirming Your 2017-2024 GSX-R1000 Fairing Fitment
Suzuki introduced the comprehensively redesigned GSX-R1000 and GSX-R1000R for the 2017 model year. Suzuki accessories such as its seat cowl and Double Bubble Windscreen are listed for the GSX-R1000 across 2017-2025, so a blanket claim that the headlight and all mounting points changed for 2020 would be misleading. Aftermarket kit groupings can still vary by supplier, trim, market and included panels.
Before ordering, confirm the exact model, model year and whether the motorcycle is a GSX-R1000 or GSX-R1000R. Compare the seller's component list with the panels you need, retain the original brackets and fasteners, and dry-fit every panel before final tightening. Review Suzuki's 2017 GSX-R1000 launch information, then use the NiceFairings GSX-R1000 collection to match the advertised year range.
Exploring Suzuki GSX-R1000 Fairing Kit 2017-2024 Color Options

Color turns your motorcycle from a simple machine into something that shows who you are. The right shade makes people look at every red light. The wrong one blends in with all the other traffic. You have more options than ever for your Suzuki GSX-R1000 fairing kit 2017-2024. These range from exact factory copies to bold, one-of-a-kind designs. Knowing these choices helps you pick with confidence. Your pick should match your personality and how you ride.
Why OEM-Inspired Graphics Still Win Fans
Factory paint jobs carry a special meaning. They link your bike to Suzuki's racing history and remind you of the bikes that won superbike championships. Many riders pick OEM-inspired graphics because these designs look classic and well-planned. You never stress about colors clashing because Suzuki's designers already figured that out.
Bringing Back the Classic Suzuki Blue and White Look
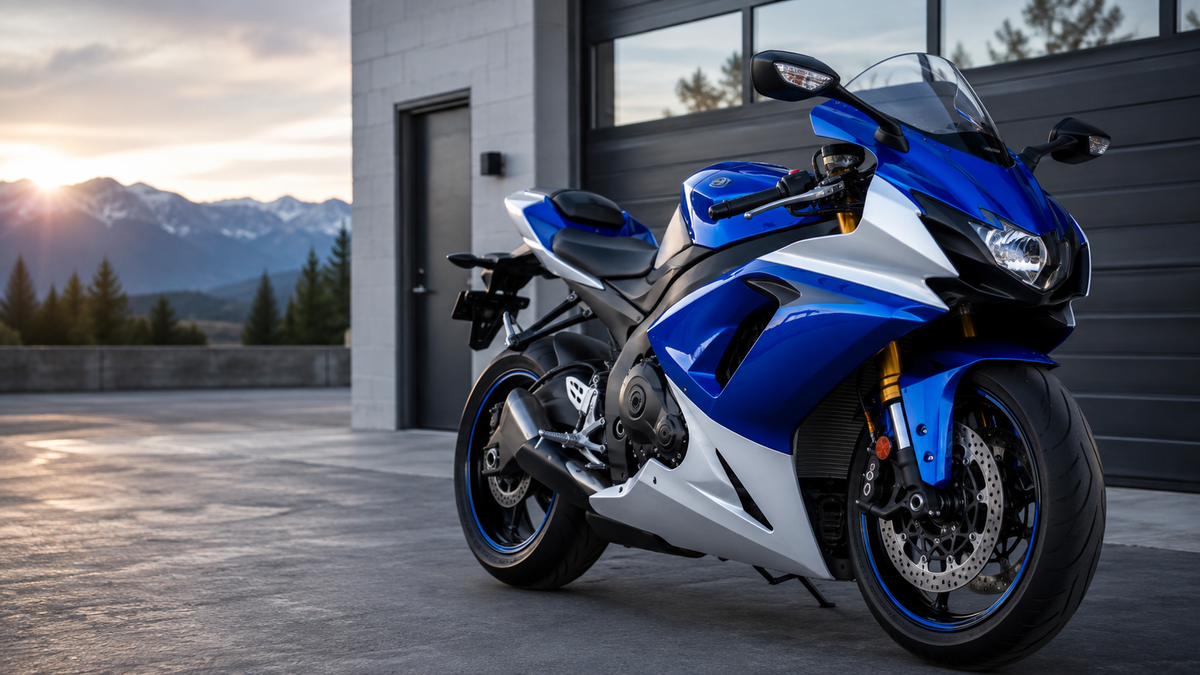
The blue and white mix is Suzuki's most famous style. This design goes back to the early GSX-R models. People around the world still know it right away. New copies get the exact blue Suzuki uses. They pair it with clean white panels and small accent lines. You get that brand-new factory look without paying dealer prices. This design works great on street bikes because it mixes power with style. Blue panels catch sunlight and show off the bike's strong lines. White parts create contrast that highlights the fairing's curves.
Other Factory Colors from 2017 to 2024
Suzuki offered many striking factory colors during these years. The 2024 model brought Glass Matte Mechanical Gray. This classy finish comes with dark red wheels. Together they give the bike a tough street look. Metallic Matte Black No. 2 also came back for 2024. It offers a hidden style that doesn't show dirt easily. Earlier years had Thunder Gray, Pearl Glacier White, and the always-popular Metallic Triton Blue. Each color tells its own story. Gray shows quiet confidence. White looks clean and exact. Black brings pure power. You can pick any of these factory shades for your new kit. They will look totally natural on your bike.
The Growth of Custom and Unique Color Plans
Factory colors look good, but they all look the same. Every GSX-R1000 owner can buy the same blue and white kit. Custom plans let you stand out from everyone else. You can make something that is truly yours. The aftermarket world loves this creativity. It offers endless mixes that show your own taste.
Popular Custom Colors and Two-Tone Combos
Matte black with red accents stays a top pick for street riders. The dark base gives a tough look. Red details on the wheels, windscreen, or lower fairing add a race-style pop. This mix works great on city streets. The bike stands out without yelling for attention. Bright yellow is another popular choice. This color makes people notice you. It keeps you safer in traffic and gives your bike a track-day feel. Two-tone designs are also getting more popular. You might pair a deep metallic blue top fairing with a shiny black belly pan. Or mix pearl white with carbon fiber parts. The trick is picking colors that work together, not fight each other.
How Color Changes the Way People See Your Bike's Size
Color does more than look nice. It changes how people see your bike's size. Light colors like white and silver make the bike look bigger and more noticeable on the road. Dark colors like black and deep gray make it look slimmer and faster. Bright colors pull eyes to certain spots. You can highlight the sharp front or the strong rear. Smart color placement lets you shape how the bike looks. A dark belly pan makes the bike seem lower to the ground. A bright top fairing pulls eyes up toward the windscreen and rider. Knowing these visual tricks helps you design a look that shows off your bike's best parts.
Your pick really comes down to what you like. Look at online photo galleries, go to local bike meetups, and save pictures of bikes that catch your eye. Trusted sellers like NiceFairings offer big color catalogs and custom options. They let you see different designs before you commit. Take your time with this choice. The right color makes every ride better each time you get on the bike.
Decoding Finish Types: Gloss, Matte, and Carbon Fiber

The finish you pick changes everything about your bike. It affects how the bike looks in sunlight. It changes how often you clean it. It even changes how long the paint lasts. Three main finish types dominate the market for the Suzuki GSX-R1000 fairing kit 2017-2024: gloss, matte, and carbon fiber. Your riding style and maintenance habits should guide your choice.
Gloss Finishes: The Classic Shine and Depth
Gloss paint gives you that wet-look shine. Many riders choose gloss because it looks rich and polished. It works with any color, from bright blue to deep black. The deep reflection creates a showroom feel that grabs attention at every stoplight.
Ease of Cleaning and the Visibility of Imperfections
Gloss surfaces clean up fast. Spray on some detailer. Wipe with a microfiber cloth. The smooth surface releases dirt and bugs without effort. But gloss has a downside. Every tiny flaw shows up clearly: dust particles, orange peel texture, uneven clear coat, paint coverage problems, and color inconsistency between panels. Common imperfections need specific attention:
Imperfection |
Cause |
Prevention / Fix |
|---|---|---|
Cracked paint |
Uneven coats, applying on semi-dry coats, inadequate sanding |
Sand with 400-grit wet sandpaper, clean, and recoat properly |
Thick/irregular patches |
Applying new layer before previous one dries |
Sand with 400-grit sandpaper, apply new coat, wait 3-6 hours between coats |
Dull appearance |
Low-quality paint or incorrect spraying technique |
Sand dull spots or use high-quality paint suited for plastic |
You need to watch for these issues when you choose a pre-painted kit. Quality suppliers use a multi-stage paint process to minimize these risks.
Best Practices for Maintaining a Gloss Surface
Keep gloss paint perfect with regular work. Clean your bike often with a motorcycle cleaner or mild detergent and water. Use a soft microfiber cloth or sponge. Never use steel brushes or wool. Those materials scratch the paint instantly. Apply polish or wax to preserve the shine. Products like Novus Plastic Polish work well for sealing the surface. Park in the shade or use a motorcycle cover. Sun exposure causes cracking and fading over time. These steps keep your gloss finish looking like a mirror for years.
Matte Finishes: The Modern, Stealthy Aesthetic
Matte paint gives your bike a flat, non-reflective look. No glare bounces off the panels. This finish screams modern and aggressive. Street riders love matte because it looks tough and purposeful. It hides dust between washes. The finish also gives your bike a custom, factory-race-team vibe that stands out from typical street bikes.
Hiding Fingerprints and Minor Scratches
Matte surfaces forgive a lot. Fingerprints barely show. Light scratches from zippers become almost invisible. The flat finish scatters light, so small imperfections disappear. You can touch the fairing without leaving marks. This makes matte perfect for daily riding. You do not stress about every contact or small scuff.
Specialized Cleaning Products and Techniques for Matte Paint
Do not use regular wax on matte paint. Wax creates shiny spots that ruin the uniform look. You need specialized matte cleaners. Use gentle soap and water for regular washes. Dry with a soft microfiber towel. Do not rub hard. Rubbing can polish the surface and leave shiny patches. Clean off sap and bird droppings right away. A ceramic coating designed for matte surfaces helps protect the color and makes cleaning easier.
Alternative Finishes: Metallic, Pearl, and Carbon Fiber
Beyond gloss and matte, you have other exciting options. These finishes add extra depth or a whole new material to your build.
The Subtle Sparkle of Metallic and Pearl Paints
Metallic paint has tiny metal flakes mixed into the color. The flakes catch light and create a sparkle effect. The bike changes color slightly as you move around it. Pearl paint uses ceramic crystals that create a deep, multi-tonal look. White pearl shines with hints of pink and blue. Black pearl looks almost purple in certain light. These finishes add a premium feel to your bike. The extra depth makes the bodywork look richer and more expensive.
The High-Tech Look and Weight Savings of Carbon Fiber
Carbon fiber goes beyond paint. The material itself creates the finish. You get that woven texture that screams race track. Carbon fiber panels weigh less than plastic ones. You save ounces on your build. The look pairs well with gloss or matte accents. The contrast between woven carbon and solid color creates a stunning street build that turns heads.
Think about your riding habits before you pick a finish. Do you ride daily through city streets? Matte handles daily use well and hides small wear. Do you want the deepest shine? Gloss delivers the most impressive showroom look. Do you want to save weight? Carbon fiber helps. Your choice should match how you ride and how much time you want to spend on cleaning.
Coordinating Colors with Your Street Build's Components

Your fairing kit doesn't stand alone. It sits next to your wheels, frame, tank, and windscreen. Every part adds to the overall look. A smart color plan connects everything. A careless one makes a mess. You want people to see one smooth machine, not a pile of parts that don't match.
Matching Fairings to Your Wheels, Frame, and Tank
Begin with the parts that are hard to swap. Your frame color stays the same unless you tear the bike apart. Your tank usually stays stock because new tanks cost a lot. Your wheels may be stock or aftermarket. These parts form the base of your color story. Your fairing kit must work with them.
Creating a Cohesive Look with Stock or Aftermarket Wheels
Check your wheels first. Stock Suzuki wheels are usually black or dark gray. These neutral tones go with almost any fairing color. You can pick bold blues, strong reds, or stealthy matte blacks without issues. Aftermarket wheels give you more choices. Gold wheels look great with the classic Suzuki blue and white style. Red wheels match well with black or white fairings. If your wheels are colorful, choose a fairing color that has a matching accent. This trick gives a factory-made feel. The eye moves smoothly from the spinning wheel to the still bodywork.
Using Windscreen and Accent Colors to Tie the Design Together
Your windscreen connects the upper fairing and your helmet. A dark smoke or black windscreen fits almost any color plan. It adds a slight aggressive touch without stealing attention. Clear windscreens keep things simple and classic. For a bolder look, pick a tinted windscreen that matches your accent color. A light blue tint on a blue and white bike looks planned. The same idea works for small accents. Brake line bolts, frame sliders, and lever adjusters come in many colors. Use these tiny parts to repeat your fairing's second color. You don't need many. A few well-placed red accents on a matte black build create a strong visual flow.
Prioritizing Visibility and Safety on the Road
Style matters, but staying alive matters more. Street riding puts you near distracted drivers. Your color choice changes how well others see you. This fact should shape your final pick.
Choosing High-Visibility Colors for Urban Environments
Bright colors help you stay safe in city traffic. Yellow, orange, and white stand out against gray roads and dark building shadows. These colors catch side vision better than dark shades. A study of motorcycle crashes shows that visibility helps prevent collisions. You don't need a full neon bike. A bright upper fairing or a white tail section boosts your presence a lot. If you love black, add bright accents. A black bike with a fluorescent yellow windscreen and matching wheel stripes stays visible without losing your style.
The Role of Reflective Graphics in a Custom Paint Job
Reflective materials add another layer of safety. These graphics bounce light back toward its source. When a car's headlights hit your bike at night, reflective panels shine brightly. You become visible from hundreds of feet away. Many custom paint shops offer reflective decals that match your color plan. You can add reflective strips to the sides of your fairings or the rear tail section. These don't look odd during the day. They just look like part of the design. At night, they turn into a safety signal. This upgrade costs little compared to the safety it gives.
Your Suzuki GSX-R1000 fairing kit 2017-2024 should look great parked and moving. The best designs mix personal style with practical safety. Choose colors that work with your current parts. Add visibility features that protect you in traffic. This method gives you a bike you enjoy riding and one that keeps you safer on every trip.
Painted vs. Unpainted Fairing Kits: Weighing the Options
You face one more big decision before you order. Do you buy a pre-painted Suzuki GSX-R1000 fairing kit 2017-2024, or do you start with raw plastic and handle the paint yourself? Each path has clear benefits and real drawbacks. Your budget, your patience, and your eye for detail will point you toward the right choice.
The Convenience of Pre-Painted Kits
Pre-painted kits arrive ready to bolt on. You open the box, mount the panels, and ride. No paint booth, no waiting weeks for a shop, no risk of ruining expensive plastic with a bad spray job. This option suits riders who want results fast and want them done right the first time.
Ensuring a Professional Finish with a Multi-Stage Paint Process
Quality pre-painted kits go through a professional multi-stage paint application. This process starts with surface preparation. The plastic gets cleaned, sanded, and primed. Then the color coats go on in thin, even layers. A clear coat seals everything and adds depth. This method produces a deep, even color that resists chipping and fading. You get a factory-quality finish without factory dealership prices. Price depends on the included panels, paint complexity, finish and shipping destination. Compare the complete delivered cost with local paintwork before deciding.
The Risk of Shipping Damage and the Need for Touch-Ups
No option comes without risk. Pre-painted panels can suffer damage during shipping. A careless courier can crack a corner or scratch a surface. Reputable sellers pack carefully with foam and sturdy boxes. Still, accidents happen. You might need to do small touch-ups when your kit arrives. Most suppliers include touch-up paint or offer replacement panels at a discount. Check the seller's return policy before you order. A good warranty protects your investment and gives you peace of mind.
The Flexibility of Unpainted (Primer or Raw) Kits
Unpainted kits give you total control. You start with panels in primer or raw ABS plastic. No color decisions are locked in. You can change your mind a dozen times before you commit. This route appeals to riders with a specific vision or those who want a truly one-off look.
The Process of Commissioning a Custom Paint Job
When you buy unpainted, you take on the paint project yourself. You can commission a local auto body shop or a custom motorcycle painter. You bring them your panels and your design ideas. They handle the prep, color matching, and clear coat. This process takes time. A good painter might need two to four weeks to complete your job. You also need to communicate clearly. Bring reference photos and color samples. Ask to see progress photos. A professional painter delivers stunning results, but you must manage the relationship carefully.
Total Cost and Time Investment for a DIY Finish
The DIY route demands more than money. You need space, equipment, and skill. A basic spray setup costs several hundred dollars. You need a compressor, spray gun, respirator, and paint supplies. You also need a clean, dust-free area to work. Painting plastic requires patience. You must sand between coats, clean thoroughly, and apply even layers. Mistakes mean sanding back and starting over. The learning curve is steep. Your first attempt might look decent from ten feet away. Up close, you will see runs, orange peel, and uneven coverage. If you enjoy hands-on projects and have the time, DIY painting can save money. If you want a flawless finish without the hassle, pre-painted wins every time.
The smart move: Add up your real costs. Include your time, materials, and the risk of redoing work. Most street riders find that a quality pre-painted kit delivers the best balance of price, speed, and professional results.
From Design Approval to Final Installation

You have picked your colors and finish. Now the real work starts. The path from a digital idea to a mounted fairing kit needs careful steps. Each step protects your money and makes sure the final look matches your plan. Follow this guide, and you will avoid costly errors.
Visualizing Your Build with Digital Mockups
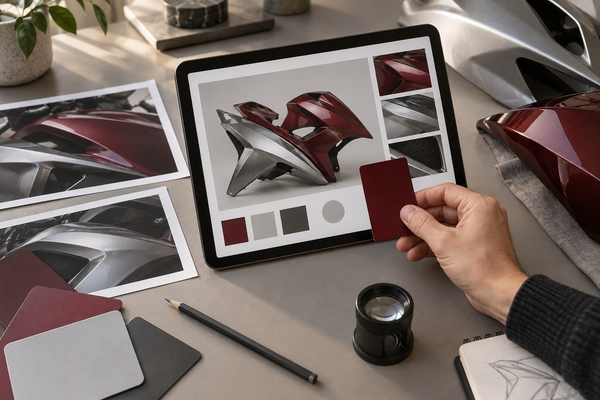
Before any paint goes on plastic, you need to see your design clearly. A picture in your head rarely matches the real thing. Digital mockups fix that. They show you exactly how your chosen colors and graphics will look together. This step saves you from expensive surprises.
Using Reference Images to Preview Colors and Graphics
Collect left, right, front and tail references before production. Ask for a design confirmation that shows how colors and graphics cross seams and vents. Keep the approved reference so you can compare the finished panels before shipping. See the NiceFairings custom fairings process for what to prepare.
Seeking Feedback from Online Forums and Communities
Your own eyes can miss problems. Other riders give useful advice. Join GSX-R1000 forums and social media groups. Post your digital mockup and ask for honest opinions. Experienced owners will point out color clashes you missed. They will suggest accent colors that tie your design together. They might even warn you about finishes that show dirt quickly. This feedback costs nothing. It often saves you from a design that looks great on screen but fails in person. Listen to the community. They share your passion and want your build to succeed.
The Critical Step of a Dry-Fit Before Painting
You have your painted kit in hand. The panels look amazing. Do not bolt them on yet. Do a dry-fit first. This step means mounting every panel without final tightening. It shows fitment issues before they become permanent problems.
Checking Panel Gaps and Alignment on the Bike
Mount each panel using the stock hardware. Do not force anything. Check the gaps between the upper fairing and the side panels. Look at the alignment where the belly pan meets the lower fairing. Examine the tail section's fit against the subframe. A quality Suzuki GSX-R1000 fairing kit 2017-2024 should line up with little effort. Small gaps should be even on both sides. Panel edges should sit flush with each other. Walk around the bike and check every joint from different angles. This inspection takes thirty minutes. It stops you from finding misalignment after the paint cures and the warranty ends.
Making Necessary Adjustments for a Perfect Fit
Sometimes a panel sits slightly off. You might need to loosen nearby bolts and shift the panel a few millimeters. You might need to trim a small amount of plastic where two panels meet. Use a fine file or sandpaper for these adjustments. Work slowly and check the fit often. Remove only small amounts at a time. Once the panels line up perfectly, tighten all fasteners to the manufacturer's specs. Mark each fastener location with a small dot of paint. This trick helps you put everything back correctly after you remove the panels for the last time.
Protecting Your Investment for the Long Haul
Your new fairing kit looks perfect. You want it to stay that way. Street riding exposes your bike to constant threats. Rocks, bugs, and UV rays all attack your paint. Smart protection keeps your finish looking new for years.
Applying Paint Protection Film (PPF) to High-Impact Areas
PPF acts as a shield, taking damage before it reaches the paint. The film gives impact resistance, stain protection, and UV defense. It is most often used on high-risk areas like front fairings. Think about these benefits:
Shields gas tank, fairings, and fenders from rock chips and road rash
Provides defense against road debris and bug splatter
Offers protection against UV damage
Apply PPF to the leading edges of your fairings. Cover the front of the upper fairing, the nose of the belly pan, and the area around the headlight. These zones take the most hits. Professional installation gives the best results. The film disappears once applied correctly. You keep your bike's looks while adding a tough layer of armor.
Proper Washing and Detailing Routines for Your Chosen Finish
Your washing routine must match your finish type. Gloss paint responds well to gentle soap and water. Use a microfiber mitt and dry with a soft chamois. Apply a good wax every few months to keep the shine. Matte paint needs special care. Use cleaners made for matte surfaces. Avoid waxes and polishes. They create shiny spots that ruin the even look. For both finishes, rinse your bike before washing. This removes loose dirt that can scratch the paint. Wash in the shade to prevent soap from drying too fast. Dry right after washing to stop water spots. These simple habits keep your fairing kit looking new for thousands of miles.
Approval Checklist Before You Order:
Confirm your exact model year (2017-2019 or 2020-2024)
Review the digital mockup from every angle
Verify all included components match your needs
Check the seller's warranty and return policy
Inspect the kit thoroughly upon delivery
Your journey from design to installation ends with a stunning street machine. Each careful step protects your money. The digital mockup makes sure you love the design. The dry-fit ensures perfect alignment. The PPF and proper washing keep your finish perfect. Take your time with each stage. The reward is a Suzuki GSX-R1000 that turns heads and makes you proud on every ride.
Your Suzuki GSX-R1000 fairing kit 2017-2024 transforms your bike from stock to standout. Year-specific fitment protects your investment. Color choices express your personality. Finish types determine daily maintenance. Coordinating with wheels and tank creates visual harmony. Visibility features keep you safe in traffic.
The best kit balances what you love with how you ride. Matte hides wear but needs special care. Gloss shines brilliantly but shows flaws. Bright colors increase safety. Dark tones look aggressive.
Use online configurators to preview designs before ordering. Trust reputable suppliers like NiceFairings for quality results. Take your time with each decision.
Your perfect fairing kit exists. With careful consideration, you will build a stunning, durable street machine that turns heads for years.
FAQ
What year GSX-R1000 fairing kit fits my bike?
You need a kit made for your exact model. 2017-2019 bikes use different fairings than 2020-2024 models. Check the fitment guide on NiceFairings before ordering. A wrong year means misaligned panels and extra work.
Can I choose custom colors not shown on the website?
Yes, you can. NiceFairings offers custom color matching. Send them your color reference or design idea. They create a digital mockup for approval before painting. You get exactly what you want.
What finish lasts longer on a daily street bike?
Gloss finishes resist fading better with proper care. Matte finishes hide scratches and fingerprints well. Both last years with the right maintenance. Your choice should match your riding habits and cleaning routine.
How long does a pre-painted kit take?
Custom-painted bodywork is made to order. Allow approximately 15-25 business days for production and another 10-20 business days for shipping after dispatch; these are estimates, not guaranteed delivery dates. Check Production & Shipping for current details.
Will the fairing kit include all mounting hardware?
Most kits use your stock Suzuki mounting hardware. The panels come with pre-drilled holes aligned to factory specs. You reuse your original bolts, brackets, and fasteners for a seamless fit.
What if my fairing kit arrives with damage?
Photograph the outer packaging and affected panels as soon as the parcel arrives, keep all packing materials, and contact NiceFairings promptly. Follow the current refund and return policy rather than assuming every type of damage has identical coverage.
Can I match my fairing kit to my stock tank and wheels?
Yes, you can. Choose a color that complements your existing parts. The classic Suzuki blue coordinates well with black wheels. Use the online configurator to preview how your chosen color works with your bike.