
A scraped side fairing is easy to see. What matters before ordering replacement bodywork is harder to photograph: whether the panel's support points, front-cowl stay, mirror mounting area, headlight support and nearby controls are still where they belong. On a 2019–2024 Yamaha YZF-R3, the sensible first step is not automatically buying a “complete kit.” It is establishing what the fall changed. If the motorcycle's steering, brake, fork, wheel, controls, lights or frame may have been affected, stop riding and arrange a qualified inspection. New paint cannot make a damaged motorcycle safe.
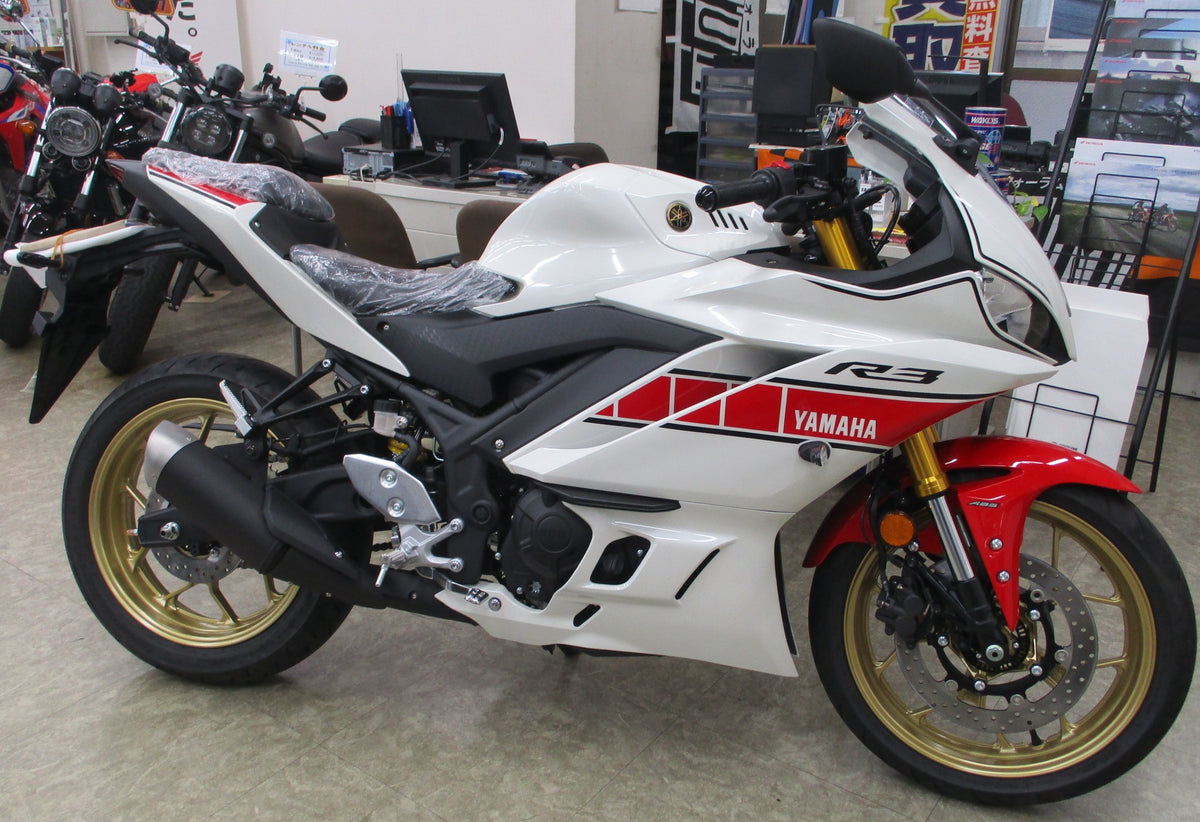
The cover shows an intact reference R3, not a crashed motorcycle, a NiceFairings product or evidence of a specific repair. Use your own pre-repair photographs for the checks below.
This guide is a post-drop evidence and buying decision, not a removal tutorial or a color-match comparison. For a general photo-and-fastener map, use our R3 replacement record. For the separate question of how a new blue panel will look beside older paint, see the R3 color-matching guide. Here the job is to establish which components actually need attention and give a supplier or repair shop evidence they can act on.
The 2019 model brought revised exterior styling and inverted front suspension, according to Yamaha's model announcement. Yamaha announced another body-design change for the 2025 Japanese-market R3. Those releases are context for identifying the motorcycle, not an interchangeability table. Confirm your exact year and market with the VIN, registration and appropriate Yamaha parts information; do not infer that every panel across 2019–2024 or every aftermarket listing shares the same mounts.
First separate “can it move?” from “does it look good?”
If the motorcycle fell while stopped or at walking pace, you may be tempted to pick it up, brush off grit and ride. A low-speed event does not by itself establish that the damage is only cosmetic. Before you decide on plastics, look for leaking fluid, a dragging brake, a bent lever or bar, a mirror that no longer holds position, a steering stop that looks disturbed, a tire that rubs, a front wheel or fork that appears misaligned, and lights or turn signals that no longer work. These are reasons to stop and have the motorcycle assessed. Do not use a fairing gap as a substitute for a steering or chassis diagnosis: a shifted support and a twisted outer shell can produce similar-looking gaps.
If you are in traffic, move yourself out of danger first and seek assistance as needed. If you are documenting an insurance claim, take scene and condition photos before altering damaged parts, subject to safety and local claim requirements. Note whether the bike struck a curb, wall, another vehicle or a fixed object; that matters more to a mechanic than the eventual paint color. A fall onto flat ground with a scratched panel is a different inspection problem from an impact that loaded the front wheel or mirror.
Read the pattern of contact, not just the largest scratch
Walk around the R3 in neutral light. Start with wide front, left, right and rear views, then make close views with enough surrounding motorcycle to locate each mark. Record the contact points in the approximate order they could have met the ground: bar end or lever, mirror, turn signal, side fairing, lower cover, footpeg and exhaust. This is a documentation method, not a claim that every R3 lands in that order. A mark on the mirror combined with a new front-cowl gap deserves closer attention at the mirror support and the cowl's surrounding attachments. Abrasion at the lower edge deserves an inside-face and clearance check after the panel can be safely accessed. A torn graphic by itself says little about the bracket behind it.
Compare both sides rather than treating the undamaged side as a perfect factory datum. A previous owner may already have changed a panel, mirror or bracket. Photograph the existing left/right gaps at the headlight, windscreen, upper side-panel joint, tank-side interface and lower seam. Put a straightedge or a card in the frame only to show scale, without forcing it against painted parts. If a fastener head sits proud, record the nearby washer, collar and rubber part; do not tighten it to “pull the fairing back into shape.” A screw can conceal a displaced stay until the tab cracks.
On a motorcycle with uncertain history, distinguish new damage you witnessed, damage you cannot date, and a suspected underlying problem. This keeps the supplier inquiry honest and avoids blaming a new panel for a pre-existing gap.
Where a cosmetic repair can turn into a support repair
The outer fairing is a cover, not a structural alignment tool. Look inside the scraped side if access is safe and the correct service information is available. A clean surface scratch with intact mounting ears is different from a crack radiating from a fastener hole, a missing locating tab, a deformed metal stay or a fastener pushed into a rubber mount at an angle. If the part cannot be supported without forcing it, stop the test. Do not drill a new hole or heat-bend a panel to compensate for a stay whose position has not been verified.
The front deserves its own pass. Compare the headlight opening and nose gap from straight ahead. Check whether the windscreen edge, mirror area and signal on the affected side still sit consistently. A mirror may take the impact while the painted nose appears nearly untouched. That does not prove the cowl support is bent, but it gives the installer a specific interface to inspect. A headlight that no longer points normally or is loose needs attention to its mounting and electrical function, not a new painted shell alone. Avoid a generic instruction to pull the nose straight forward or remove wiring in a fixed sequence; use the service procedure for the particular bike.
At the lower fairing, look for road debris inside, broken fastener heads, witness marks around the exhaust and any shield or pad that was displaced. If a panel shifted toward hot or moving parts, do not ride until clearance is assessed. Record the actual motorcycle; do not apply a universal clearance number.
| What you find | What it suggests | Next useful evidence or action |
|---|---|---|
| Surface rash; tabs, stays and nearby equipment appear undisturbed | Exterior repair may be enough, subject to a closer check | Photograph outside and inside; compare the damaged panel's exact part/application and refinishing options. |
| Crack at a mounting ear or fastener hole | The attachment may not carry normal loads reliably | Photograph the back of the part with the fastener removed per service guidance; ask about a correct replacement and hardware. |
| Mirror moved or front-cowl/headlight gap changed | A support or adjacent assembly may need inspection | Record front and side views; have the stay, mirror interface, light and steering checked before ordering paint. |
| Lower panel shifted, shield missing or hot-part contact visible | Cosmetic replacement alone is not the decision | Stop riding; document the inner surface and obtain mechanical/clearance assessment. |
| Several panels cracked or old paint already differs | A coordinated set may simplify the visual project after damage is resolved | Request an itemized kit quote, exact fitment and retained-part list; compare it with individual OEM and local repair quotes. |
The table is triage, not a mechanical inspection. If support integrity is uncertain, have a shop inspect it before buying panels.
Build an evidence packet a seller can answer
The strongest inquiry is short enough to read but specific enough to answer. Start with model, year, market and the VIN-derived identification you have; share the full VIN only through a channel you trust, not in a public post. Note any prior repairs, non-stock mirrors, signals, windscreen or bodywork. Add six to ten well-lit photos: both sides, straight front, one wide shot of the damaged side, the scratched panel close-up, its inner face if removed, the suspect mount or bracket, and any hardware or heat shield that changed position. Include a photo of the undamaged corresponding side only as a visual comparator, not proof of interchangeability.
Then write one sentence of decision intent: “The left side panel is abraded, the mirror moved, and the nose gap is different; I need to know whether to repair one shell, replace the affected assembly or pause for a stay inspection.” That is much more answerable than “How much for a full 2019–2024 R3 kit?” It allows a supplier to say what they can confirm from photos and what must be measured or inspected by a mechanic. Do not ask a product seller to certify a motorcycle safe after an impact.
If you have a Yamaha catalog callout or an existing part number, include a screenshot with the model-year/market context. A diagram callout is not itself the orderable number. Our R3 parts-diagram guide shows how to carry that context into a parts inquiry. Tell the seller exactly which factory pieces you expect to reuse: inner trim, brackets, collars, rubber grommets, fasteners, shielding and lights. Do not assume a painted fairing kit includes them.
Decide among repair, one panel and a coordinated set
An intact shell with light abrasion may be a refinishing candidate. Have a qualified painter assess gouge depth, substrate condition, previous repair and whether the finish can be blended acceptably. A single replacement panel is sensible if the rest of the motorcycle is sound and you can identify the exact part and finish. It may still look different beside aged surrounding paint; that is a visual question, not an automatic reason to replace everything. A coordinated kit becomes relevant when multiple panels are damaged or the owner deliberately wants a new scheme. It increases the number of pieces to verify and the time spent transferring serviceable original hardware. None of these choices is intrinsically cheapest: compare current itemized parts, paint and labor quotes.
There is a fourth option that should not be hidden in a shopping guide: do not order fairings yet. If the front stay is suspect, a fork or handlebar moved, the radiator or engine area leaked, or the lower panel will not hold safe clearance, solve that problem first. The price of a bodywork kit does not include a diagnosis of these parts unless a written shop quote says so.
NiceFairings' Yamaha R3 collection currently includes sets labeled for 2019–2024, such as this listed bodywork set. That label is a starting point, not proof of fit for your exact bike or a promise that individual damaged panels are sold separately. You can also browse the wider Yamaha fairings collection, but a brand page is even less specific. Send the evidence packet through NiceFairings contact and ask for written confirmation of current availability, exact model application and itemized contents. If you want a coordinated design rather than an exact factory-style repair, the custom fairings page explains the design inquiry; a sketch or photo reference still does not establish mechanical fit.
Questions to settle before any payment
Ask what model-year/market combination the proposed item is documented for and whether the supplier needs additional photographs. Request the actual panel list rather than a claimed “20+ piece” number. Ask what is not included, particularly the front support, inner trims, fasteners, grommets, lights and heat protection. Ask whether the supplier can supply one affected outer panel or only a set; what finish and graphics options exist; and which surfaces of the motorcycle will remain original. Request the present production and shipping terms from the production and shipping page or a written quote; do not use a historic lead time as a promise. Read the FAQ and applicable policy before modifying a delivered part.
When the parts arrive, compare the invoice and photos to the physical pieces before installation. Record transit damage, missing pieces and finish issues immediately. A dry fit should establish that the surrounding hardware is sound and the panels meet without bolt tension concealing an offset. The installer should follow the applicable Yamaha instructions for access, fasteners and electrical connections; this article supplies no universal torque or disassembly sequence. If the kit seems wrong, preserve the evidence and ask before drilling, trimming or painting over the issue.
Frequently asked questions
Is a scraped fairing after a standstill drop only cosmetic?
Not necessarily. It may be, but a moved mirror, damaged mount, changed headlight aim, bent control or lower-panel contact can accompany a scrape. Check the motorcycle, not just the visible paint. Seek mechanical inspection whenever steering, brakes, lights, leaks or mounting integrity is uncertain.
Does a 2019–2024 R3 listing prove the same shell fits every year?
No. Yamaha's public model announcements explain styling generations, not every panel's interchangeability. Match the specific listing and, where relevant, OEM part information to your exact motorcycle, market and modifications.
Should I replace both sides to hide one scratch?
Only if the wider project is justified. A single panel, local refinishing or accepting a minor cosmetic mark may be more appropriate. If color consistency is critical, compare actual finish references and quote the retained tank and panels; a color name cannot guarantee a match.
Can NiceFairings confirm a bent stay from photos?
Photos can help clarify the product you are asking about, but they cannot replace an in-person chassis, steering or support inspection. Ask a qualified shop to assess a suspected stay; then provide the confirmed finding to the bodywork supplier.
What is the smallest useful message to send?
“My [year and market] R3 fell on [side]. Here are front/side photos, close-ups of the outer and inner panel, and a note on the mirror/headlight gap. A shop has [confirmed/not yet assessed] the support. Can you identify the exact compatible panel or set, what it includes, current availability and the terms before modification?” The bracketed facts must be filled in honestly.
The point of the evidence packet
After a drop, the question is not how quickly you can make the motorcycle blue, white or black again. It is which layers of the problem are cosmetic, which are mounting or mechanical, and what you can prove about each. Once the motorcycle has been assessed, an itemized, model-specific bodywork inquiry is straightforward. That sequence gives you a better chance of buying the right panel—and of not using a shiny panel to hide an unresolved problem.
Cover photo: Kuro202 / Wikimedia Commons, CC BY-SA 4.0. Unmodified photograph of an intact R3 taken in 2022; it does not document a drop, fitment test or NiceFairings product.




