A smoked screen can finish a fairing design beautifully. It can also make a view through the screen much darker than a buyer expected. Before choosing a color, sit on your own motorcycle and establish whether you ever look through the windscreen when you ride. Then compare the screen maker's optical information, your lighting conditions, the exact screen fitment and the hardware that will hold it. A photo of a parked bike cannot answer those questions for you.
This is a buying decision, not a claim that one tint is universally safer or faster. The rider who stays upright behind a low screen may barely look through it. Another rider may tuck behind it at speed, in rain, on a track or on a long ride. The correct choice depends on that real sight line. If a dark or opaque screen would occupy your view, choose a screen that lets you see adequately through it, or change the riding setup. Do not test poor visibility in traffic.
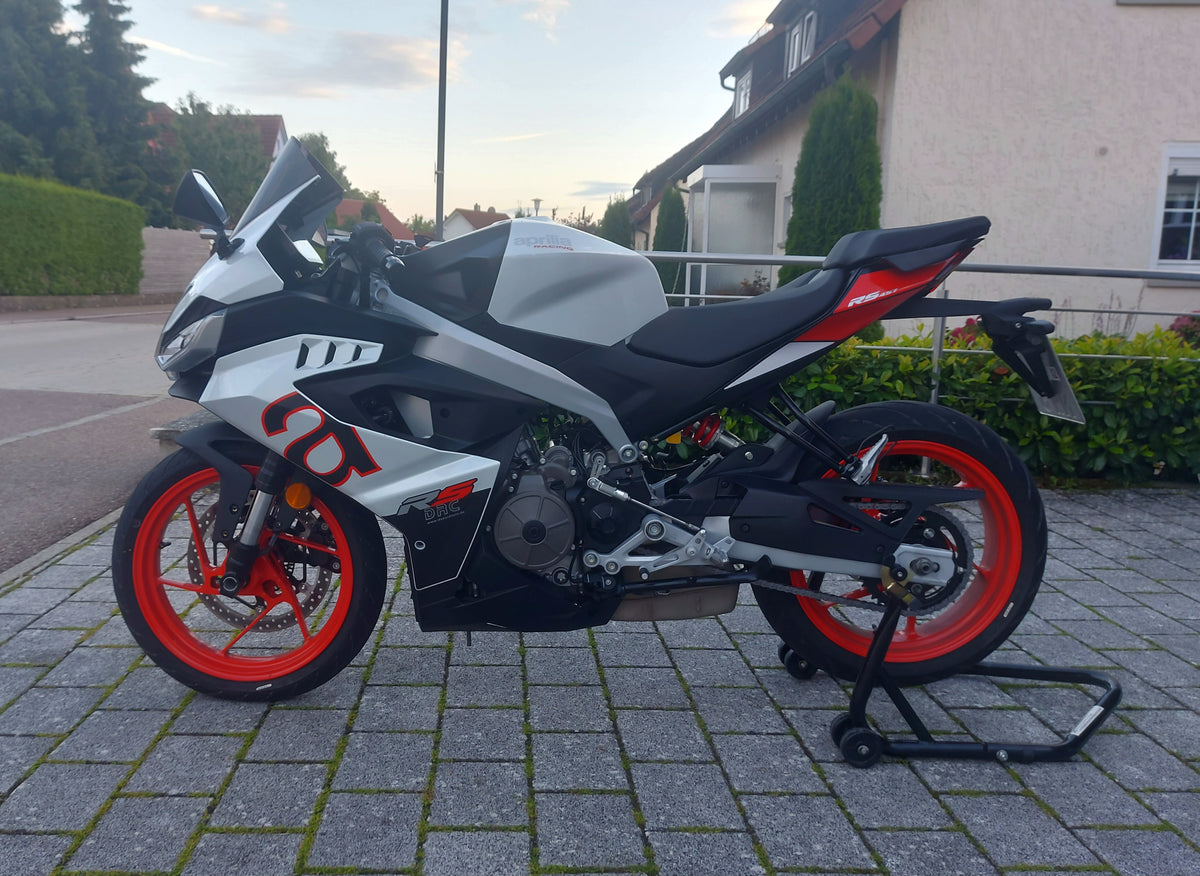
Cover: a real Aprilia RS 457 with a smoked Puig screen, photographed by NicoWmann / Wikimedia Commons, CC BY 4.0. It illustrates a screen color on a complete sportbike. It is not a NiceFairings product, an optical test or a fitment recommendation for another motorcycle.
Start with the seated sight line
Park the motorcycle securely in a well-lit place. Wear your usual helmet and sit where you normally ride. Look toward the horizon and then adopt your typical tucked position. Note whether your view crosses the screen, its upper edge or clear air above it. Repeat with the luggage or posture you actually use. A rider's height, seat position, screen profile and clip-on position can change the result.
This simple exercise separates two questions that product photographs blur together. Appearance: how does the screen look against the upper fairing? Vision: what will your eyes see through it? A dark screen can look almost black from outside yet behave differently when viewed from behind in bright daylight. Conversely, a screen that appears mildly tinted on a white studio background can be harder to use against a dark road scene. Photos alone cannot establish optical clarity, light transmission or distortion.
If you ride after sunset, in tunnels, through shade or in heavy rain, include those conditions in the decision. An unlit showroom or edited product photo is not a substitute for inspecting the actual screen from the rider's position. The manufacturer's care and use guidance should take precedence over a color nickname.
Clear, smoke and opaque are not universal specifications
“Light smoke” and “dark smoke” are marketing descriptions, not an industry-wide light-transmission scale. One screen maker, Zero Gravity, publishes different light-transparency values for its own clear, light-smoke and dark-smoke options. Those figures describe its products; they cannot be applied to another brand's identically named tint. Its color-options page is a useful example of why asking for actual product data is better than judging a listing by a label.
| Choice | What it can do visually | What you still need to establish |
|---|---|---|
| Clear | Keeps the cockpit light and preserves the least tinted view of these options | Optical quality, scratches, glare and actual shape on your bike |
| Light smoke | Softens the transition into a dark or two-tone fairing | Manufacturer-specific transmission and your view in poor light |
| Dark smoke | Makes a strong black-cowl design look cohesive | Whether you will ever need to see through it, day or night |
| Opaque or painted | Creates a solid graphic surface | That it does not replace a sight line you depend on |
Zero Gravity's care and use guide explicitly tells buyers who depend on looking through a screen to test optical clarity and light transmission before installation; it also states that an opaque screen cannot be seen through. That is sound decision logic even when you are shopping another brand. It does not turn Zero Gravity's numbers into a NiceFairings specification.
Treat the screen and upper cowl as one order interface
Tint is only one variable. The screen must match the nose-fairing shape, hole pattern and intended hardware for the exact motorcycle and bodywork configuration. A 2008–2016 R6 listing, for example, should not be treated as proof of 2017-and-later R6 screen interchange. Our R6 generation guide explains that the front cowl and screen form part of the generation boundary.
If you are ordering painted panels, start with the specific fairing listing, not a generic screen photo. That R6 product page describes a typical kit that may include a windscreen while warning that exact pieces vary. Ask which screen, tint and hardware are supplied for the selected option and your exact year. If you already own an aftermarket screen, send its brand, part number and photographs of its base and mounting holes. A seller's confirmation of a fairing generation is not a guarantee that an unrelated third-party screen will fit it.
Our fairing-and-windscreen order checklist covers the upper-cowl mounting interface in detail. Use it when the nose fairing, screen or both are being replaced. Inspect the front stay and original well nuts or grommets after a drop: a bent support or missing rubber component can make the new screen appear “too small” or “wrong” even when its part number is correct.

A real R6 with an MRA windscreen, photographed by Wursta / Wikimedia Commons, public domain. This separate motorcycle illustrates how screen height and rider position interact; it is not a side-by-side tint test or a NiceFairings installation.
A daylight appearance decision is different from a low-light visibility decision
Imagine two owners choosing the same dark screen. One uses the bike on short daytime rides and keeps their eyes above the screen. The other rides home after work in autumn, sometimes in rain, and tucks low behind the cowl on faster roads. The visual choice is identical; the visibility requirement is not. The second rider should be especially cautious about a tint that cuts the view they use.
Do not rely on “I can still see it in the garage.” Test the actual screen in controlled, stationary conditions before fitting it and follow the screen maker's instructions. Look through the area you would use from a seated position, toward objects at different distances, under different ordinary lighting. Watch for haze, waviness, discoloration and scratches as well as darkness. If the screen distorts or blocks the view you need, do not make the first road ride your experiment. Consult the screen maker and choose a suitable alternative.
The same discipline applies to a clear screen. Clear plastic with scratches or glare can be a visibility problem too. Our windscreen glare and condition guide deals with cleaning, damage and the seated view. A darker tint is not a repair for a scratched clear screen; it is a different optical and styling choice.
Make the color work with the fairings without hiding the decision
On a bright white-and-red motorcycle, a deep-black screen can create a deliberate dark anchor at the nose. On a mostly black build, it can make the front look quieter and more unified. A light-smoke screen may preserve some of that transition without appearing as visually heavy. None of these aesthetic outcomes determines what the rider can see through the actual product.
Before approving a custom paint design, ask for a front-three-quarter mockup with your chosen screen color and the correct fairing outline. Show the screen, mirrors, headlight openings and any dark painted area around the nose. A design can look balanced from the side but become an unbroken black mass from the front. If you want a black upper cowl and a transparent screen, say so explicitly; “black front” leaves too much to interpretation. The NiceFairings custom-design request is a place to supply that visual brief, while the exact listing and written confirmation should define what is delivered.
Keep the original screen if it is serviceable. It gives you a reversible option if a new tint proves less useful in your normal riding conditions. Do not describe a third-party screen shown in an inspiration photo as a supplied part of a NiceFairings kit unless your order has confirmed it.
Confirm the installation before riding
Set the screen in place without using bolts to drag the holes into alignment. Verify the specified rubber mounts, collars and fasteners, then tighten by the procedure for the screen and motorcycle. Forcing a stressed screen or overtightening a well nut can crack the plastic around a hole. After assembly, turn the bars from lock to lock and check levers, reservoirs, mirrors, cables and the screen edge. Our R6 front-cowl alignment guide illustrates why the nose and screen should be checked as an assembly, not as isolated pieces.
Then sit on the bike again with your helmet. Confirm the view and inspect the surface from both sides. If the screen vibrates, touches the cowl, blocks a control or distorts the sight line you depend on, stop and resolve that issue before a normal ride. A screen that looks perfect in a catalog but fails this check is the wrong screen for your use.
The most useful purchase message is short: “Here is my exact model and year, my current upper-cowl and screen photos, my usual daytime and night riding, and whether I look through the screen when tucked. Which screen and mounting pieces are included with this selected fairing option?” That question turns a styling preference into an order that can actually be checked.
Sources: Zero Gravity color options and care/use guidance; the linked NiceFairings pages describe current listings and related buyer checks. No third-party screen specification is attributed to NiceFairings.