
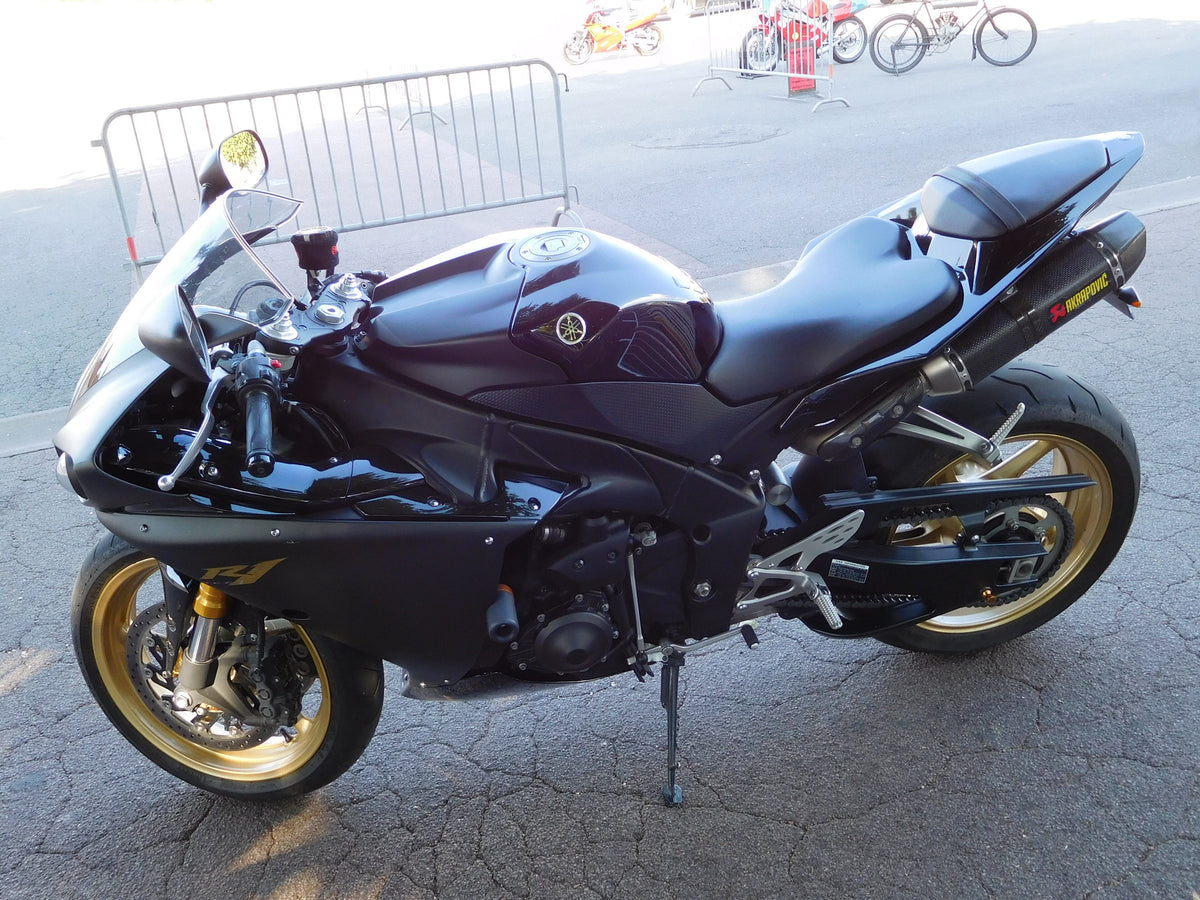
Pre-season test motorcycles often appear before the final sponsor package and race livery. Dark bodywork, development graphics and restrained identification give them a prototype mood that riders frequently call “winter test,” “stealth” or “test mule.” Those labels are useful inspiration, but they are not paint specifications.
“Make it matte black” leaves too many decisions unresolved. Matte, satin, eggshell and low-gloss black can look dramatically different. A raw black panel is not the same as a painted satin panel. Black film, black paint and black PPF have different edges and care requirements. Even two panels with the same color can look mismatched when their sheen differs.
The buyer question is therefore simple: how do you translate the winter-test mood into a complete, reviewable fairing brief that controls sheen, graphics, retained parts and cleaning?
Quick answer
- Specify color and sheen separately; “black” is not enough.
- Do not treat raw molded plastic as equivalent to a finished matte or satin paint system.
- Create a panel-by-panel sheen map before approving graphics.
- Use small accent areas to reveal body shape instead of making every surface equally dark.
- Review physical or controlled-light samples where available; screens cannot prove finish.
- Keep high-contact and service areas in mind when placing low-sheen coatings.
- Obtain care instructions for the actual paint, wrap or film system.
- Never polish an unknown matte or satin finish to remove a mark.
Why winter-test style feels different
A production color scheme often uses several saturated colors, polished graphics and brand identifiers. A stealth scheme removes much of that visual noise. The viewer notices silhouette, vents, panel breaks and mechanical contrast instead.
That restraint creates a harder design problem. On an all-black motorcycle, small errors become obvious:
- one panel reflects more strongly than its neighbor;
- a retained gloss-black tank looks blue beside warm charcoal fairings;
- a decal edge catches light on an otherwise quiet surface;
- a rubbed knee area becomes shiny;
- gray inner pieces look unfinished rather than intentional;
- a dark windscreen erases the separation between nose and cockpit.
The solution is not simply “more black.” It is controlled contrast.
Raw black plastic versus a specified finish

Unpainted molded plastic may be black, but its color, surface texture and UV behavior depend on the actual material and manufacturing process. It can show molding flow, trimming, handling marks or inconsistent sheen. A painted low-gloss system is designed to create a visual surface, but its performance still depends on the documented coating and care.
Do not claim that raw plastic always chalks or that painted satin always resists scratches. Ask what the ordered panel receives:
- substrate preparation;
- primer or sealer where applicable;
- black color coat or pigmented finish;
- clear layer and target sheen, if used;
- graphic position;
- cure and handling guidance;
- approved cleaning products.
Photos can show visible appearance, not hidden layer count or chemical composition. The fairing color-comparison guide explains how lighting and reference selection change a buyer’s judgment.
Build a sheen vocabulary
Gloss levels are sometimes measured, but buyers rarely receive a complete measurement package for a custom kit. Use plain visual references plus any supplier-provided specification.
Gloss black produces sharp reflections and strong highlights. It can be useful for a windscreen surround or small graphic block, but a large gloss area changes the stealth mood.
Satin black produces softer reflections that still describe curvature. It is often easier to photograph than a very flat matte because panel shape remains visible.
Matte black suppresses more reflection, but cleaning variation and contact marks may be more apparent on some systems.
Charcoal is a color shift, not merely lower gloss. It can separate the fairing from black frame, tires and seat while retaining a dark overall identity.
Avoid approving by name alone. One supplier’s satin may resemble another’s matte. Ask for a sample, representative product photograph in controlled light or a written reference to the finish being supplied.
Create a panel-by-panel sheen map
Print or mark front, left, right and rear views. Assign every visible part to a finish zone.
Zone A: primary satin bodywork
Use this for the nose, main side panels and tail if the goal is one continuous prototype form. Satin reflections reveal the fairing architecture without becoming mirror-like.
Zone B: low-gloss structural areas
Lower panels, inner trims and duct surrounds can be darker or flatter. This visually grounds the bike and makes the main body volume easier to read.
Zone C: controlled gloss accents
A narrow nose insert, number-field edge or tail detail can use gloss black to create a light-catching boundary. Keep it small. If every seam is gloss, the design becomes a patchwork.
Zone D: silver-gray identification
Muted silver, warm gray or cool gray graphics can suggest development markings without copying a factory test livery. Specify whether they are painted, printed beneath clear or surface-applied.
Our mixing matte and gloss guide covers the panel-transition questions in more detail. For a single dark-gray base, the battleship-gray design brief helps define undertone and contrast.
Comparison: four ways to get a dark motorcycle
| Approach | Visual control | Main uncertainty | Best planning step |
|---|---|---|---|
| Raw black replacement panel | Limited; texture follows molding | Whether panels match adjacent painted parts | Request actual panel photos and plan finishing |
| DIY low-gloss paint | Depends on preparation and application | Uniformity, compatibility and repair quality | Use a qualified refinishing process or test panel |
| Professionally specified painted set | Can coordinate color, sheen and graphics | Whether the approved reference matches production | Approve a finish map and pre-shipping views |
| Matte or satin wrap | Reversible in some applications | Edges, curvature, removal and substrate condition | Confirm film maker and installer guidance |
None of these earns an automatic durability or resale score. Resale depends on the motorcycle, buyer, execution and documentation.
Accents that reveal the shape
The safest stealth design uses contrast sparingly.
Monochrome technical marks
Small gray bars, coordinate-like blocks or test-number shapes can create a development-bike mood. Avoid fake technical data and unreadable pseudo-labels. Keep any actual safety labels visible.
One restrained color
A small yellow, red, blue or white accent can identify the nose, wheel relationship or tail. Do not call a color “neon” unless the material and color actually support that description.
Negative-space graphics
Instead of adding a bright stripe, let a satin panel show through a matte graphic block. This creates contrast through sheen. It also requires careful production control because the difference may vanish under flat lighting.
Visible fastener discipline
Black bodywork makes mismatched hardware conspicuous. Decide which original fasteners transfer and which visible hardware will be renewed. Do not replace structural or model-specific fasteners with a universal black bolt simply for appearance. The fastener reuse-or-replace guide explains what to inventory.
Coordinate the retained motorcycle
A full fairing kit is rarely the entire visible motorcycle. Record the color and sheen of:
- fuel tank;
- front fender;
- wheels and rim tape;
- frame and swingarm;
- windscreen;
- mirrors;
- seat and cowl;
- exhaust and heat shields;
- visible inner trim.
If the tank remains glossy black, either repeat that gloss intentionally in small areas or create a clear satin-to-gloss boundary. Do not assume two blacks match because both look neutral in a phone photo. Use the retained-tank planning guide before approving the final render.
For model-specific ordering, begin with the NiceFairings catalog. If the reference motorcycle is a Yamaha, narrow the search to the Yamaha fairings collection and then the exact model and year. The photographed R1 is a visual example, not evidence that its year shares parts with the reader’s bike. Confirm the actual listing and panel list. A complete visual concept does not prove which inner trims, scoops or seat pieces are included in a particular listing.
Approval photography for dark finishes
Black finishes are difficult to judge in one exposure. Request:
1. diffuse daylight or soft-box view of the complete set; 2. low raking light across the main side panel; 3. close view where satin meets gloss or a graphic edge; 4. both sides arranged in installation order; 5. nose and tail views showing symmetry; 6. one neutral-color reference card if the supplier uses it; 7. no heavy filter that crushes shadow detail.
The finished-fairing photo checklist explains what these images can confirm. They can reveal visible consistency and graphic placement. They cannot prove UV lifespan, coating thickness or abrasion resistance.
Dry fit before judging the final look
Dark panels hide some gaps in photographs, but they do not fix them. Install loosely, check first contact and confirm the full set before tightening. Look at:
- nose-to-side-panel seams;
- windscreen and well-nut seating;
- mirror bases and wiring;
- tank and seat interfaces;
- lower-panel and exhaust clearance;
- tail alignment and light openings;
- steering clearance at full lock.
Do not drill, file or force a painted panel to make the styling concept work. Use the panel-gap diagnostic and document the first conflict.
Caring for satin and matte bodywork
The most important rule is to identify the actual finish. Matte paint, satin paint, wrap and matte PPF are not one system. Follow the supplied instructions.
Avoid conventional polish or wax unless explicitly approved. These products may create uneven shine or residue. Rinse loose grit gently, use clean soft media, and test any unfamiliar product in a discreet area. Treat bug residue promptly according to the finish maker’s guidance rather than increasing scrubbing pressure.
High-contact zones deserve attention. Tank edges, knee areas, luggage straps and cover seams can rub low-sheen finishes. If protection film is considered, confirm a compatible matte or satin product and approve how its sheen meets surrounding paint. Review the matte cleaning mistakes guide before the first wash.
If a shiny patch appears, stop. It may be residue, compression, abrasion or a coating change. Aggressive correction can enlarge it. Photograph the area under controlled light and ask the finish supplier or qualified refinisher.
Photographing black without hiding the design
A dark scheme can look like a featureless silhouette when the camera exposes for a bright garage door or sky. That makes a dramatic post but a poor approval image. Ask for broad side light that creates a soft highlight across each panel. Keep shadow detail visible around vents, lower edges and inner trims.
Use the same camera position for left and right sides, and avoid changing filters between finish samples. Include one frame with the retained tank or fender when possible. If the supplier sends only a wet-looking close-up with sharp reflections, request a diffuse-light view before deciding whether the panel is satin or gloss.
Phone HDR can lift shadows and alter the apparent gray level. Compressed social-media images can also shift undertone. Treat them as composition references, then approve against controlled photographs or a physical sample. A useful delivery set shows the motorcycle form; it does not crush every black into one tone.
A complete winter-test brief
Send the supplier one package containing:
- exact motorcycle, year, market and variant;
- clear photos of retained parts;
- front, left, right and rear design views;
- panel-by-panel color and sheen map;
- graphic placement and logo permissions;
- explicit exclusions, such as no carbon-print texture or no sponsor marks;
- gloss/satin/matte transition references;
- desired approval photos;
- care and touch-up questions;
- a statement that the concept image is mood guidance, not a fitment reference.
The custom fairing design-brief guide provides a reusable structure. Send the completed map through the NiceFairings custom-fairings enquiry, and ask which finishes and supplied pieces are currently possible for the exact motorcycle before approving a proof. If a mood board includes generated imagery, separate its styling cues from real panel geometry. Our AI-to-reviewable-brief workflow shows how to turn an image into decisions that can be checked on the actual motorcycle.
Final verdict
Winter-test style is compelling because it reveals the motorcycle’s shape with fewer distractions. Achieving that effect requires more precision, not less. The buyer must define undertone, sheen, panel transitions, accents, retained parts and care.
Do not sell the scheme with unverifiable claims that it “dominates social media,” improves resale or uses a magic satin coating that never buffs shiny. Sell the design discipline: a controlled dark palette, readable panel architecture, documented production views and finish-safe ownership.
Short FAQ
Is satin black easier to maintain than matte black?
Not universally. Visibility of fingerprints, residue and rub marks depends on the coating, lighting and care. Select from the actual sample and use its instructions instead of treating the finish name as a maintenance rating.
Can gloss decals be added to a satin panel later?
Possibly, but confirm adhesive compatibility, edge appearance and removal risk first. A gloss mark on satin creates deliberate contrast and may also reveal every edge. Test the proposed material on an approved sample rather than experimenting on a finished nose panel.
Photograph and care-source notes
The cover is an unaltered real Yamaha YZF-R1 photograph by Cjp24, CC BY-SA 4.0. The in-article Yamaha YZF-R1 photograph by BrokenSphere is unaltered and CC BY-SA 3.0. These motorcycles are visual references only: neither is a NiceFairings product, a winter-test prototype, or proof of a coating specification or model fitment. For actual matte-surface care, consult your finish supplier; a Yamaha motorcycle owner's manual cautions against wax on matte-colored parts, while 3M's film guidance addresses its own PPF products. Different systems require their own instructions.





