
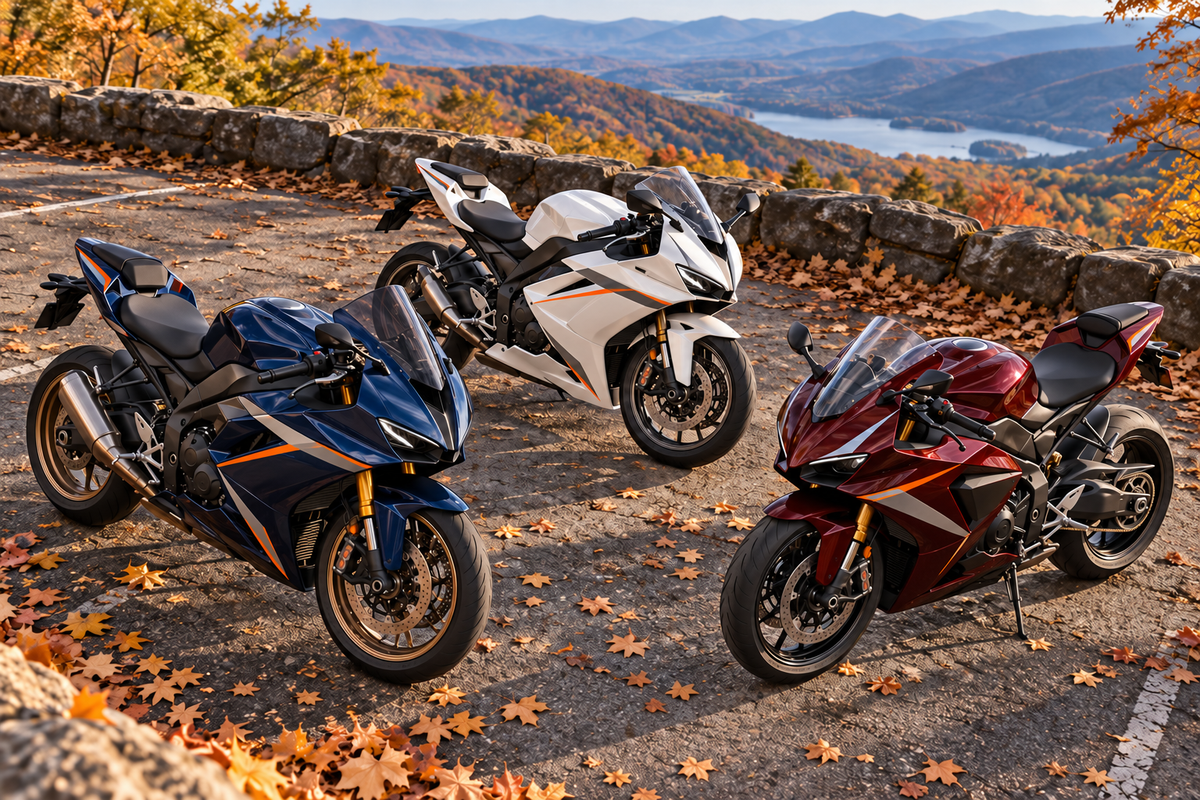
A strong motorcycle club fairing scheme should be recognizable as a group without turning three different sportbikes into poor copies of one race machine. Keep one or two visual signatures consistent—an accent color, stripe rhythm or small club mark—then adapt their scale and placement to each motorcycle’s actual bodywork. Every rider still needs a model-specific order, proof and fitment check.
The timing is useful for this conversation. As of September 30, 2026, the official MotoGP calendar continues from Japan in early October through Valencia in late November, while the official WorldSBK calendar lists October rounds at Estoril and Jerez. Those events can give a club a reason to meet, watch racing or compare design references. They do not prove that one color or livery is popular, and a race calendar is not a product-fitment source.
This guide focuses on the multi-bike design problem. It does not replace a group-riding plan, a motorcycle service manual or a full design brief for an individual order. For the latter, use our custom fairing paint brief guide after the club has agreed on its shared visual system.
Define the club signature in one sentence
Begin with a sentence that is specific enough to review but flexible enough to fit different motorcycles. For example:
Shared-rule example: A narrow burnt-orange line with a silver companion line, rising from the lower side panel toward the tail, with a small approved club mark placed away from vents and fasteners.
That sentence establishes a relationship between colors and direction. It does not lock every bike to an identical sticker file. A Yamaha, Honda, Suzuki, Kawasaki, BMW, Ducati or Aprilia can have different panel breaks, vents, tanks and tail proportions. The visual rule should survive those differences.
A weak instruction such as “make all the bikes match” leaves the designer to guess which details matter and how a flat reference should cross real seams. A useful club statement answers four questions:
- What is the shared color or finish cue?
- What line, shape or pattern creates recognition?
- Where should the motif generally begin and end?
- Which parts must remain individual to the rider and motorcycle?
The last question matters. A club design is more credible when each bike keeps its own base color, body shape and owner-approved details.
Separate fixed rules from flexible rules
Create a simple system before anyone orders bodywork.
| Design decision | Fixed across the club | Flexible by motorcycle | Must be approved separately |
|---|---|---|---|
| Accent palette | One named orange and one named silver reference | Amount of each color | Physical or supplier color reference |
| Graphic direction | Forward-to-rear rising movement | Angle and length | Left, right, front and rear proof |
| Club mark | Approved artwork and clear-space rule | Size within a limited range | Permission, spelling and placement |
| Base color | Not fixed | Rider chooses from approved compatible options | Finish and retained-part coordination |
| Number or initials | Typeface family if desired | Rider-specific characters | Accuracy and local/event suitability |
| Finish | Shared vocabulary such as gloss, satin or matte | Panel allocation | Sample and care requirements |
| Fitment | No shared assumption | Exact model, year, market and sub-model | Product page and supplier confirmation |
This table prevents the club identity from swallowing the product requirements. A common orange line does not make panels interchangeable, and a shared order date does not make every kit contain the same pieces.
Give every rider a bike identity sheet
Before a designer adapts the group motif, each rider should submit an individual identity sheet. Record:
- Make, model, year and market.
- Sub-model where relevant.
- Current left, right, front and rear three-quarter photographs.
- Tank color and whether the tank or tank cover will remain.
- Wheel, frame, fork, windscreen and exhaust colors.
- Existing accessories that change the visible outline.
- Damaged, repaired or missing panels and attachments.
- The exact panels being requested.
- Rider’s preferred base color and finish.
Do not use a club group photo as the only reference. It may hide the far side, alter colors and obscure damage. Use it for visual balance, not as the order record.
If a supplier needs help identifying existing bodywork, follow our guide to photographing a fairing for supplier identification. Identification photos and design inspiration photos have different jobs.
Use the club meet as a documentation session
An autumn club meet can be more productive than swapping screenshots in a group chat. Park the motorcycles safely and legally, then photograph them under the same light and from comparable angles. This lets the group see how one accent behaves on different proportions.
Capture these views while the motorcycles are stationary:
- Full left side at motorcycle mid-height.
- Full right side from the same distance.
- Front three-quarter showing the nose and upper panels.
- Rear three-quarter showing the tail and lower panels.
- Rider-eye view of the tank and cockpit.
- Close views of vents, seams, fasteners and retained accessories.
- A lineup photograph with all bikes in the order the club expects to display them.
Use the lineup to judge group rhythm, not exact color. Cameras and screens alter paint appearance, so use a named reference, sample or documented approval process for color.
Review the concept in neutral daylight and the lighting typical of club meetings. Southern Hemisphere riders can apply the same method during spring; local conditions matter more than the month name.
Build one motif, then redraw it for each panel set
The shared element should follow each motorcycle’s real geometry. Start and stop points must be described using visible features on that motorcycle: a panel crease, vent boundary, seam, tail transition or lower-fairing edge.
Do not force a stripe to cross a deep vent merely because it crosses a flat area on another bike. Do not move a logo onto a hot, flexible or highly curved zone just to keep all proofs visually identical. And do not allow a graphic to disguise a hole, crack or alignment problem.

Editorial concept: the three panels illustrate a shared visual system adapted to different shapes. They are not product samples, a customer club order or evidence that the panels fit a particular motorcycle.
For each motorcycle, ask the designer to show:
- The shared motif at card size, where group recognition matters.
- A full-resolution side proof, where seams and vents matter.
- A front or nose view, where left-right balance matters.
- A rear three-quarter view, where the graphic must finish cleanly.
- A version with retained tank, wheels and windscreen visible.
The correct result may look slightly different on every bike. Consistency comes from the rule, not pixel-for-pixel duplication.
Use racing as a reference, not a parts list or ownership claim
Late-season MotoGP and WorldSBK rounds can supply useful questions: Is the club drawn to a restrained factory-style palette, a large number field, a thin technical stripe or a high-contrast nose? Discuss the visual principle before copying the surface.
Race motorcycles and street motorcycles may have different bodywork, sponsor arrangements, vents, lighting openings and regulatory requirements. A photograph of a race bike does not show that its fairings fit a road bike. A painted winglet shape does not add a winglet. A dark headlight graphic does not remove the need for functioning road equipment.
Choose one of three reference levels:
Club-original
Use an original club palette and motif with no race-team identity. This gives the group the clearest ownership of the result and avoids making the bikes look like incomplete replicas.
Race-inspired
Borrow a general color relationship, line rhythm or number-field idea, then redesign it around the club and the actual motorcycles. Describe the inspiration without claiming an official team connection.
Faithful replica request
Treat this as a separate project. Confirm whether the artwork can be reproduced, whether the supplier accepts it and whether the correct logos, spelling and proportions are available. Do not assume a public image grants permission to reproduce every mark.
Our article on older Suzuki GSX-R race liveries shows how one model family can distinguish faithful, inspired and personal directions. A mixed-model club needs an additional adaptation layer.
Get permission before placing club, sponsor or business marks
The person who shares a logo file may not own it. Before production, record who approved the club mark and which version is current. If a local business, event or charity is included, obtain its approval for the exact use. Avoid adding manufacturer, racing-team or sponsor marks merely to fill empty space.
The artwork package should contain:
- An approved vector or high-resolution source file.
- Exact spelling, capitalization and punctuation.
- Permitted colors and monochrome alternatives.
- Minimum clear space around the mark.
- Maximum and minimum intended size.
- Prohibited placements, distortions and color changes.
- A named person who can approve the final proof.
Numbers and initials need the same discipline. Confirm every character before paint or decal production. If a number could be mistaken for an event entry, competition identifier or official designation, check the organizer’s rules and local requirements rather than relying on a generic road-bike assumption.
Review the lineup and each motorcycle separately
One group proof cannot approve every kit. Use two review levels.
Level 1: the lineup review
Place the side proofs next to each other at the same visual scale. Check whether the shared accent appears in a comparable visual zone and whether one bike becomes unexpectedly dominant. A white motorcycle may make the orange brighter; a burgundy bike may reduce contrast; a navy bike may make silver more prominent. Adjust the amount, not the identity, of the motif.
Level 2: the bike review
Review each motorcycle at full size. Confirm panel boundaries, retained parts, finish, text, logo placement and the actual requested panel list. A club vote should not override a rider’s model-specific fitment or a supplier’s need for accurate details.
Use our seven-check livery review for the individual paint proof. Keep the club master sheet and the rider approval sheet as separate files with version dates.
Create one master brief and one order sheet per bike
The master brief should contain only shared decisions:
- Club motif statement.
- Approved color references and finish vocabulary.
- Approved club artwork and permissions.
- Graphic direction and acceptable adaptation range.
- Required proof views.
- Shared deadline or event target, labeled as a planning goal rather than a delivery promise.
Each bike order sheet should contain:
- Rider name or internal order label.
- Motorcycle identity and market.
- Exact product or quoted panel list.
- Bike-specific photos.
- Retained colors and accessories.
- Individual base color and finish.
- Bike-specific motif placement.
- Text, number and logo proof.
- Shipping destination and separate commercial terms.
Do not combine the technical details into one spreadsheet row that says “same as the others.” That phrase is acceptable for the shared orange reference; it is not acceptable for the motorcycle year, headlight opening, fastener locations or supplied pieces.
Approve production and delivery with the same discipline
After the design is approved, keep fitment, finish and delivery evidence separate.
Before production, confirm the correct motorcycle and panel list. Before dispatch, request the agreed finished-photo views for each individual order. At delivery, inspect every box and panel before installation or irreversible changes. Our finished fairing photo checklist and delivery inspection checklist cover those two stages.
Do not call three matching photo proofs proof of fitment. Finished photos can verify visible paint, graphics and included pieces; they do not prove that the motorcycle, brackets, hardware and transferred parts are ready for installation.
Keep the ride plan separate from the design plan
Coordinated fairings can support a club photo, race-watch meetup or charity event, but appearance should not determine riding formation, pace or safety decisions. Use the organizer’s plan, local law and recognized rider-training guidance. The Motorcycle Safety Foundation’s group-riding guide covers pre-ride meetings, group size, formation and rider responsibility; this article does not replace it.
Evaluate the fairing design while motorcycles are parked. Do not ask riders to bunch together or repeat road maneuvers for a photograph.
Choose the right coordination level
| Club goal | Best starting point | Main risk to control |
|---|---|---|
| Subtle recognition | One small accent and approved club mark | Mark disappears or lands on unsuitable geometry |
| Strong lineup identity | Shared two-color motif with bike-specific placement | Bikes become visually identical or one dominates |
| Race-inspired event look | Shared reference principle, original club adaptation | Accidental team/trademark claim or bodywork mismatch |
| Temporary meetup theme | Removable graphics approved for the actual finish | Adhesive, removal and coating compatibility |
| Full custom club build | Master system plus separate model-specific orders | Treating one proof or panel list as universal |
The most expensive-looking option is not automatically the best. A narrow, repeated detail can create more genuine group identity than covering every panel with the same graphics.
Club fairing project checklist
- Confirm the season or event is context, not evidence of popularity.
- Write the shared visual rule in one sentence.
- Separate fixed club elements from rider-specific choices.
- Record exact model, year, market and panel scope for every bike.
- Photograph all motorcycles under comparable stationary conditions.
- Adapt the motif to each motorcycle’s seams, vents and retained parts.
- Keep race references separate from fitment claims.
- Verify permission for every club, sponsor, event or business mark.
- Approve lineup balance and each bike’s full-size proof separately.
- Store a dated master brief and dated rider order sheets.
- Verify finished appearance before dispatch and delivery condition before installation.
- Use recognized group-riding guidance for the ride itself.
A club livery works when the motorcycles look related at first glance and correct on inspection. The group should be visible in the repeated idea; each rider and each motorcycle should remain visible in the execution.
Current-season and safety references
- Official 2026 MotoGP calendar — calendar checked September 30, 2026; verify current dates before planning an event.
- Official 2026 WorldSBK calendar — calendar checked September 30, 2026; verify current dates before planning an event.
- Motorcycle Safety Foundation guide to group riding — use for riding guidance, not fairing fitment or product claims.



