
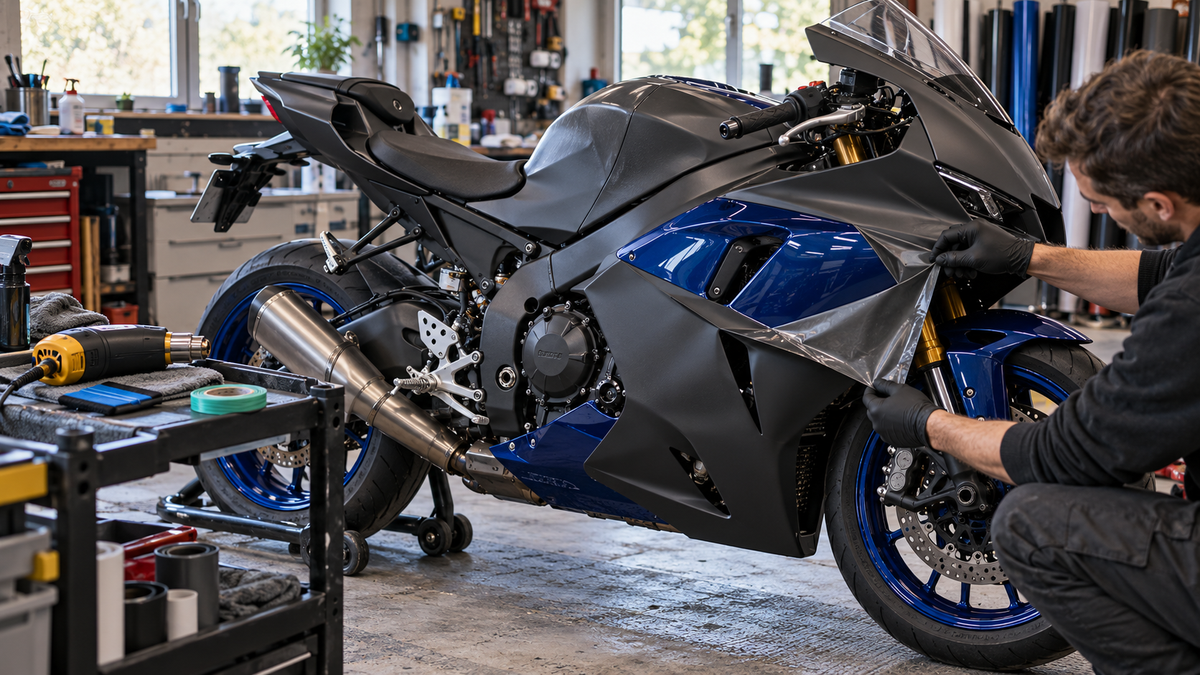
Your sportbike is already wrapped, one edge is lifting, and the easy answer seems to be “just rewrap it.” Stop before ordering another roll. The correct next step depends on what the film is hiding, how the existing coating behaves during a controlled removal test, and whether the panels themselves are structurally sound. Rewrapping is a finish project. Replacement fairings are a bodywork project. Removing the film is an inspection step, not proof that either route is automatically right.
This guide addresses the decision after a wrap has aged, failed locally or stopped matching the look you want. It complements our broader vinyl wrap versus painted replacement panel comparison by focusing on the evidence you need once film is already on the motorcycle.
Start with one test area, not the most visible panel
Do not begin by tearing the largest sheet off the nose. First identify a small, accessible edge where an installer can evaluate the film, adhesive and coating beneath it. Record the motorcycle in daylight before anything moves. Photograph the left and right sides, every lifted edge, bubbles, discoloration, impact mark and area close to fuel filling or exhaust heat.
The first removal test should answer four questions:
- Does the film release in a controlled way under the product maker’s removal method?
- Does adhesive remain on the surface?
- Does the underlying paint appear stable, or does color or clear coat transfer with the film?
- Is the panel underneath cracked, repaired, distorted or missing an attachment?
The answers may vary from panel to panel. A motorcycle can have original paint on the tank, refinished side fairings and an older replacement tail. One successful test does not certify every surface.
Film manufacturers recommend product-specific procedures and professional removal when the coating history is uncertain. 3M, for example, tells consumers that poorly cured resprays can be more vulnerable and recommends authorized professional removal. Treat that as a reminder to identify the actual film and finish—not as a promise that any film will release cleanly from any motorcycle.
Read the failure pattern before choosing a remedy
A lifted edge is a symptom, not a complete diagnosis. Note exactly where it occurs.
Edge lifting at a removable trim line
If the film is lifting only at an accessible edge while the panel and coating remain sound, a qualified installer may be able to determine whether a local repair or panel rewrap is appropriate. The decision depends on contamination, remaining film condition, seam placement and whether the original application left enough stable material.
Lifting inside a deep vent or recess
Deep channels and concave surfaces require careful application and post-heating under the film maker’s instructions. Current 3M vehicle-wrap guidance specifically calls for post-heating in recessed areas and deep channels. That does not mean every failed recess was installed incorrectly; film selection, geometry, preparation and service history also matter. It does mean a sportbike’s ducts and vents deserve their own feasibility assessment before you repeat the same design.
Bubbles or contamination across a broad area
Broad bubbling can involve trapped contamination, coating condition, application technique or exposure. Do not puncture, heat or press every bubble as a universal fix. Photograph the pattern and ask the installer to identify the film and approved corrective process. An improvised repair can make a later assessment harder.
Film lifting with paint attached
Stop. Do not continue simply to “get it over with.” Preserve the released sample, photograph the affected area and record the removal conditions. The next step belongs with the coating or wrap professional who can evaluate the substrate and decide whether the panel needs refinishing, repair or replacement.
Decide from panel condition, not frustration
| What the inspection finds | Remove and retain paint | Rewrap the panel | Consider panel repair or replacement |
|---|---|---|---|
| Sound panel, stable coating, clean release | Strong candidate after full removal and care review | Possible after surface approval | Usually unnecessary for appearance alone |
| Sound panel, stable coating, adhesive residue | Possible after approved residue-removal process | Possible only after the installer approves the prepared surface | Usually unnecessary unless other damage exists |
| Cracked panel or missing mounting tab | Film removal is only part of diagnosis | Do not use film as structural repair | Have repairability and replacement scope assessed |
| Distorted panel or unexplained gap | Appearance work should wait | Rewrap does not correct geometry | Inspect brackets, supports and panel condition first |
| Coating lifts during test | Stop and document | Do not rewrap until the coating is assessed | Refinish or replacement may be considered after assessment |
| Design no longer suits the bike, bodywork is sound | Remove and maintain if paint is acceptable | Rewrap can be a valid color-change route | Replacement is a style choice, not a required repair |
The table is a decision aid, not a remote diagnosis. A photograph cannot determine coating adhesion, hidden crack depth or the suitability of a particular repair.
The geometry question: can the design be wrapped cleanly?
Sportbike panels combine small radii, vents, compound curves and narrow returns. The fact that a shape can be covered for a reveal video does not establish how the edge will behave in service. Ask the installer to mark three zones on a photo of your motorcycle:
- Low-risk coverage zones: broad, accessible surfaces with manageable edge returns.
- High-work zones: deep recesses, compound curves, close vent edges and tight transitions.
- Do-not-wrap or redesign zones: locations the installer believes require a seam, altered graphic boundary or different finish method.
A smart rewrap may use paint as the main color and vinyl only for stripes or accents. That reduces the number of stressed recesses and makes future graphic changes easier. Partial wrap is not a compromise when it follows the geometry; it is often a more deliberate design.
If your design depends on uninterrupted color through every duct, ask whether painted panels are the clearer route. Confirm the actual panel list, finish process and proof views instead of assuming “pre-painted kit” describes one universal product.

Editorial concept: this image illustrates a condition-assessment workflow. It is not a product test, customer panel or promise that removal will produce the same result.
Compare real quotes with the same scope
Generic internet prices do not decide your project. Request itemized, current quotes that describe the same motorcycle and the same coverage.
For a removal-and-rewrap quote, ask for:
- Film brand, product line, color and finish.
- Included panels and any excluded recesses or edges.
- Removal, adhesive cleanup and surface-assessment scope.
- Disassembly and reassembly responsibilities.
- Treatment of prior paintwork, decals and repaired panels.
- Design seams, knifeless-tape use and any unavoidable joins.
- Care instructions, warranty terms and excluded conditions.
For a painted replacement-panel quote, ask for:
- Exact model, year, market and sub-model coverage.
- Named panel list and separately required inner pieces or trim.
- Paint color, sheen and graphic proof process.
- Hardware, heat protection, windscreen and other transfer items.
- Shipping, tax or import scope for your destination.
- Return and custom-order terms.
- Installation and pre-fit responsibilities.
Do not compare the material price of a roll with a finished installed bodywork project. Do not compare a full professional wrap with a panel-only kit price. Build two complete totals using the work your motorcycle actually needs.
Fuel, washing and outdoor storage: use the film maker’s rules
The attachment topic claims fuel “instantly eats” wrap adhesive and that painted ABS is automatically power-wash safe. Both statements are too broad. 3M’s care guidance says fuel spills should be wiped promptly and the film hand washed and dried as soon as possible. It also warns that aggressive pressure washing can force water beneath film and lift edges. Those are product-care instructions, not a verdict on every film or painted panel.
Ask for the care sheet for the exact film or coating. Record:
- Waiting period before washing after installation.
- Permitted cleaners and prohibited abrasive products.
- Fuel-spill response.
- Pressure-washing limits, if permitted at all.
- Outdoor-storage and UV guidance.
- Procedures for edge lifting, staining or surface change.
The best route is the one you can maintain. A satin film and a satin painted clear may look similar in one photograph but require different products and correction options.
Protect the original bodywork without calling the change “100% reversible”
Storing original panels can preserve their present condition while a different set is used, but the overall project still involves handling, storage, transfers and later reinstallation. Likewise, vinyl removal can be possible without damage under suitable conditions, yet coating history, film age and removal method matter. “Reversible” should describe a planned process with known limitations, not a guarantee.
If storing original fairings:
- Clean and dry them using the approved method.
- Photograph all sides and attachments before storage.
- Protect painted faces from contact and point loading.
- Label each panel and its hardware without adhesive on visible paint.
- Use a dry, temperature-stable location away from direct sunlight and heat.
- Keep transferred trim and fasteners traceable.
Before replacing panels, use the fairing kit delivery inspection checklist and confirm the pre-fit process before making irreversible changes.
A practical three-route decision
Route 1: Remove the film and keep the exposed finish
Choose this when the coating is stable, the bodywork is sound and you prefer the revealed finish. Complete the removal under the film maker’s guidance, resolve residue with approved products and document any variation before polishing or refinishing.
Route 2: Rewrap sound bodywork
Choose this when the panels and coating are suitable, the installer has reviewed the complex zones and the design can be executed with acceptable seams and maintenance. A partial accent design may outperform a full-color concept that fights every recess.
Route 3: Repair or replace bodywork, then specify the finish
Choose this when the film hides cracks, missing attachments, distortion or an unstable coating that makes another wrap inappropriate. Decide the repair scope first. If replacement panels are selected, verify fitment and supplied pieces separately from paint approval. Our painted versus unpainted fairing guide helps separate those decisions.
Before you authorize the next project
- Identify the film and any known paint or repair history.
- Photograph every failure and the full motorcycle before removal.
- Conduct a controlled test in an appropriate area.
- Stop if coating transfers or hidden damage appears.
- Map deep recesses, vents and edge returns with the installer.
- Compare complete, itemized quotes for equal coverage.
- Keep fitment, finish and installation approvals separate.
- Save product-specific care and warranty instructions.
- Do not use new film to conceal unresolved structural or mounting damage.
The best outcome is not always the newest surface. It is the route that begins with an honest inspection, respects the geometry of the motorcycle and leaves you with a finish you understand how to maintain.



