A stored sportbike can look untouched while the space behind its fairings has changed. Shredded paper near a lower vent, a stale odor, small droppings on the floor or fresh marks on a cable are not reasons to press the starter and “see whether it runs.” They are reasons to pause, ventilate, document and inspect.
The response has two goals: protect people from contaminated dust and protect the motorcycle from hidden intake, wiring, hose and bodywork damage. Public-health guidance controls cleanup; the motorcycle’s service information controls access, disconnection and return-to-service checks.
The short answer: inspect before you start or vacuum
If a motorcycle has been stored and shows possible rodent activity, do not start it, sweep the area, vacuum dry droppings or blast debris with compressed air. The U.S. Centers for Disease Control and Prevention (CDC) warns that disturbing dry rodent urine, droppings or nesting material can put contaminated particles into the air. Its vehicle guidance also says to inspect air intakes and filters before starting a long-idle vehicle.
Ventilate the garage as the CDC recommends for the type of space, keep people and pets away, wear the specified protective equipment and follow its current disinfection instructions. If contamination is extensive, inside ventilation systems, or beyond your ability to handle safely, use public-health, pest-control and qualified motorcycle-service help.
Treat the first sighting as evidence, not a cleaning cue
Before moving anything, photograph the floor, the motorcycle and the suspected entry area. Record the date, storage duration and whether the bike was covered. Useful evidence includes shredded paper, fabric or plant matter; droppings; gnaw marks; displaced insulation; an unusual odor; or new debris below a vent.
Those signs do not prove where an animal traveled or whether a cable is damaged. Do not pull a visible nest through a fairing opening; it may be tangled around wiring, hoses or a filter. Take wide and close views for a technician or pest professional.
If you already keep a winter fairing condition log, add this inspection as a separate event rather than overwriting the pre-storage record.
Separate garage prevention from motorcycle repair
EPA guidance emphasizes removing food, water and shelter and sealing entry holes in the building. That means cleaning food residue, securing rubbish, moving loose nesting material away from the storage zone and repairing gaps in doors, walls or utility penetrations.
Do not interpret “seal holes” as permission to block the motorcycle’s air intake, exhaust, drains or vents. The building and the motorcycle are different systems. Only the motorcycle manufacturer’s storage instructions should determine whether a particular opening receives a temporary cover—and every approved temporary item must be recorded for removal before starting.
Our motorcycle-cover fit guide addresses paint rub and moisture. A cover can reduce dust, but it is not a rodent-proof enclosure and should not hide the bike for months without inspection.
Skip folklore that cannot prove protection
Strong-smelling oils, dryer sheets, soap, mothballs and ultrasonic devices are commonly discussed online. Their presence does not verify that a motorcycle is protected, and some can create new concerns around paint, plastic, pets, children or indoor air. Do not put unapproved chemicals, loose fabric or scented material inside fairings or the airbox.
Use evidence-based building exclusion, sanitation and a pest-control plan suitable for the property and local rules. Follow trap or pesticide labels exactly and consider risks to pets and wildlife. If poison or a trap is used, do not place it on the motorcycle or where service work can disturb it. A licensed pest professional can help when activity continues.
Build an inspection boundary before touching bodywork
Mark a clean side for tools and a potentially contaminated side for removed items. Do not place a painted panel on concrete or nesting material.
The CDC advises rubber or plastic gloves for cleanup and additional precautions for heavy infestation. Follow its current instructions rather than improvising protective equipment. Motorcycle gloves are not automatically chemical-resistant or disposable.
Do not use a fan that blows dry debris across the motorcycle or toward another room.
Do not power the bike before the electrical path is checked
A starter test energizes circuits and moves components before you know whether insulation has been damaged. With the motorcycle off, look for fresh tooth marks, exposed conductor, displaced loom tape, pulled connectors or nesting pressed against a wire.
Do not reconnect a stored battery or operate switches merely to identify a fault. Battery disconnection and reconnection are model-specific procedures. If safe inspection requires electrical isolation, follow the service information or use a technician. Our winter battery-lead routing guide explains why an added charging lead is another circuit that needs inspection, not a convenient handle for moving a harness.
Any chewed, stiff or heat-marked cable needs proper evaluation. Tape over visible copper is not a complete repair; damage may extend beneath the loom or into a connector.
Check the intake path before the starter button
CDC vehicle guidance specifically calls for checking air intakes and filters before starting a vehicle that has been idle. On a motorcycle, the exact intake openings, ducts, filter and airbox access vary by model and fairing design. Use the owner or service manual to identify them.
Do not probe an intake blindly with a wire, vacuum nozzle or high-pressure air. If nesting material is visible in the intake system, stop and plan controlled access. The CDC vehicle instructions say contaminated nesting material should be removed safely and the affected air filter replaced; a motorcycle technician should determine what else in the intake path needs inspection.
The exhaust and intake are separate paths. A clear outlet does not prove the intake is clear.
Remove only the panels the service information requires
Full fairings hide useful inspection routes, but removing every panel at once can mix hardware, spread contamination and create unnecessary paint risk. Identify the minimum access needed, then follow the exact model’s sequence. Support each panel before its last fastener is removed.
Map screws, collars, clips, well-nuts and grommets by location. Similar-looking pieces may differ in shoulder length or thread. The fairing-fastener reuse guide explains why a generic bolt assortment is not a substitute for a position map.

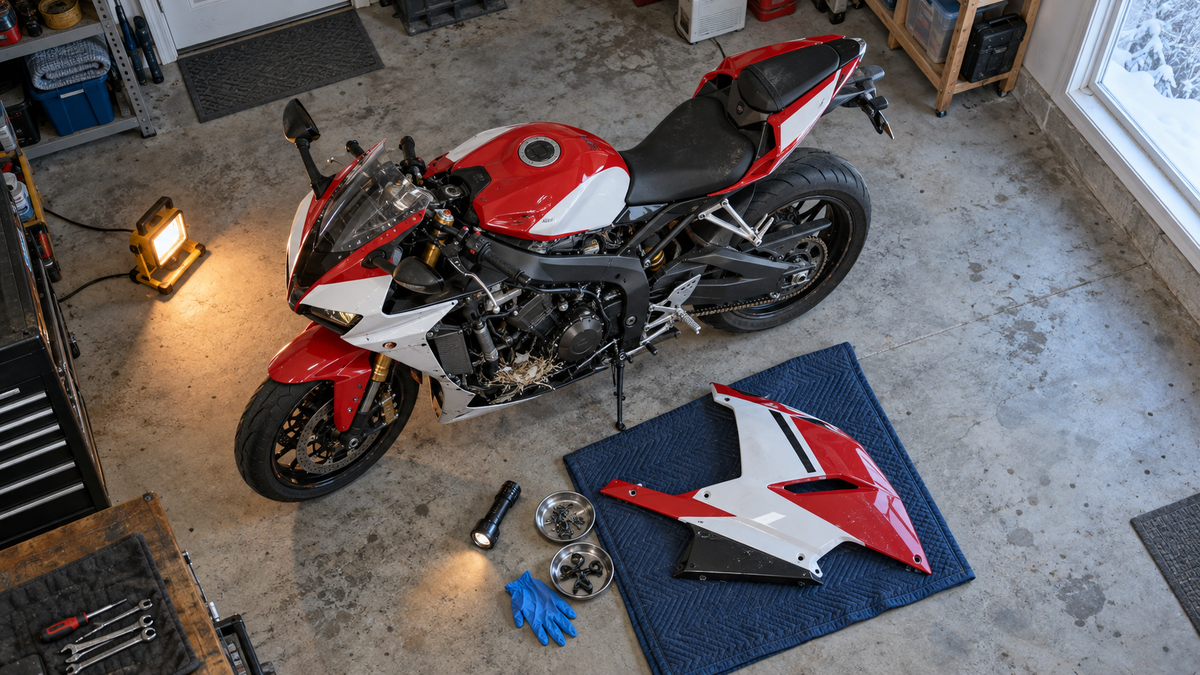
AI-generated editorial illustration. It demonstrates organized access and inspection, not the mounting layout of a specific motorcycle or NiceFairings kit.
Protect painted panels while inspecting the hidden side
Place a removed panel on a clean padded surface that supports its broad shape without loading tabs or graphics. Keep contaminated material away from the finished face. Photograph the inside before cleaning: dust trails, debris caught behind ribs, stains and fresh gnaw marks can help reconstruct the path.
Do not flex a panel to gain access. A tab already weakened by age, prior repair or incorrect installation can crack. If a panel gap had changed before storage, use the first-conflict panel-gap method rather than forcing it flat during reassembly.
Public-health chemistry and paint chemistry are not the same
CDC cleanup instructions describe disinfectants or a specified bleach solution for rodent-contaminated areas. That does not mean every disinfectant is compatible with clear coat, decals, windscreens, anodized hardware, electrical connectors or motorcycle plastics.
Do not spray a strong solution across the motorcycle to satisfy both jobs at once. Follow current health guidance for handling contamination, the disinfectant label for surfaces and ventilation, and the motorcycle or finish maker’s care instructions. When the requirements conflict or the contaminated surface is delicate, isolate the area and ask a qualified professional how to protect people without damaging the component.
Never mix cleaning chemicals. Do not use fuel, brake cleaner or an unapproved solvent as a disinfectant. Our fuel and brake-fluid first-response guide addresses different contamination and should not be substituted for rodent cleanup.
Do not sweep, dry-vacuum or pressure-blast evidence
This point deserves repetition because ordinary garage habits are wrong for potential rodent waste. CDC guidance says not to sweep or vacuum urine, droppings or nests before disinfection. It also advises against using a high-pressure sprayer on contaminated vehicle surfaces before they are disinfected.
A pressure washer can spread contamination and drive water toward hidden components. The pressure-washing guide explains why there is no universal pressure or distance setting.
Use the current CDC process for wetting, contact time, pickup and disposal. If the contamination is heavy or inaccessible, stop rather than scaling up household equipment.
Inspect hoses, insulation and heat shields as systems
Rodent damage is not limited to electrical wire. Look for marks on rubber hoses, insulation, foam, sound or heat barriers, drain lines and protective sleeves. Do not decide a hose is safe because the outer mark seems shallow. Fuel, brake and coolant systems have different consequences and inspection standards.
Any suspected fluid-line damage, exposed reinforcement, leak, soft spot or unknown residue is a no-start condition for qualified service. A heat shield that has been shredded or moved can also change the temperature around bodywork. Our fairing heat-damage map can help record nearby discoloration and clearance, but it cannot certify a damaged shield.
Keep cleanup debris out of clips and panel joints
After contaminated material has been handled according to public-health instructions, inspect each mounting interface before reassembly. A small piece of paper trapped under a grommet can hold a panel proud; a hardened deposit in a clip can make the correct fastener feel wrong.
Do not tighten harder to close a new gap. Confirm that rubber parts are seated, collars are present and brackets have not shifted. The fairing-rattle guide separates missing hardware from contact or alignment problems.
If a fastener was lost during storage or cleanup, use the missing-fastener decision guide rather than installing a longer screw that may reach wiring behind the panel.
Reassemble slowly and prove every clearance again
Once the area is dry, repaired as necessary and cleared for reassembly, install bodywork in the model-specific sequence. Start fasteners as instructed, keep the panel supported and stop if a tab must be pulled into place. Check that no harness, hose or newly added barrier is pinched between panels.
Turn the handlebar through its normal range with the motorcycle safely supported and off if front bodywork or wiring was disturbed. Follow the full-lock steering-clearance checklist for the affected area.
Compare final gaps with pre-storage photos; a clean exterior does not prove the hidden route is correct.
Set a return-to-service gate
Do not start or ride until all temporary intake or exhaust measures are accounted for, the air path is cleared, electrical and hose damage has been resolved, every disturbed panel is secure and the manufacturer’s normal pre-ride inspection is complete.
If the bike sat through winter, use the broader spring wake-up checklist. It covers bodywork, controls, lights, leaks and road-readiness; it does not replace professional diagnosis after rodent damage.
After clearance, stop the first start for warning lights, unusual odor, smoke, leaks or abnormal sound.
Prevent recurrence with a visible routine
Prevention works better as a schedule than a scent. Remove food and water sources, reduce paper and fabric clutter near the bike, repair garage entry gaps, keep rubbish closed and inspect the building periodically. Use pest-control measures consistent with EPA guidance, product labels and local requirements.
During storage, uncover and inspect the floor, intake approaches, tail cavity, battery area and lower openings without disturbing dry debris. Fresh signs after cleanup indicate continuing activity.
Keep the prevention log beside the cover contact map and battery-maintainer record so one storage task does not hide another.
When replacement fairings enter the plan
Rodent activity may damage paint, tabs or an already weakened panel, but replacement should follow diagnosis—not substitute for it. Resolve wiring, intake, hose and pest-control problems first. Then photograph the complete bodywork and verify the exact motorcycle model and year.
Use the NiceFairings collection index to locate the correct model family. If the damage or required pieces are unclear, contact NiceFairings with wide views, close-ups, model/year information and a list of missing or damaged panels. We can discuss bodywork scope; a qualified motorcycle technician must assess structural, electrical and mechanical damage.
A one-page winter rodent inspection record
Record these items before closing the job:
- motorcycle model, year, storage dates and location;
- date and type of first evidence;
- wide and close photographs before disturbance;
- CDC cleanup guidance version or access date used;
- panels and hardware removed, mapped by position;
- intake and filter inspection result;
- wiring, hose, insulation and heat-shield findings;
- cleanup products used and surface-compatibility checks;
- repairs completed and person or workshop responsible;
- building exclusion and pest-control actions;
- reassembly, pre-ride and follow-up inspection results.
The record prevents a serious winter problem from becoming an undocumented spring surprise.
Sources and image notes
- CDC: How to Clean Up After Rodents, including vehicle inspection and the warning not to sweep or vacuum dry contamination.
- CDC: Controlling Wild Rodent Infestations, signs of activity and the remove-food, water and shelter framework.
- U.S. EPA: Identify and Prevent Rodent Infestations, building exclusion and prevention guidance.
- Yamaha motorcycle care and storage guidance, one model-specific example of cool, dry, ventilated storage; it is not a substitute for the reader’s exact manual.
- Header and inline images: AI-generated editorial illustrations reviewed for topic relevance and mechanical plausibility. They do not document a customer motorcycle, real infestation, product test or model-specific repair.