
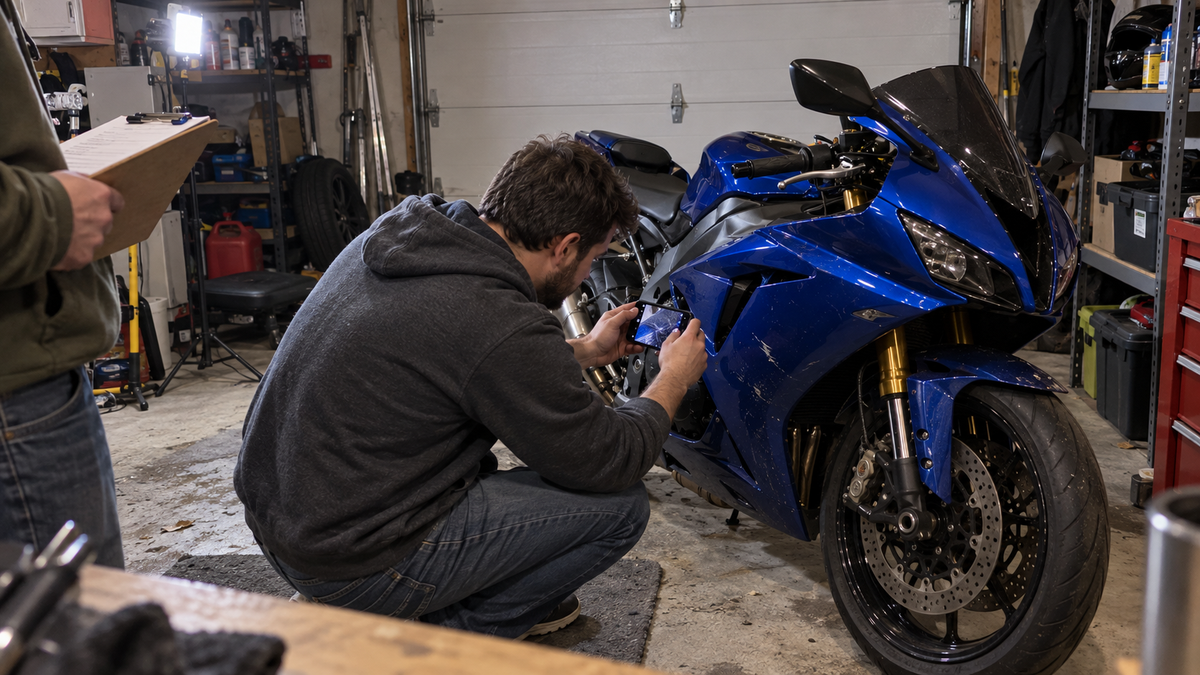
An end-of-season club garage night can be more useful than another hour of comparing scratches in poor parking-lot light. The goal is not to have the most experienced rider pronounce every panel “good” or “bad.” It is to give each motorcycle a repeatable bodywork record: what is fitted now, what changed during the season, which concerns need qualified inspection, and which cosmetic ideas can wait for a winter project.
This article covers the fairing documentation session, not mechanical winterization, repair instruction or a spring safety inspection. Storage procedures vary by motorcycle, battery, fuel system, climate and facility. Follow the owner's manual and qualified service guidance for those tasks. When the motorcycle returns to use, complete a full pre-ride inspection; the spring wake-up fairing checklist begins after the winter work is complete.
If the audit shows that replacement bodywork belongs in the plan, browse the current NiceFairings fairing selection only after you have recorded the exact motorcycle and the panels involved.
Give the Night One Deliverable
The useful output is a condition log for each motorcycle, not a stack of random photos. Keep the scope narrow enough to finish in one evening. A complete log should contain:
- the motorcycle identity supplied by its owner;
- four consistent overview photographs;
- close-ups of every recorded concern;
- a panel-by-panel condition grade;
- a list of unknown hardware or fitment questions;
- one decision for each concern: monitor, clean, obtain technical inspection, repair assessment, or replacement inquiry;
- the owner's winter design ideas, clearly separated from condition findings.
That separation matters. A rider may dislike a faded color while the panel remains serviceable, or love a graphic while a hidden mounting tab needs attention. Appearance and condition are related project inputs, not interchangeable judgments.
Set Up the Garage Before the Motorcycles Arrive
Choose a stable, dry, ventilated workspace with enough room to walk around one motorcycle without brushing the next. Provide even, neutral light where possible. A bright work lamp aimed across the paint can reveal waves, scuffs and lifted edges, but harsh reflections can also exaggerate harmless marks. Use both general light and a movable light, then photograph the concern from more than one angle.
Create three zones:
- Photo bay: one motorcycle at a time, with a plain background and floor clear of tools.
- Record table: blank condition sheets, removable paper identifiers, clean microfiber cloths and a phone or camera.
- Project board: separate columns for “monitor,” “needs evidence,” “service question,” and “bodywork quote.”
Do not turn the photo bay into a repair area. Removing panels during a social session can mix hardware, erase evidence and create pressure to finish before everyone leaves. If a component must be removed for a proper inspection, schedule that work separately with the correct instructions and workspace.
Record the Motorcycle Before the Fairings
Ask the owner to provide the motorcycle's make, model, model year, market or country version when known, and any recent bodywork, lighting, exhaust or accessory changes. Do not infer the year from paint graphics. Do not assume a registration year is identical to a model year. If the identity is uncertain, mark it uncertain.
Give the session a neutral record name such as the owner's initials plus the date. Avoid publishing a license plate, home location or personal contact details in a shared club folder. Agree in advance who can view the photos and whether any image may be posted publicly. A condition record can be useful without becoming social content.
If the club already has loose panels of unknown origin, keep that as a separate project. The mixed-fairing identification guide explains how to inventory detached parts without guessing their model from color alone.
Use the Same Four Overview Photos Every Time

Editorial concept: pair a close-up with a neutral record and keep removed hardware separated; the image is not a model-specific removal sequence.
Consistency makes later comparison possible. Photograph the front three-quarter view, left side, right side and tail three-quarter view from roughly the same distance and height. Keep the wheels straight unless the owner's manual or space requires otherwise. The motorcycle should be stable and switched off.
Add a fifth image from above only when it can be taken safely without climbing on furniture or leaning over an unstable motorcycle. The overview set should show the relationship between panels; it is not meant to prove the condition of every tab or fastener.
Before taking close-ups, include one wider locator photo that shows where the concern sits on the motorcycle. Then photograph the detail with a clean reference object only if scale truly matters. Do not place coins, metal rulers or tools directly on the paint. Avoid filters, portrait-mode edge effects and heavy edits that can hide cracks or change color.
Grade Condition Without Pretending to Diagnose It
A simple grade keeps the group consistent. It should describe visible condition, not certify strength or safety.
| Grade | What the group can record | What it does not prove |
|---|---|---|
| A — stable appearance | No new visible concern in the documented area | Hidden mounts and inner surfaces are undamaged |
| B — cosmetic change | Scuff, chip, fading, residue or finish difference without visible movement | The substrate and every mounting point are sound |
| C — fitment question | Uneven seam, displaced edge, unknown fastener stack or repeated contact mark | Which panel or bracket caused the conflict |
| D — damage evidence | Visible crack, broken or missing tab, spreading stress mark, loose component or heat deformation | Whether repair or replacement is the correct solution |
When the evidence reaches Grade C or D, stop short of a garage-night diagnosis. The panel-gap troubleshooting guide shows why forcing an edge or changing hardware before finding the first conflict can create more damage. For an existing crack, use the repair-or-replace decision guide to assemble the right questions for a professional assessment.
Audit One Panel Zone at a Time
Move around the motorcycle in a fixed order: windscreen and upper cowl, left side, lower fairing, tail, right side, front fender and any painted covers. This is an observation sequence, not a universal removal sequence.
For each zone, record:
- finish type and visible color direction;
- scratches, chips, fading, residue or lifted graphic edges;
- cracks, stress whitening or heat marks;
- seam changes compared with earlier photographs;
- visibly missing or unknown fasteners, collars, clips or rubber pieces;
- contact evidence from boots, luggage, cables, accessories or another panel;
- whether the concern is visible only under a particular light or viewing angle.
Avoid statements such as “all hardware is complete” unless you have the model-specific inventory and have actually verified it. A visible screw head does not reveal the full stack behind the panel. Likewise, a glossy outer face does not prove the inner tabs are intact.
Keep a Separate Unknown-Hardware List
Club projects often slow down because a rider puts every unidentified item into one bag labeled “fairing bolts.” Instead, assign each unknown piece a temporary identifier and photograph it beside the location where it was found—without claiming it belongs there.
Record its material, finish, head shape, approximate dimensions measured away from the painted motorcycle, and any washers, collars or rubber components found with it. Do not substitute a visually similar fastener during the session. The correct specification comes from model-specific documentation or a verified parts source, not group consensus.
If the motorcycle has recently received replacement bodywork, compare the assembly record with the fairing installation pre-fit checklist. The checklist helps distinguish a missing inventory item from a part that was never included or never intended for that location.
Separate Cleaning Questions From Damage Questions
Road film, insect residue, adhesive and hard-water marks can make a panel look worse than it is. Do not solve that uncertainty by testing a strong chemical on the most visible area. Record the finish and contaminant first. Follow the paint, wrap, decal and care-product instructions, and test only as those instructions allow.
Matte, satin, gloss, wrapped and under-clear graphic surfaces may respond differently to the same product. The matte fairing cleaning guide explains why polishing a matte area can permanently change its sheen. When the graphic construction is unknown, photograph the edge and ask before lifting it.
After careful cleaning, repeat the close-up from the same angle. Label the pair “before cleaning” and “after cleaning.” If a mark remains, record what was used and stop escalating the treatment during the social session.
Turn Findings Into a Winter Project Queue
At the end of each motorcycle's slot, move every concern into one of four queues:
Monitor
Use this for a stable cosmetic mark or seam that the owner wants to compare later. Define the next comparison point—after storage, after a short spring ride, or after a specified service visit—rather than writing “keep an eye on it” with no plan.
Obtain evidence
Use this when the model year, panel identity, hardware stack, finish construction or prior repair is unknown. The next step is documentation, not purchasing.
Technical inspection or repair assessment
Use this for cracks, loose components, interference, heat damage, or any concern that may affect lights, controls, wheels, hot parts or secure mounting. The club log helps communicate the evidence but does not replace qualified inspection.
Replacement or custom-bodywork inquiry
Use this only after the exact motorcycle and desired scope are known. Decide whether the rider is asking for one replacement panel, a coordinated full set, a color match to retained parts, or a new design. The NiceFairings custom fairings page explains the design route, while the production and shipping page helps the group plan around lead time rather than assuming a winter order is instant.
Build a Supplier-Ready Photo Packet
For a bodywork inquiry, reduce the entire evening to a concise packet:
- exact motorcycle details supplied by the owner;
- left, right, front and tail views;
- one locator and one close-up for each relevant concern;
- the panel or full-set scope;
- photographs of retained tank, fender, wheels or accessories that the new design should coordinate with;
- the requested finish and color direction;
- a list of logos, names or numbers only when the rider has permission to use them;
- the required destination country and target timing.
Do not send twenty near-identical images with no explanation. Do not ask a supplier to infer model year from a custom paint job. Review the NiceFairings FAQ, then contact NiceFairings with the organized packet when a quote or fitment discussion is appropriate.
Keep the Club Helpful Without Creating False Authority
A club garage night works because riders contribute time, lighting and a second set of eyes. It fails when opinions become undocumented technical claims. Use phrases such as “visible in this photograph,” “changed since the earlier image,” and “needs model-specific confirmation.” Avoid “definitely safe,” “guaranteed to fit,” or “all bikes do this.”
The motorcycle owner remains responsible for deciding whether and how the machine is serviced. The club should never pressure someone to ride, buy a full kit or copy another member's design. If a concern may affect safe operation, the useful contribution is helping the rider document it and arrange proper assistance.
Club Garage Night Checklist
- Define one deliverable: a condition log for each motorcycle.
- Prepare a photo bay, record table and project board.
- Obtain owner-provided motorcycle identity and photo-sharing permission.
- Capture the same overview angles for every bike.
- Pair every close-up with a wider locator image.
- Grade visible condition without claiming a diagnosis.
- Keep unknown hardware separate and labeled neutrally.
- Separate cleaning tests from structural or fitment questions.
- Assign each concern to monitor, evidence, inspection or inquiry.
- Build a concise supplier packet only after the scope is known.
- Preserve the log for the spring comparison.
Finish the Night With Better Records, Not More Loose Parts
The best club workshop evening ends with every motorcycle still organized and every owner knowing the next step. A useful log makes winter projects calmer: the rider can request the correct evidence, budget for the right scope and recognize whether a future change is cosmetic or connected to a mounting concern.
When the project moves from notes to bodywork, start at NiceFairings with the exact motorcycle, current photographs and a clearly defined goal. Keep the garage-night audit as a dated record—not a certificate, not a repair manual and not a reason to rush a purchase.
Cover and inline images for this draft are editorial concepts. They are not customer motorcycles, product photographs, repair demonstrations or proof of fitment.



