
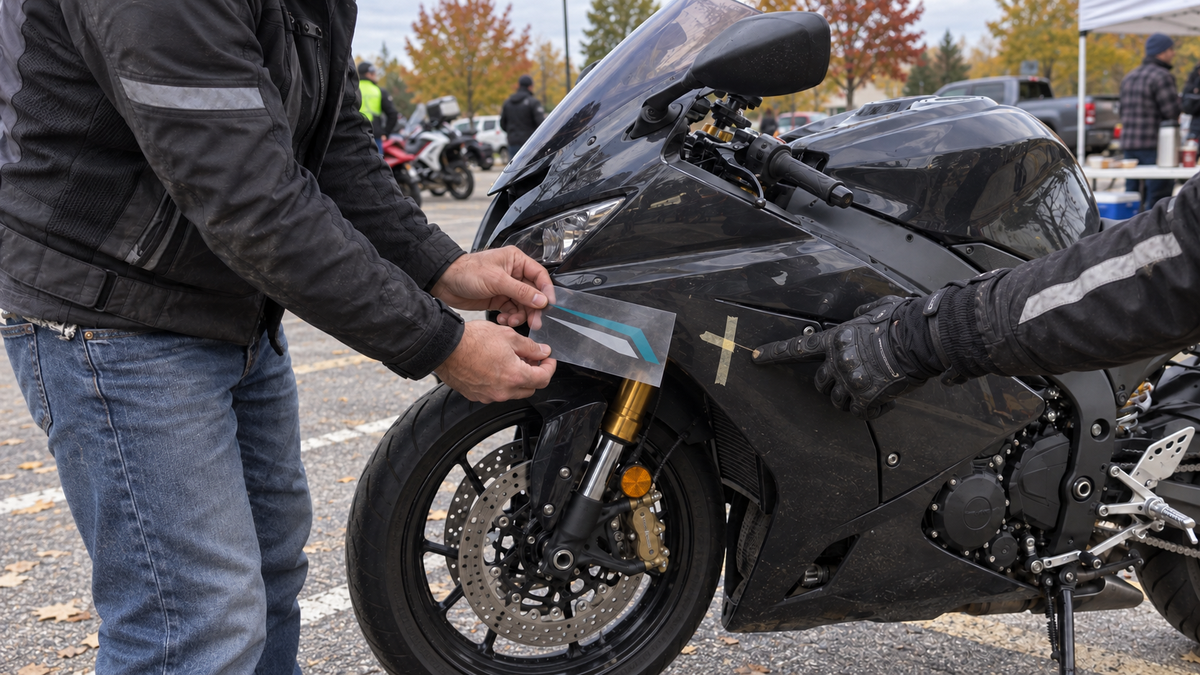
A charity ride, toy run or community fundraiser can give a motorcycle club a reason to add a shared event mark for one day. The safest design process starts with restraint. A small, approved surface graphic in a suitable location may communicate the event clearly; covering every panel with an untested film, hiding existing damage or blocking required equipment creates problems that a good cause does not excuse.
This guide is about planning temporary fairing graphics, not guaranteeing that a particular adhesive will release cleanly from every paint system. Factory paint, repainted panels, wraps, matte finishes, aged clear coat and repaired areas can respond differently. Follow the graphic manufacturer's instructions, the coating or wrap provider's guidance, the motorcycle owner's manual and local law. When the finish is uncertain, do not use the event as the test.
Riders planning a permanent redesign should use the NiceFairings custom fairings service instead of asking a temporary event sticker to imitate an under-clear custom paint job.
Start With the Event's Real Communication Need
Before drawing anything, ask what the graphic must do. Common answers include identifying participating motorcycles, showing an approved event emblem in photographs, recognizing a named beneficiary, or helping volunteers distinguish ride groups. These goals do not require the same size or placement.
Write one sentence:
“This temporary graphic helps ______ identify or understand ______ during ______.”
If the blank cannot be filled without words such as “look more official” or “resemble a sponsored race team,” the design may be solving the wrong problem. A charity ride should not imply that a business, racing organization or beneficiary endorses the club unless that permission actually exists.
Keep fundraising links, registration instructions and detailed sponsor information on the official event page or rider briefing. A moving motorcycle is a poor place for small text.
Obtain Permission Before Designing the Mark
List every name, logo, mascot, photograph, number and phrase proposed for the graphic. Assign an owner or source to each item and record written permission where required. Approval to participate in an event is not automatically approval to reproduce the organizer's logo on motorcycles. Approval to display a charity name does not automatically cover altered colors, added slogans or placement beside commercial marks.
The same rule applies inside the club. A rider should approve what appears on their motorcycle and how event photographs may be used.
For a longer-term shared design, the motorcycle club fairing design guide explains how to manage permissions and adapt one motif across different panel shapes. A one-day event graphic should be simpler, not less disciplined.
Identify the Surface Before Choosing the Graphic
Photograph the intended placement area in neutral light and record what is known about the surface:
- factory paint or repainted panel;
- gloss, satin or matte finish;
- bare plastic, painted plastic, wrap or existing surface graphic;
- repaired, cracked, chipped or lifting area;
- approximate age of the finish when known;
- compound curves, vents, seams and fastener locations.
If the surface history is unknown, mark it unknown. Do not infer a coating from shine alone. A temporary graphic applied over lifting clear coat, an unstable repair or an existing decal edge can remove more than the event mark when it comes off.
The under-clear versus surface-decal guide helps distinguish a removable surface layer from graphics protected within the coating system. If you cannot identify which construction you have, stop before treating the graphic as removable.
Never Use a Graphic to Hide a Condition Problem
A fresh sticker can cover a crack, chip, heat mark or lifted clear coat in photographs without changing the underlying condition. That makes later assessment harder and can mislead another rider or buyer. Inspect and document the panel before application.
Create one clean “before” photograph of the full side and one close-up of the placement area. Record every mark that will sit under or near the temporary graphic. If there is a crack radiating from a mounting point, an unexplained panel gap, loose bodywork or heat deformation, address that concern separately. The cracked-fairing repair-or-replace guide can help structure the questions, while the panel-gap diagnosis guide explains why forcing the panel flat is not a solution.
Do not place the event graphic over the concern and call the motorcycle ready. Temporary identity belongs on stable, suitable bodywork after the motorcycle's condition has been evaluated through the correct process.
Build a Placement Exclusion Map
Mark areas where no event graphic will be placed. The exact exclusions depend on the motorcycle and local requirements, but the planning review should consider:
- headlights, brake lights, turn signals and required reflectors;
- license plates and legally required identifiers;
- windscreen sight areas and instrument visibility;
- vents, radiator openings and designed airflow paths;
- panel seams, service points, fasteners and removable covers;
- warning labels that must remain readable;
- hot zones and areas with known exhaust or engine heat exposure;
- surfaces contacted by boots, knees, luggage or moving controls;
- cracked, lifting, freshly repaired or otherwise uncertain finishes.
NHTSA advises riders to keep lighting and signals working and to make themselves visible. That does not authorize covering required equipment with decorative material. Check the rules that apply on the route.
A placement map should show the motorcycle, not just a rectangular sticker proof. Put the proposed mark on a photograph of the actual bike so the club can see curvature, seams and nearby equipment.
Choose a Small System That Works Across Different Bikes
Mixed motorcycles rarely offer the same flat panel. Instead of forcing one large rectangle onto every machine, define a modular system:
| Element | Fixed across the group | Flexible by motorcycle |
|---|---|---|
| Event emblem | Approved artwork and protected clear space | Final size within an agreed range |
| Color | Approved high-contrast palette | One alternate for light or dark bodywork |
| Rider identifier | Format, if the event needs one | Position that avoids seams and equipment |
| Supporting stripe or shape | Stroke style and proportion | Length and direction to suit the panel |
| Removal record | Required before-and-after photos | Owner's notes about the finish |
This produces a recognizable family without pretending every fairing has the same geometry. A rider with no suitable surface can use an approved alternative supplied by the organizer—such as a vest, placard at the parked display or another lawful option—instead of accepting a risky panel location.
Approve at Actual Size, Not Only on Screen

Editorial concept: review the real panel geometry without taping the paper mockup to the paint.
Print a plain-paper mockup at the intended size and hold it near the panel without adhesive. Do not tape the paper to the paint. Photograph the motorcycle from standing distance and from the likely event-camera angle. Check whether the mark is recognizable, whether small text disappears, and whether it visually collides with existing graphics.
Then review the outline against seams, fasteners and curves. A design that fits inside a digital rectangle may wrinkle across a compound curve or bridge two parts that move independently. Ask the graphic supplier whether the selected material and installation method are suitable for the identified finish and shape. Do not invent stretching, heating or surface-preparation instructions from a generic online video.
Approve the artwork, size, placement zone and duration. “Temporary” should have a defined removal date.
Create One Bike Sheet Per Rider
Even a small event benefits from a one-page bike sheet:
- rider-approved motorcycle identity;
- left and right photographs;
- known finish and surface history;
- approved graphic file version;
- actual dimensions;
- exact placement photo with an outline;
- application and planned removal date;
- installer or responsible person;
- product name and instructions retained by the owner;
- before, installed and after-removal photo fields.
Do not combine six motorcycles into one vague message that says “same sticker for all.” The sheet protects the differences. It also prevents a volunteer from applying the correct design to the wrong surface or on the wrong side.
If the club is considering permanent painted fairings after the event, keep that as a second brief. Browse NiceFairings motorcycle fairing kits and record each bike separately rather than converting an event sheet into a group order by assumption.
Make Application a Controlled Appointment
Schedule application before event morning. Use the correct product instructions and conditions, with the motorcycle stable, switched off and cool.
Clean only according to the finish and graphic manufacturer's guidance. A product suitable for one gloss clear coat may be inappropriate for matte paint, a wrap or a fresh repair.
Confirm the exclusion map again immediately before application. If the placement area has changed—a new chip, lifting edge, residue or repair—the previous approval is no longer enough. Pause and choose an approved alternative.
Photograph the result after confirming that the graphic does not bridge a seam, block a fastener or interfere with equipment. The image documents placement, not long-term compatibility.
Keep the Ride Briefing Separate From the Design Session
The event mark does not make a motorcycle mechanically ready or a rider trained for group formation. Hold a briefing covering the route, stops, regrouping plan, communication and local rules. The Motorcycle Safety Foundation's group-riding guidance recommends arriving prepared and holding a riders' meeting; follow current training and organizer instructions.
Complete the motorcycle's normal pre-ride inspection after the graphic work. Check all lights and signals again. Verify that no edge has moved into a vent, sight area or control path. If the route involves trailering the motorcycles, the fully faired sportbike transport guide explains why neither fairings nor windscreens are tie-down points.
At the first planned stop, look for lifting edges or movement. Do not press a loose piece back down beside traffic or on a hot panel. Move to a safe location and follow the product instructions or remove the motorcycle from the event display plan as appropriate.
Plan Removal Before the Event Begins
The rider should know who will remove the graphic, when, and according to which instructions. Do not promise “peels off with no residue” unless the specific supplier supports that claim for the identified surface and conditions.
The sticker-removal guide emphasizes identifying the graphic and checking the substrate before using heat or a remover. Follow the actual product guidance. Stop if paint, clear coat, wrap or an underlying graphic begins to lift.
Take an after-removal photo from the same angle and lighting as the before image. Record residue, gloss difference, edge marks or any surface change without hiding it through editing. If residue remains, do not escalate through stronger chemicals during the club cleanup. Ask the product and finish providers for the appropriate next step.
Decide When Temporary Graphics Are the Wrong Tool
Skip the fairing graphic when:
- permission for the logo, name or photograph is missing;
- the panel finish or repair history is unknown and no supplier will support the application;
- the only available location affects a light, reflector, vent, control, warning label or legal identifier;
- existing damage would be covered;
- the design depends on small text or a QR code that has not been tested on the real surface;
- there is no controlled removal plan;
- the rider does not want the graphic on their motorcycle.
The alternative can be simpler: coordinated rider apparel, an event placard displayed while parked, a shared photo backdrop, or approved digital frames added to event photographs after the ride. The communication goal matters more than putting adhesive on every bike.
Convert a Successful Event Look Into a Permanent Brief
If riders like the event palette, preserve the photographs and note what worked at motorcycle scale. A permanent custom fairing design still needs a new brief: exact model and year, panel set, retained tank and fender colors, approved logos, finish, graphic placement and production proof.
Review the production and shipping overview before selecting a deadline, read the NiceFairings FAQ, and contact NiceFairings with one packet per motorcycle. A temporary event graphic can inspire the palette, but it is not a production-ready template.
Charity-Ride Graphic Checklist
- Define the communication purpose in one sentence.
- Obtain permission for every name, logo, number and photograph.
- Identify the finish and record unknowns.
- Photograph the panel before covering any area.
- Exclude damage, lights, reflectors, vents, seams, fasteners and legal identifiers.
- Adapt a small modular design to each motorcycle.
- Review a paper mockup at actual size without taping it to the paint.
- Create one bike sheet with artwork, dimensions, placement and dates.
- Apply only under the graphic and finish providers' instructions.
- Repeat the pre-ride light and equipment checks.
- Inspect at the first safe stop.
- Remove according to the product instructions and photograph the result.
Let the Cause Be More Visible Than the Sticker
A good temporary event graphic is approved, modest and easy to explain. It supports the ride without disguising damage, copying a race livery, inventing sponsorship or taking over the motorcycle's required equipment. The process should leave the owner with a clear record before, during and after the event.
For permanent bodywork and color planning, start at NiceFairings with the exact motorcycle and an owner-approved brief. For a one-day charity ride, choose the smallest suitable graphic system—and be willing to use no fairing graphic at all when the surface or placement is uncertain.
Cover and inline images for this draft are editorial concepts. They are not customer motorcycles, product photographs, application tests or proof that a graphic is removable from a specific finish.



