
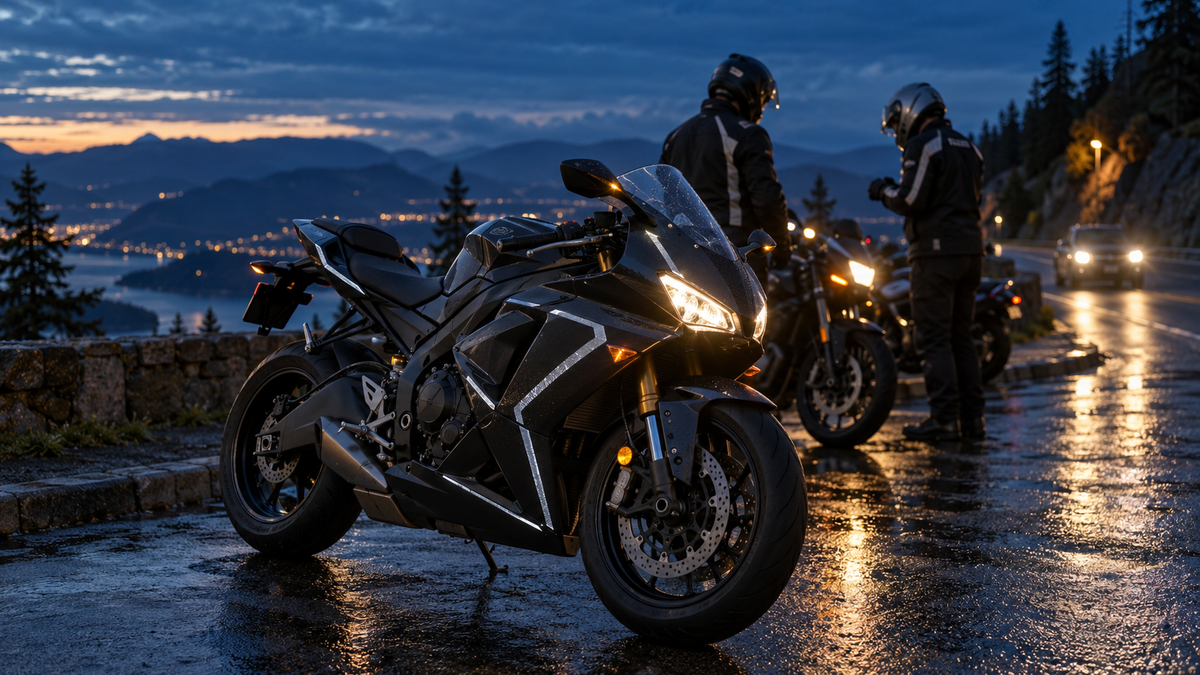
Night group rides create a visual problem that daytime paint renders rarely show. A design can look crisp in the garage, disappear under flat street lighting, then flash back strongly only when a headlamp reaches it from a favorable angle. Riders often respond by adding more brightness, more tape or a larger graphic. That can produce a busy motorcycle without solving the real issue: helping another road user recognize the bike’s position and orientation while every required light and reflector remains clear.
Reflective bodywork should therefore be planned as a conspicuity layer, not a safety guarantee and not a substitute for approved lighting, protective gear or defensive riding. The U.S. National Highway Traffic Safety Administration says reflective materials can increase motorcycle visibility, particularly at night. The Motorcycle Safety Foundation also advises using reflective strips or decals on clothing and the motorcycle. Neither recommendation means any decorative film will prevent a crash.
This guide turns that cautious principle into a fairing design workflow—useful for club rides, commuting after sunset or anyone who wants a dark daytime livery with controlled nighttime response.
Quick answer
- Keep headlamps, turn signals, brake lights and required reflectors fully visible.
- Verify local rules before choosing colors, placement or light-like effects.
- Use material whose manufacturer documents retroreflective behavior and application limits.
- Design for a readable motorcycle outline instead of one dazzling patch.
- Place accents across more than one viewing direction, but avoid vents, hot zones and panel hardware.
- Test from realistic driver heights and angles with the motorcycle stationary.
- Photograph and film the result with exposure locked; phone auto-exposure can exaggerate the effect.
- Pair reflective fairing details with visible riding gear, working lights and conservative night-riding habits.
Reflective, fluorescent and bright paint are different
The terms are often blended in product captions, but they describe different visual behavior.
Bright or neon-looking paint is a color impression. It may stand out during the day and under broad lighting, yet it does not necessarily return a headlamp beam toward the driver.
Fluorescent color converts some ultraviolet energy into visible light and can appear unusually vivid in daylight or twilight. Its advantage changes with the available light and material.
Retroreflective material is engineered to return much of the incoming light toward its source. That is why a strip can look gray in ambient light and suddenly appear bright near a camera placed close to a flash. Angle, distance, surface curvature, contamination and the relationship between observer and light source all affect the result.
Ask for the material data rather than relying on “reflective style” in a marketplace title. If a supplier cannot identify the film, color, surface compatibility and expected outdoor use, treat the night effect as unverified decoration.
Start with recognition, not maximum brightness
A single large reflective shape may announce that something is present without clearly describing a motorcycle. A better brief asks what another driver should be able to read: front, side, rear and change of direction.
Sketch the motorcycle as three zones:
- Front recognition: modest accents near—but never over—the nose edges can support the headlamp outline.
- Side recognition: separated marks across the mid and tail panels can suggest length and orientation.
- Rear recognition: restrained tail accents can complement, not compete with, the brake light and required reflectors.
Do not imitate emergency-vehicle markings or create a pattern likely to be confused with authorized lighting. Rules differ by jurisdiction, so check current local vehicle codes before approving color and placement. What is acceptable as passive film in one location may be restricted when it resembles a lamp, flashes, or uses reserved colors.
Protect the legal and functional hardware
Begin the graphic mask with no-go zones. Keep clear of:
- headlamp and position-lamp lenses;
- turn-signal and brake-light lenses;
- factory reflectors and license-plate lighting;
- VIN, compliance and warning labels;
- radiator outlets, intake ducts and drain paths;
- quick-release points, screws and panel seams;
- hot areas identified near the exhaust or radiator;
- textured surfaces the film maker does not approve.
The same front-end alignment that matters in daylight matters more after dark. If the nose has recently been replaced, complete the headlight aim and nose-fairing alignment check before using decorative material to “correct” a crooked visual line. Graphics should follow sound bodywork; they should not hide a shifted bracket or uneven seam.
Five design strategies that stay readable
1. Edge rhythm
Thin repeated segments can describe the main fairing silhouette without turning the whole panel silver. Keep spacing consistent across adjacent pieces and decide whether the line stops at a seam or continues after it. A reflected line that jumps several centimeters after installation looks like a fitment fault.
2. Directional chevrons
Small chevrons can show orientation on side panels, but scale matters. Too many produce visual noise; overly large shapes can dominate the daytime livery. Keep points away from fastener holes and deep compound curves where film tension may lift an edge.
3. Graphic shadow
Place a reflective element as a narrow shadow beside an existing painted stripe. During the day it behaves like a neutral outline; under direct light it separates from the base graphic. This works especially well when the rider wants a mostly black or dark-gray build.
4. Interrupted contour
Rather than tracing every edge, mark selected structural changes: nose shoulder, mid-panel break and tail rise. The gaps prevent a “safety tape” appearance while preserving a recognizable sequence from front to rear.
5. Club identifier with a quiet secondary role
A club mark can be cut from certified reflective film, but it should remain subordinate to the motorcycle’s required signals. Confirm permission to use the club artwork and avoid sponsor marks you do not own. Our custom fairing design-brief guide explains how to specify artwork, references and exclusions clearly.
Daytime color still has to work
Reflective gray, white or color film can shift the balance of the daytime bike. Review the design in shade, overcast light and direct sun before judging the night response. A warm silver may look beige against cool white paint; a black reflective film may reveal a brown or charcoal undertone. Matte paint next to glossy film also creates contrast even when their colors appear similar.
If you are coordinating the accents with a new kit, choose the base scheme first. The five sportbike fairing color directions can help narrow the palette, while the tank-color planning guide explains how to connect painted and retained surfaces. Ask NiceFairings whether the reflective element is planned as surface-applied film, an under-clear graphic effect, or a customer-installed detail. Those are not interchangeable production methods.
For conventional decals, compare the tradeoffs in under-clear graphics versus surface stickers. A true retroreflective film must retain the optical construction specified by its manufacturer; covering, printing or clear-coating it without approval may change performance.
Application planning on compound curves
Sportbike panels rarely offer large flat areas. A material can bridge a gentle crown but wrinkle or lift near a sharp recess. Build the graphic from the physical panel, not only a side-view render.
Use paper or low-tack test shapes to confirm scale. Keep them away from fresh paint until the coating’s cure and care requirements are known. Look at the panel from front three-quarter, direct side, rear three-quarter and rider-eye positions. Openings and overlapping edges can make a continuous digital stripe impossible on the real kit.
If a design crosses panels, establish alignment marks that do not require stretching the film. Temporarily fit the entire fairing set before final application. Follow the film maker’s cleaning, temperature, squeegee and edge-sealing procedure; a generic heat-gun setting is not safe for every film or painted panel.
When ordering replacement bodywork, browse the NiceFairings motorcycle fairing catalog by exact model and year range. Send clear photos of the motorcycle and mark retained parts such as the tank, fender or seat cowl. A product thumbnail is not enough to prove that a proposed line will cross every real seam cleanly.
A realistic night test
Do not test by standing directly behind a phone flash and declaring the design “high visibility.” That geometry favors retroreflection. Instead, create a repeatable comparison in a safe, stationary area:
- Clean the motorcycle and confirm all factory lights work.
- Park on level ground away from traffic.
- Position the observer or camera at approximate driver-eye height.
- Test front three-quarter, side and rear three-quarter views at several distances.
- Use low beam from a stationary vehicle only where safe and legal.
- Keep camera exposure, white balance and zoom fixed between comparisons.
- Repeat with the bike slightly rotated; small angular changes can alter the return.
- Record a daylight reference and an ambient-light reference.
The goal is documentation, not a dramatic social-media clip. If one patch blows out to pure white while the motorcycle disappears, reduce glare, change placement or add a more distributed pattern. Also inspect whether reflected light competes visually with the turn signal or brake light.
NHTSA’s motorcycle guidance recommends reflective material as one way to increase visibility, while its broader research notes that visibility aids should not be treated as proof of crash reduction or a cure for risky behavior. That distinction belongs in every product or blog claim.
Video: useful evidence, easy to misread
Video can reveal how a color and finish move across fairing curves better than one still image. It can also mislead. Automatic exposure, HDR processing, wet pavement and a light placed near the lens can make bright bodywork or reflective film appear stronger than a rider would see from another angle.
The clip below is an existing NiceFairings bright-bodywork motion reference. It is included to show how a saturated finish reads while the camera moves. It does not demonstrate certified retroreflective material, nighttime conspicuity or a safety outcome.
For a genuine reflective-design approval video, request four short locked-exposure clips: daylight walkaround, ambient dusk, headlamp-on comparison, and off-axis comparison. Include the material name and camera settings. Never label ordinary fluorescent paint “reflective” because it looks bright on video.
Group-ride checks beyond the graphics
Before a club ride leaves, the graphic is only one item on the list. Confirm tire condition and pressure according to the motorcycle and tire information, clean the lamp lenses, test brake lights and signals, set mirrors, and agree on route, fuel stops and regroup points. Riders should use suitable protective gear and ride within conditions and experience.
Inspect the bodywork for loose edges and hardware. A lifted strip near a vent can flap at speed; a poorly seated panel can rub a wire or affect a lamp housing. The autumn group-ride fairing inspection provides a broader pre-ride bodywork routine. If the fairing was just installed, also check windscreen well-nuts and loose fasteners.
After the ride, look for edge lift, heat distortion, grime patterns and contact marks. Document any change before cleaning. Do not pressure-wash an edge simply because the film is rated for outdoor use.
Approval checklist for a custom request
Before approving a reflective fairing concept, answer these questions in writing:
- What exact film or process creates the reflective effect?
- Is it compatible with the paint finish and panel curvature?
- Which views should form a readable sequence?
- Which lights, reflectors, vents, seams and labels are protected as no-go zones?
- Is the color legal for passive use where the bike will be ridden?
- Does the daytime design still look intentional?
- Can damaged film be replaced without repainting the panel?
- What photos and videos will be supplied before final approval?
- Which claims are visual descriptions, and which are supported specifications?
Use the seven-check livery review to examine balance, seams and real-bike views, then ask for finished fairing photos before shipping. If reflective material is customer-installed, the pre-shipping photos should show the base finish clearly rather than imply the optical layer is already present.
Final design rule
A strong night-oriented fairing design does not chase the brightest possible photograph. It preserves every required signal, uses documented material, distributes accents so the motorcycle remains recognizable, and survives scrutiny in daylight, dusk and realistic off-axis light. It also states its limits honestly.
Reflective details can add a smart second identity to a sportbike: restrained graphics by day, a controlled response under direct light at night. Build that effect around legal equipment and good riding practice, not over them. If you want to adapt the idea to a specific model, start with exact year identification and a physical panel map, then send NiceFairings a brief that separates base paint, conventional graphics and any surface-applied reflective layer.
QC source note
Safety framing was checked against NHTSA motorcycle guidance, NHTSA’s conspicuity strategy summary, and the Motorcycle Safety Foundation’s rider guidelines. These sources support reflective material as a visibility measure; this draft does not claim a guaranteed crash reduction. The embedded video is a verified existing NiceFairings asset and is labeled with its limitations.



