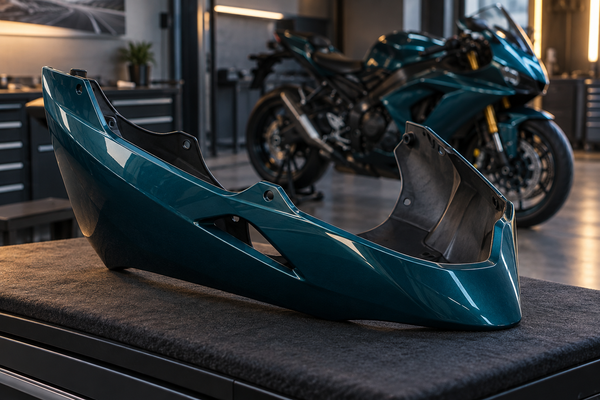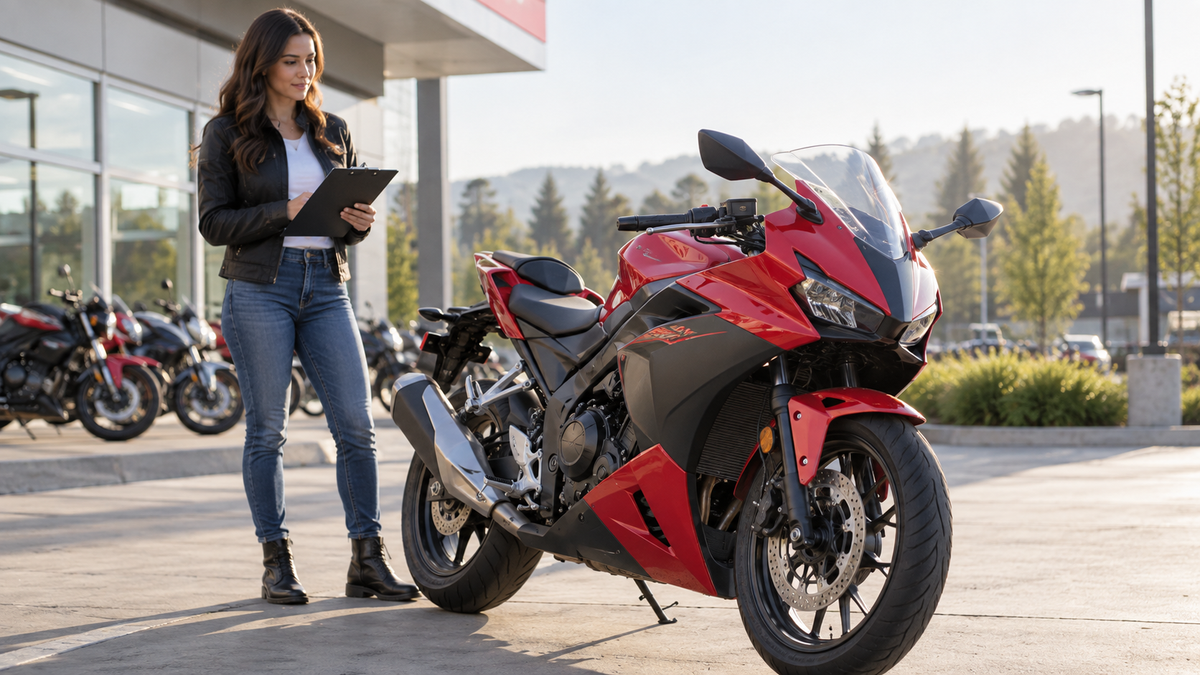
You spot a used CBR500R online with shiny paint and tidy bodywork. Before buying, examine the actual motorcycle rather than relying on photographs. A used Honda CBR500R fairing inspection can identify visible concerns and useful questions, but it cannot establish the complete accident history or certify the motorcycle as safe to ride.
Look at panel alignment, visible attachments and the surrounding finish. Record cracked tabs, unusual gaps or signs of earlier work without assuming their cause. Incorrect assembly, non-original parts, wear and accidental damage can require different remedies. A qualified mechanic should investigate concerns that go beyond a straightforward visual check.
Bodywork condition also affects the scope of your purchase. A bike that looks inexpensive may need replacement pieces, hardware, refinishing or installation work. Separate the appearance you would like from repairs actually required, and obtain a realistic assessment before agreeing a budget. Do not judge the whole motorcycle from its fairings alone.
This guide follows a document check, a non-invasive walkaround, a closer visual inspection and a quote-based decision. Keep the engine off, allow hot components to cool and have the bike securely supported. Ask the owner's permission before inspecting or photographing it. Do not press, bend, probe, dismantle or tighten parts to test them.
Key Takeaways
Use unusual gaps and alignment as prompts for further inspection, not proof of a crash.
Record visible cracks around attachment points; let a qualified professional assess their significance.
Note paint blisters, texture changes and color differences without guessing the repair history.
Look for apparently missing or damaged attachments; do not test them by tightening or pulling.
Use a flashlight only where access is safe and already available. Mark hidden areas as uninspected.
Compare vehicle identification with the documents and ask for available service and repair records.
Use itemized, application-specific quotes to evaluate repair costs instead of generic price ranges.
Pause the purchase and arrange a professional inspection when condition or safety remains uncertain.
Why Used Honda CBR500R Fairing Inspection Before Buying Matters
The Safety and Structural Connection
Fairings as Inspection Clues
Visible fairing defects can justify a closer look, but they do not diagnose a crash. A crack, paint blister or unusual seam can have more than one explanation. Write down the location and appearance first, then ask about repairs and modifications. Keep observed facts separate from what you suspect may have caused them.
Treat this process as a fact-finding mission. Do not accuse the seller of hiding anything. Ask open questions about the bike's history instead. Frame your inspection as standard due diligence. Most sellers expect this from serious buyers.
Aftermarket fairings alone do not prove a crash. Owners may change colors, replace worn panels or build a different style. Evaluate the actual installation and ask which parts were changed. For subsequent work, use the exact model's instructions rather than assuming every CBR500R shares the same panel arrangement.
Impact on Wind Protection and Ergonomics
A cosmetic walkaround is not a roadworthiness inspection. If a panel appears insecure, damaged or out of position, do not use a test ride to discover what happens at speed. Ask a qualified mechanic to assess the attachment and any related damage before riding. Your notes should identify concerns rather than predict their effects:
A visible crack near a mount needs assessment of the panel and its attachment.
A protruding or displaced panel needs an explanation and an appropriate fitment check.
Missing pieces or attachments require confirmation against the correct assembly information.
Do not infer handling, airflow or protection from appearance alone. Similarly, a neat-looking replacement does not establish correct installation or rule out damage beneath it. If the viewing cannot safely answer your questions, make a professional assessment part of the buying process rather than treating uncertainty as a cosmetic inconvenience.
The Resale Value Equation
How Damage Affects the Bike's Worth
Visible damage and modifications may influence what you are willing to pay, but there is no fixed premium for original paint or automatic discount for aftermarket panels. Consider the bike's overall condition, records, comparable listings and the work you actually plan. A documented repair can be more useful than an unsupported claim of untouched originality.
Do not force a misaligned tab into place during a viewing. Instead, document what is visible and ask the inspector to determine why it does not align. Keep two separate questions in your notes:
Is the installed part appropriate for this exact motorcycle and configuration?
Are its supports and attachments in suitable condition and correctly assembled?
The answers affect repair scope. An incorrect part, missing component and damaged support are different problems; replacing the outer panel may not resolve all of them. Avoid attributing intent to a previous owner. Focus on obtaining enough evidence and a written assessment to decide whether the project makes sense for you.
The Cost of Future Repairs
Compare CBR500R replacement fairing options only after identifying the exact pieces involved. A whole kit and a single painted panel are not equivalent purchases. Use the following quote checklist instead of treating generic online price ranges as estimates for your bike.
Quote component |
What to identify |
What to confirm |
|---|---|---|
Panel or assembly |
Exact side, model application and finish |
Included decals, covers and attachments |
Assessment and installation |
Access, removal, fitting and related repairs |
Written labor scope and excluded work |
Complete project |
Parts, labor, shipping and applicable charges |
Availability, estimate limits and approval process |
Do not assume the CBR500R's engine size or beginner-friendly reputation makes a particular repair inexpensive. The actual panel, availability and underlying condition determine the job. Ask whether the quote includes removal, graphics and refitting, and what inspection is needed before the shop can give a reliable scope.
A quote helps you compare this purchase with other motorcycles, not prove that the seller must deduct a particular amount. Distinguish necessary repairs from optional color changes. If a major unknown could change the budget, resolve it before committing rather than relying on an attractive asking price.
Confirming Model Year and Document History
Verify the VIN and Registration Papers
Matching the VIN to the Title
Compare the full VIN on the motorcycle with the available ownership and registration documents. Use the correct manual or dealer guidance to locate it; do not disturb parts to gain access without permission. If details disagree or identification appears altered, pause and resolve the discrepancy through the appropriate authority before proceeding.
Confirm the model year, market and exact variant with reliable vehicle information or an authorized dealer. Paint, decals and the registration date do not establish a panel's application. A VIN can help identify the original specification, but it does not tell you which replacement parts or modifications are on the motorcycle today.
Checking Ownership Documents
Check the applicable ownership records through the relevant local authority. Do not interpret a title label, a clean-looking document or an online history result as proof that the motorcycle has never been damaged. This article is a bodywork viewing guide, not a substitute for the checks required in your location.
Keep document verification separate from mechanical inspection. If the recorded status or the seller's authority to sell is unclear, resolve those questions before negotiating repairs. For imported or previously rebuilt motorcycles, seek appropriate local professional advice instead of assuming that another market's terminology or process applies.
Asking for Service and Repair Invoices
Evidence of Previous Fairing Work
Ask for available service records and repair invoices, especially those identifying replaced panels. Useful details include the date, part description, supplier and work performed. Records can explain a change you notice, but an invoice alone does not prove the current condition or the quality of every earlier repair.
Compare the records with the motorcycle in front of you. If an invoice describes a replaced left panel but you see a different finish on the right, ask about both. Missing documents leave uncertainty; they do not by themselves establish dishonesty or a crash. Decide what further inspection would address the gap.
Replaced Brackets and Hardware
Ask whether brackets, grommets, clips or other attachments were changed with the panels. Replacement can have several explanations, including ordinary maintenance or a modification. Record the answer and let a qualified mechanic determine whether the current parts and assembly are appropriate. Do not assume a replaced bracket proves an impact.
Find the correct year and market information through Honda's owner's manual library. The US site covers US products; use the relevant local source elsewhere. An owner's manual is useful context, while detailed bodywork work may require the appropriate service information and parts identification.
An itemized workshop invoice is helpful when it identifies what was actually assessed or replaced. A DIY record can also document parts and dates. Neither the payment method nor a shop name establishes quality by itself. Ask specific questions about the work and compare the answers with a professional inspection if needed.
Treat the documentation as partial evidence rather than a complete history. Before purchase, also review Honda's recall information and ask a dealer about the exact motorcycle and any unresolved questions. Recall information is separate from bodywork condition and does not replace inspection.

Common Fairing Damage Types to Spot
Cracks and Stress Marks
Hairline Cracks Near Fasteners
Use available light to look for fine lines around visible fastener holes and edges. A photograph of the whole panel plus a closer view helps preserve location and scale. Do not scrape the finish to decide whether a line is a scratch or a crack; ask a professional to assess uncertainty.
A line near a fastener may warrant investigation, but its location does not identify the cause. Record whether it reaches an edge, surrounds an attachment or appears on several areas. Avoid predicting how long the part will last or deciding that a particular repair is safe from a viewing alone.
Spiderweb Stress Fractures
Clusters of lines around a mount deserve attention because they may involve more than the visible finish. Do not label every web-like mark as evidence of a drop. The inspector may need to examine the material, attachment and underlying support before explaining the damage and the available repair options.
Look without bending the panel or opening a suspected crack. If glare makes the area difficult to see, change your viewing position or use a light at a different angle. If the area remains unclear, photograph what is visible with permission and list it for the mechanic rather than escalating to a physical test.
Poor Repairs and Mismatched Paint
Signs of Bondo or Epoxy
Uneven surfaces or visible repair material can prompt questions about prior refinishing. Do not press the panel to search for filler, and do not assume its flexibility identifies the material beneath the paint. Ask for repair records and a qualified assessment of any questionable area. A visual check has limits.
A texture difference may justify a closer finish comparison, but it does not prove hidden damage or careless work. Lighting, the surface shape and earlier refinishing can complicate what you see. Describe the observable texture and its location, then ask how that surface came to differ from adjacent panels.
Color and Finish Discrepancies
Compare adjacent panels under similar lighting and from several positions. Do not expect every surface or material on the bike to have identical gloss. A difference is a question to investigate, not a diagnosis. If appearance matters to your purchase, agree which existing variations you accept before budgeting for changes.
Look at graphics and clear-coat transitions as part of that comparison. A visible edge or a different sheen can help you ask about replacement pieces, but it does not reveal when or why work happened. Avoid judging color from a seller's edited photograph or a single reflection in a dark garage.
Missing Hardware and Broken Tabs
The Importance of Correct Fasteners
Motorcycles can use different fastener and clip types in different locations. Do not assume all visible bolts must match. The relevant question is whether the correct attachment is present at each location. Have uncertain replacements checked against exact application information rather than substituting a visually matching bolt.
Record missing-looking pieces, distorted grommets or visible makeshift attachments. Some openings may be intentional, so verify before calling them defects. A useful next step is the fairing fastener review checklist; it does not replace model-specific hardware instructions.
The Hidden World of Underside Tabs
You cannot see every mounting tab without removing the fairings. You can, however, use a flashlight to inspect visible tabs and brackets. Look for cracks on the underside of these tabs. Do not bend or stress them during your examination. A visible crack is a red flag regardless of its depth.
If a visible tab is cracked or disconnected, record it and stop short of testing its strength. Repairability and appropriate replacement depend on the material, location and complete attachment. A panel should not be declared suitable for use simply because it still looks aligned while the motorcycle is parked.

Your Step-by-Step Fairing Inspection Checklist
Work in a consistent order so that you can distinguish inspected areas from those you could not access. Start with the overall bodywork, then move to visible seams, finish and attachments. Keep this a non-invasive viewing. Arrange a separate professional inspection for anything requiring removal, measurement or a mechanical judgment.
Remember that this is a non‑invasive walk‑around. You inspect only visible and accessible areas. Do not remove any panels without the owner's explicit permission. If you see something concerning, ask the owner first. Most sellers expect a serious buyer to look closely.
The Initial Walk‑Around and Visual Check
Assessing Panel Gaps and Alignment
View the front and both sides from comparable positions, without moving an unfamiliar motorcycle yourself. Note conspicuous differences and compare them with the correct model configuration where possible. Bodywork need not be perfectly symmetrical, and design differences should not be mistaken for evidence of damage.
Follow the seams visually and note any area that appears displaced relative to its neighboring parts. Do not assign a universal gap measurement. A mechanic can distinguish the intended layout from assembly issues or damage. Keep the seller's explanation alongside your observations rather than deciding the underlying bracket is bent.
Inspect the visible relationship between the upper cowl, windscreen and nearby panels. Non-original screens or other accessories may change the appearance. Ask what has been fitted, and have any uncertain interference or mounting checked professionally. Do not attempt to push parts into line during the viewing.
There is no universal millimeter threshold in this guide. Compare the actual assembly with appropriate information for its exact year and configuration. A photograph of a different model is not a tolerance specification. If several areas are questionable, include them in the inspection scope rather than adding up visual clues into a crash verdict.
Looking for Color and Texture Mismatches
Review the finish in reasonably consistent natural or suitable inspection light. Make a note of surfaces that you cannot judge because they are wet, dirty, shadowed or highly reflective. Do not clean or apply products to the seller's bike without permission. An honest list of limitations is better than a confident guess.
Look for obvious color, gloss or texture transitions and ask whether individual panels were replaced or refinished. Such differences do not establish a particular repair method. If a close color match is important, discuss the actual retained panels with a refinisher before assuming one new painted piece will blend in invisibly.
Aftermarket bodywork can reflect a deliberate styling choice. Ask about its supplier and exact application, the installer and any changes to supports or accessories. Judge the current condition and evidence, not whether the work was done by an owner or a workshop. Both the part and installation deserve verification.
The Close Visual Examination
Documenting Uneven Surfaces Without Pressing
Keep your hands off questionable surfaces during this inspection. Pressing or flexing a panel can damage it and does not reliably identify filler, hidden cracks or structural condition. The purpose of a buying visit is to document visible concerns and arrange the right next check, not to perform an improvised materials test.
If a surface appears uneven, photograph it from more than one angle with permission. Record whether the difference is in the reflection, color or visible shape. Those observations give a professional something concrete to evaluate without risking additional damage or turning a small uncertainty into a confrontation with the seller.
Leave firmness and material assessment to an appropriate professional when needed. Panel flexibility varies with shape, material and support; it is not a simple pass-or-fail indicator. Do not infer that a softer-feeling area contains filler or that a rigid area must be original and undamaged.
Avoid squeezing the plastic, pressing around repairs or trying to open a seam. If access is poor, write 'not inspected' and explain the limitation. You can still make a sound buying decision by obtaining a proper assessment before committing, rather than forcing every question to be answered during the viewing.
Checking Fastener Security and Fit
Look at the visible hardware layout without assuming uniform bolt heads or lengths are required. Different positions can use different components. Compare suspicious locations with exact parts information through a dealer or mechanic, especially where a fairing has been changed or an accessory added.
Correct hardware involves more than appearance. A matching color does not establish the right length, shoulder, washer or grommet. Do not buy or install a generic bolt to correct an apparent omission until its role is understood. During the viewing, simply record the location and ask what was changed.
Do not wiggle screws, tighten bolts or pull panels to test attachment strength. A torque check is not part of this non-invasive viewing guide. Ask a mechanic to investigate an attachment that looks loose, damaged or improvised, following the correct service information and with the owner's permission.
The Deep Dive: Hidden Areas and Mounting Points
Inspecting Underside Tabs and Brackets
Use a flashlight to view underside areas only from a stable, safe position with the motorcycle secure and cold. Stay clear of hot, sharp or moving components. Do not crawl under an insecurely supported motorcycle or reach into a confined area merely to complete every item on the checklist.
Look only at visible, accessible tabs and their surrounding surfaces. Record a suspected crack or damaged attachment and have it assessed; do not touch, bend or open it to investigate further. If the reverse side is covered, mark it as uninspected rather than assuming the visible side tells the whole story.
Brackets may have intentional bends, finishes and differing shapes. Do not judge them against a rule that all brackets must be straight or unpainted. Record visible deformation or questionable attachments for comparison with the correct assembly. Leave diagnosis of supports and any related chassis concerns to a qualified mechanic.
If you notice concerns around the radiator, steering area or other mechanical components, stop treating the visit as a fairing-only check. Ask for an appropriate professional inspection. A mark in these areas does not establish its cause, and a bodywork guide cannot determine whether the motorcycle is safe to ride.
Verifying Latch and Clip Alignment
Ask the owner or mechanic to demonstrate any appropriate access or latch operation rather than forcing an unfamiliar cover yourself. If something resists normal operation, stop. Record what happened and ask for an explanation, without assuming a broken latch or trying to adjust it during the viewing.
Visible rubbing or displaced edges can indicate an issue worth investigating, but they do not identify its source. Photograph the area and note any non-original parts nearby. Have the fitment checked before assuming a replacement panel alone will solve the problem. Avoid moving or trimming pieces to create clearance.
A consistent walkaround gives you an organized list, not a complete diagnosis. The time needed depends on access, lighting, documents and the concerns found. Do not rush to meet a twenty-minute target. Leave unresolved items open and make a professional inspection a condition of proceeding when appropriate.

Tools of the Trade for a Thorough Check
A small toolkit for this visit should support observation, not repair. Bring a flashlight, a phone or camera for permitted photographs and a written checklist. You do not need a pick, probe or screwdriver to establish whether a used motorcycle deserves a closer professional inspection.
The Essential Toolkit
Flashlight and Work Light
A handheld light can help reveal visible edges and attachments in shaded areas. Keep the light itself clear of the painted surface and avoid directing it into anyone's eyes. Change the viewing angle if glare hides detail, and do not assume that a brighter beam reveals everything beneath an opaque panel.
A phone light may be useful when it provides enough illumination, while a separate flashlight can be easier to position. Choose what lets you observe without stretching into unsafe areas. Neither tool can reveal covered mounts or replace the access and expertise needed for a proper mechanical inspection.
Use photographs to preserve a question, not to declare a diagnosis. Capture a wider view that locates the area and a closer view of the concern. Keep images for the agreed buying or inspection purpose, and avoid recording personal documents or identifying details unnecessarily.
A Camera and Written Checklist
Leave picks and thin probes out of this viewing checklist. Inserting a tool into a seam or crack can damage paint and plastic, and the resulting feel does not certify the part's condition. Ask a professional about anything that would require contact or disassembly to evaluate properly.
If an area is too narrow to inspect visually, record that limitation. An owner-authorized workshop inspection can determine whether access should be opened using the correct procedure. Do not lever a panel away or pass a tool along its edge to find out what lies behind it.
The same rule applies to a suspected crack: observe, document and ask. Do not scratch across it, scrape paint away or test whether it catches a tool. A buying decision can wait for a qualified assessment; creating more damage is not a useful way to reduce uncertainty.
Using Your Tools Effectively
Illuminating Hidden Cracks
Illuminate an accessible area from more than one direction if it is safe to do so. Keep yourself and the light clear of hot or sharp components, and do not reposition the motorcycle without the owner's help. If safe access is unavailable, leave that area for the workshop inspection.
Different viewing angles can help distinguish a reflection from a visible surface line, but uncertainty may remain. Record what you can see and let the inspector assess it. Avoid converting a visual impression into a statement about fracture depth, material strength or the repair method required.
Color changes around an attachment may deserve attention, but they are not a universal test for a fractured tab. Lighting, finish and material differences can affect appearance. Ask for assessment of the actual component rather than judging it against a color rule from another motorcycle or an online photograph.
Recording Tab Concerns Without Contact
Do not perform a strength test on the tabs. Their condition may require examination of the reverse side, support and adjoining material, which falls outside this walkaround. Mark the location for professional review instead of pushing, bending or tracing a suspected fracture with a sharp object.
Visible damage is a reason to investigate, not an automatic instruction to repair or replace. The appropriate route depends on the actual part and application. Until assessed, do not assume the panel is suitable for riding simply because it remains attached, and do not authorize a cosmetic fix as a safety solution.
Ask the inspector or repairer to explain what can be retained, what needs replacement and what supporting work is involved. Avoid generic repair prices, universal mileage-to-failure claims or promises that all cracks can be welded. Obtain an itemized assessment for this motorcycle before comparing its total purchase cost with another example.
From Inspection to Negotiation: Figuring Out Repair Costs
Use your inspection notes to make the cost discussion specific. Record the exact area, the seller's explanation and any professional recommendation. An observation is not a guaranteed repair bill. Separate confirmed work from unknowns and optional styling so your offer reflects what you actually know about the motorcycle.
Sorting the Damage You Find
Minor Cosmetic Scratches vs. Structural Cracks
A surface mark may primarily concern appearance, but do not declare the whole area safe solely because you see no crack. Decide which cosmetic differences you would accept and which you would want professionally assessed or refinished. Keep that preference separate from any mechanical concerns identified by the inspector.
Damage around a mounting point needs appropriate assessment of the attachment and surrounding parts. This guide cannot determine repairability from a photograph or a crack pattern. Ask for the proposed remedy and its limitations, and do not assume either a new outer panel or a local repair addresses every underlying concern.
Organize findings into three groups: appearance preferences, professionally identified repair needs and unresolved questions. This is more useful than a home-made structural pass-or-fail test. Do not move an unresolved question into the cosmetic group just because you want the purchase to fit your budget.
The Cost of New Panels vs. Fixes
Look up the cost of new panels before you make an offer. Search for the exact panel you need. The left side mid-fairing costs a different amount than the front upper cowl. Each panel has its own part number and price range. You can find this info through OEM parts diagrams or aftermarket suppliers.
Compare replacement with a professional repair assessment only where repair is considered appropriate. Ask about the material, damage location, finish and the work needed to refit the panel. There is no universal rule that welding is cheaper or that a particular visible crack pattern always allows or forbids repair.
Compare the actual OEM and aftermarket proposals for scope, availability, application and finish. Neither label establishes the lowest total cost or eliminates fit checks. A whole kit can include pieces you do not need, while an individual panel may exclude decals or attachments. Compare complete requirements rather than headline prices.
Using Your Findings to Negotiate Price
Calculating a Fair Price Reduction
Build an itemized budget from the assessed work: parts, suitable attachments, labor, finish and any related repairs identified by the mechanic. Do not assume a bent support should simply be straightened. The qualified assessment should define the appropriate remedy and explain what is excluded or still uncertain.
Discuss your findings and written estimates calmly with the seller. The asking price, condition and comparable alternatives all matter; subtracting every desired upgrade does not automatically produce a fair market value. Make an offer that fits your own budget and evidence, without treating acceptance as guaranteed.
Distinguish a necessary repair from a personal preference for new colors or flawless paint. A seller may value the motorcycle differently, and neither party has to agree. The useful outcome of inspection is an informed choice, not a promise that every discovered mark creates bargaining power.
When to Walk Away from a Bad Deal
Pause or decline when important questions remain unresolved, the needed inspection cannot be arranged, or the assessed scope exceeds what you want to take on. You do not need to prove hidden damage or accuse anyone to decide that a particular motorcycle is not a suitable purchase for you.
Give yourself time to review the evidence away from the viewing if needed. A low price should not replace clarity about the vehicle, its documents and its condition. If you cannot evaluate the uncertainty confidently, seek qualified advice or choose another example rather than using a test ride as an experiment.

Red Flags and Seller Questions
The Biggest Red Flags to Watch For
Bubbling Paint and Non-OEM Fitment
Paint blisters or lifting finish are observations to document, not proof of a specific preparation mistake. Ask what work was performed and whether there are records. A refinisher can assess likely causes and repair scope after examining the surface; the appearance alone does not tell you what is beneath it.
Record where the affected finish appears and whether it extends across several areas. Do not assume that a professional shop could never produce a defect or that an owner repair is necessarily poor. Judge the current condition and the proposed remedy, including the limits of what can be established during a viewing.
A non-original panel deserves the same application and installation checks as any replacement. Ask which item was fitted and whether the supports or nearby accessories changed. Do not infer low quality or a budget purchase solely from a gap, and do not assume original parts guarantee a damage-free motorcycle.
A custom scheme may be a deliberate appearance choice. The useful questions concern the reason for the change, the supplied parts and the current fitment. Separate styling preference from repair evidence. If you later plan a different finish, review the custom fairing color planning guide after condition is resolved.
Gaps That Don't Line Up
Note unusual seams around adjacent panels and the windscreen, but compare against the actual model and installed accessories. An irregular-looking edge can have several explanations. Do not declare a hidden support damaged from the outside alone. Ask the inspector what access or information is needed to understand it.
Comparing both sides helps organize observations, not prove that their geometry must match. Some features are intentionally different. If an area appears displaced, document it in context and ask about the part and assembly. Avoid inferring an earlier impact without corroborating evidence and a proper assessment.
A changing gap may warrant a fitment check, but it does not establish whether the panel is distorted, a support is incorrect or assembly needs attention. Do not prescribe adjustment or replacement from that observation alone. A professional assessment should identify the cause before a repair budget is finalized.
Several questionable areas justify a broader inspection, not a confident crash diagnosis. Keep visible facts, the seller's explanation and unresolved questions separate.
Questions to Ask the Seller
Direct Questions About Drops and Crashes
Ask direct but polite questions about the bike's history. "Has this bike ever been dropped?" works well as an opener. "Can you tell me about any crash damage?" invites an honest answer. Frame these questions as normal due diligence, not accusations.
Ask for specific details and supporting records where available. A hesitant answer does not establish dishonesty, and a fluent explanation does not establish accuracy. Compare the account with documents and inspection findings rather than judging trustworthiness from speaking style. Give the seller an opportunity to clarify what they know and do not know.
A seller who bought the motorcycle used may not know its complete history. Ask what records they received and what work occurred during their ownership. Do not require another person's private contact details. Where the history remains incomplete, use appropriate records checks and a professional inspection to inform your decision.
Asking for Service and Repair Records
Ask for available invoices that identify replacement panels, hardware and labor. Redacted copies may provide the relevant work details without unnecessary personal information. Records help explain changes, but compare them with the actual motorcycle and the current inspection; they do not independently prove workmanship or current roadworthiness.
If records are unavailable, ask what information can be provided and record the remaining uncertainty. A lost invoice or DIY repair is not proof of concealed damage. Decide whether an independent assessment can answer the important questions before committing, rather than relying on either suspicion or reassurance alone.
Agree the scope of a professional pre-purchase inspection, including bodywork supports and any broader concerns. Ask what was inspected, what remained inaccessible and what recommendations were made. An inspection improves the evidence available to you, but it is not a guarantee that every hidden issue has been discovered.
A useful used CBR500R fairing check produces an organized record of visible condition, identification, prior work and open questions. Shiny paint does not rule out a problem, while a replacement panel does not prove a crash. Use both observations and appropriate professional input to understand the purchase.
Do not measure success by how quickly you finish or how much discount you obtain. The aim is to avoid making assumptions about parts, repairs and the motorcycle's condition. Take the time needed to obtain a clear scope and compare the complete project with the alternatives available to you.
Bring the checklist to the viewing, keep the inspection non-invasive and get permission before any access or photographs. Resolve important uncertainties before purchase or riding. When you are ready to consider replacement bodywork, verify the exact CBR500R fairing application and package contents rather than ordering from appearance alone.